Order of the Sinking StarPuzzle map & solutions

Strength walkthrough

Heroes and Beamcasters crossover area, west of the CrossroadsHigh layer6 puzzlesGemsman · Warrior · Wizard · HeroTorc

Getting here

Layer
High
Tower
Beamcasters tower in Crossroads High: solve 10 of its 12 puzzles across 5 areas to activate it. Counts here: 1
Doors and unlocks (5)
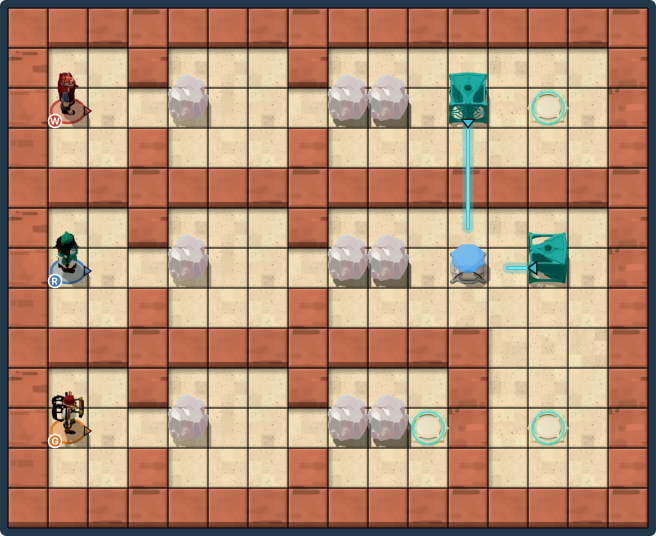
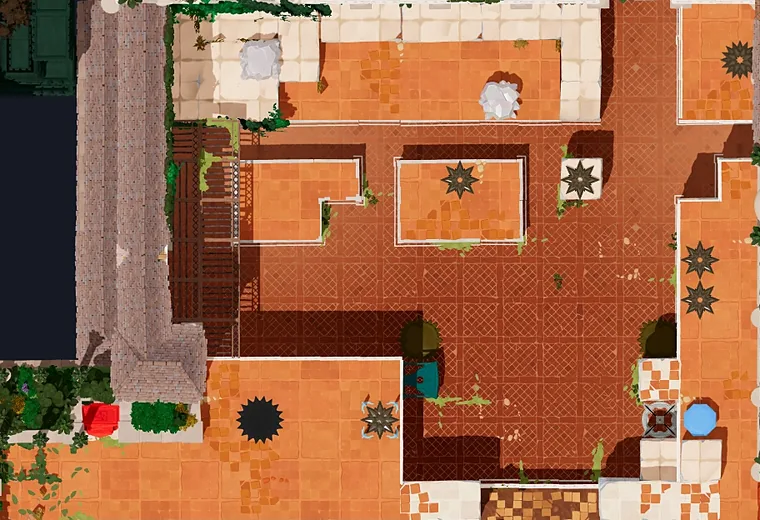
Map of Strength with every puzzle entrance numbered123456

1 Strength puzzle 1 solution

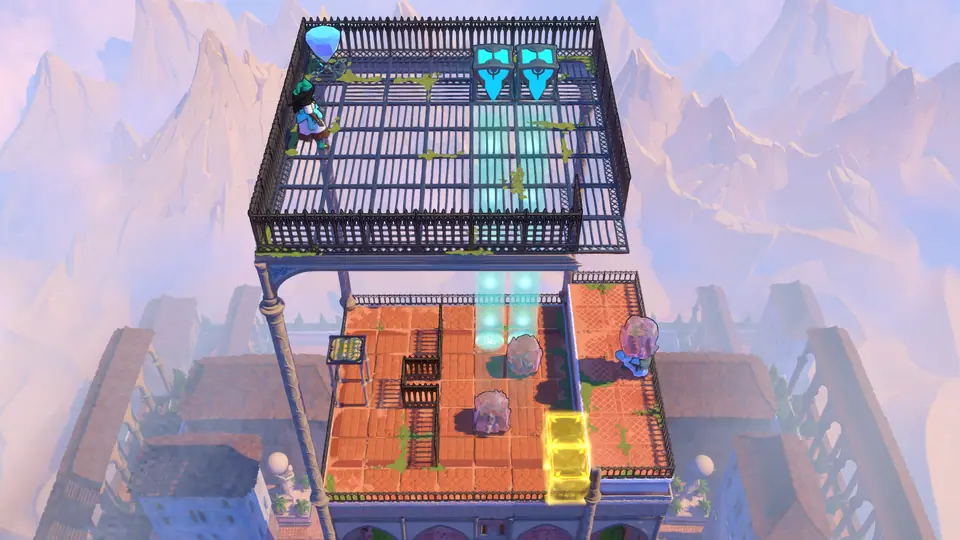
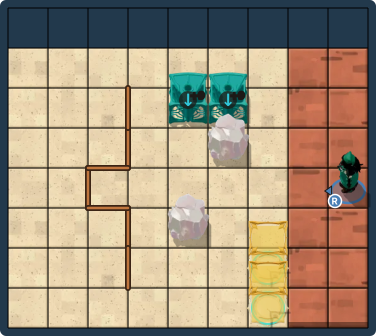
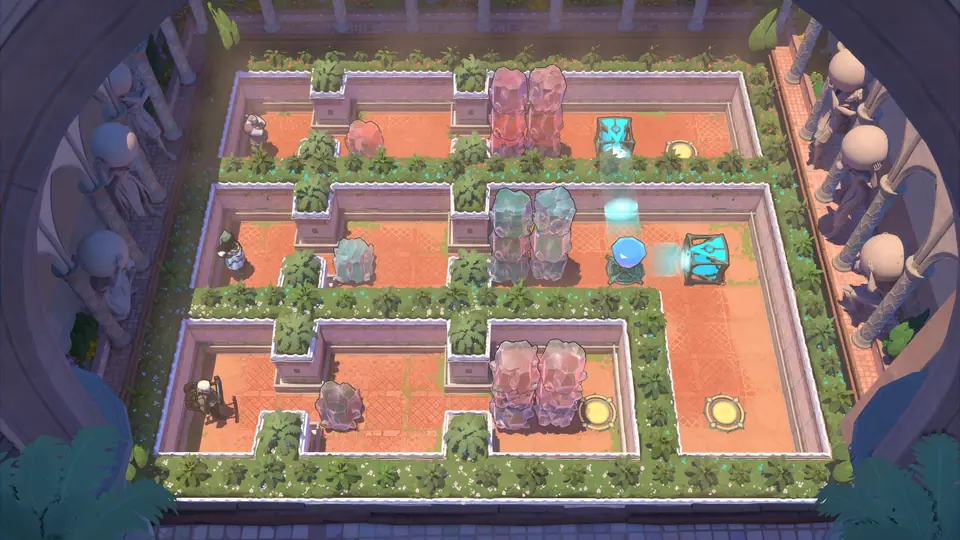
Gemsman · Warrior · Gem · Crystal ×4 · Lift · Stairs ×2 · Goblin · Beam source · Gem padOpens after Strength 6

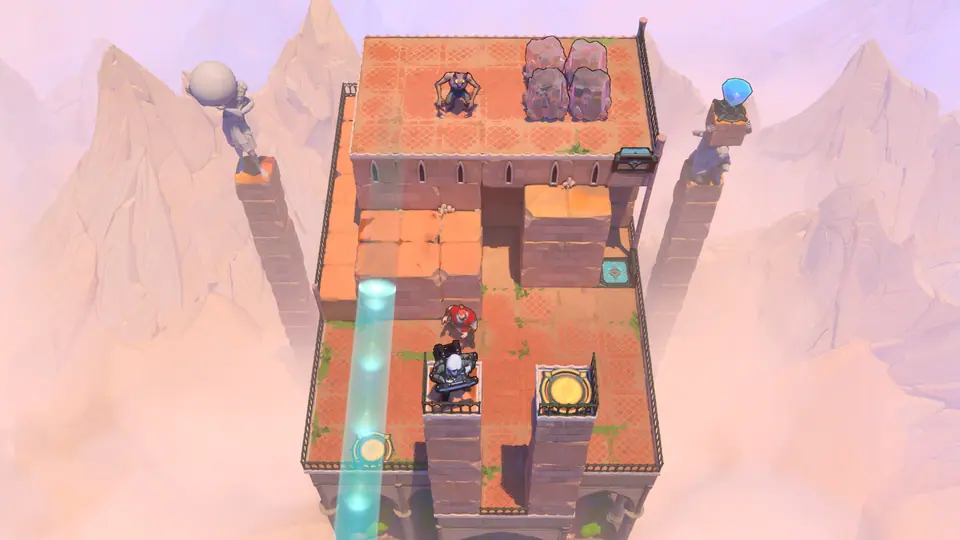
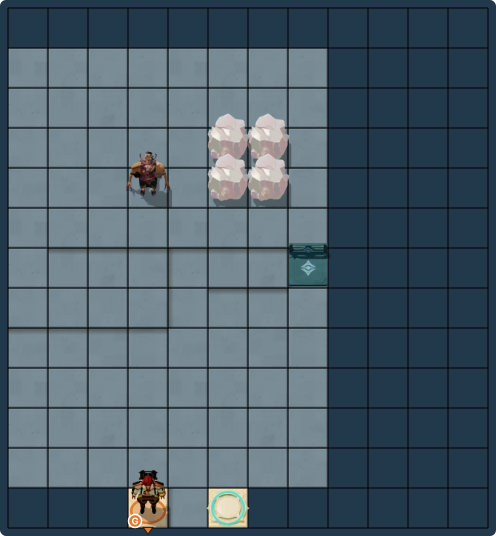
Strength puzzle 1 in game: Gemsman, Warrior, Gem, Crystal ×4, Lift, Stairs ×2, Goblin, Beam source, Gem pad
  1. Hint 1

    A Warrior pushes a whole stack at once. A goblin carrying more than one thing is crushed, unless a Strong beam gives it the strength to hold them.

  2. Hint 2

    Gemsman needs a tower five high in the gap beside him. Build it in the column the Strong beam shines down, with the goblin second from the bottom.

  3. Hint 3

    Drop a crystal into the foot of the column, stack two more crystals beside it, and push the goblin onto the column with a crystal on its head. Push the beam source over the column, push the two stacked crystals onto the tower, then push the whole tower down to Gemsman's gap.

Full solution89 steps

Verified in the game · build 26249670 · Nov 9, 2026

Route by Quigley

The Warrior builds a five-high tower of crystals and the goblin in the column the Strong beam lights, then pushes it down to bridge Gemsman's gap.

    1. Warrior →×4 · ↑×2 · ride lift
    1. Warrior ↑×2 · ← · → · ↑ · ← · ↑ · ← · ↓ · ←
    1. Warrior ↑ · ← · ↓×2
    1. Warrior ↑ · → · ↓×2
    1. Warrior ↑×2 · → · ↓×2
    1. Warrior ←×2 · ↑ · ← · ↓×2 · ←
    1. Warrior →×2
    1. Warrior ←×3 · ↑×5 · →×3
    1. Warrior ←×3 · ↓×7 · →×7 · ↑×2 · ride lift
    1. Warrior ←×2
    1. Warrior →×2 · ↑ · ←×3
    1. Warrior ↓×6
    1. Warrior ←×3
    1. Gemsman →×2

Warrior: right 4, up 2, ride the lift, up 2, left 1, right 1, up 1, left 1, up 1, left 1, down 1, left 1, up 1, left 1, down 2, up 1, right 1, down 2, up 2, right 1, down 2, left 2, up 1, left 1, down 2, left 1, right 2, left 3, up 5, right 3, left 3, down 7, right 7, up 2, ride the lift, left 2, right 2, up 1, left 3, down 6, left 3. Gemsman: right 2.
Play this puzzle

2 Strength puzzle 2 solution

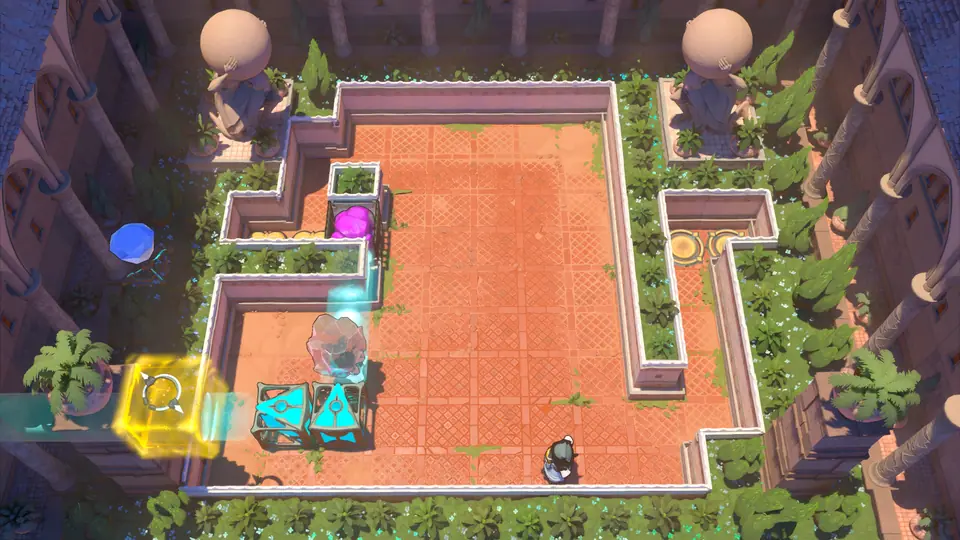
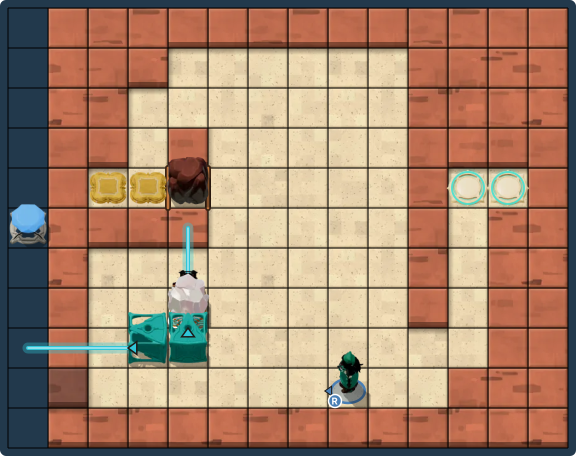
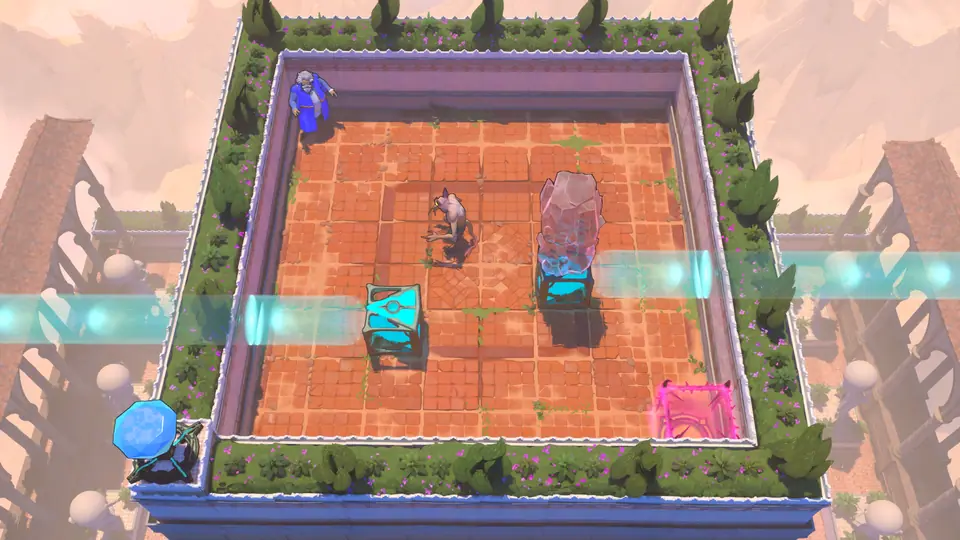
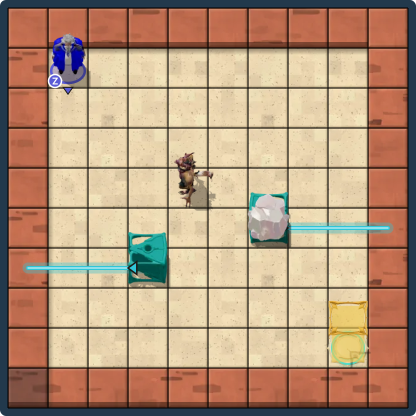
Wizard · Gem · Beam source ×2 · Gem pad · Crystal ×2 · Goblin · GateOpens after Strength 6

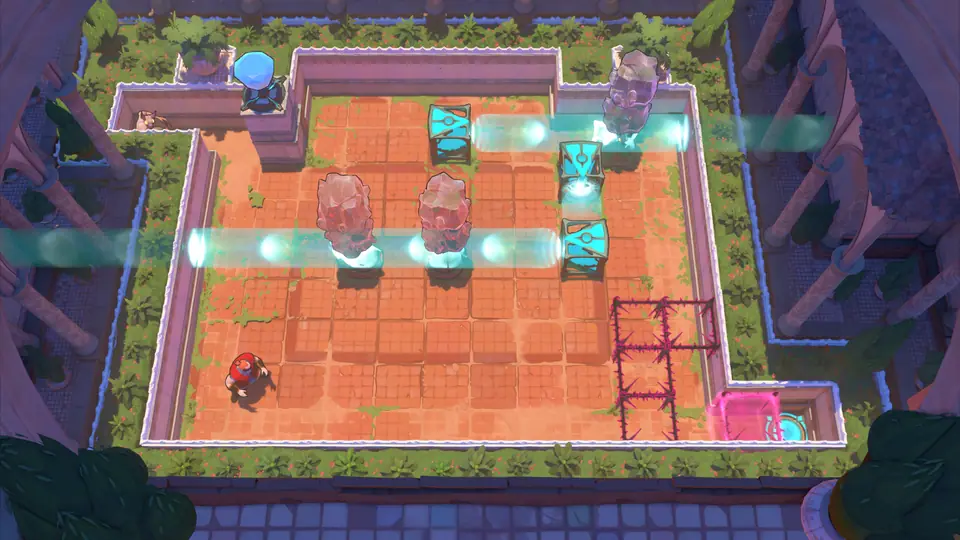
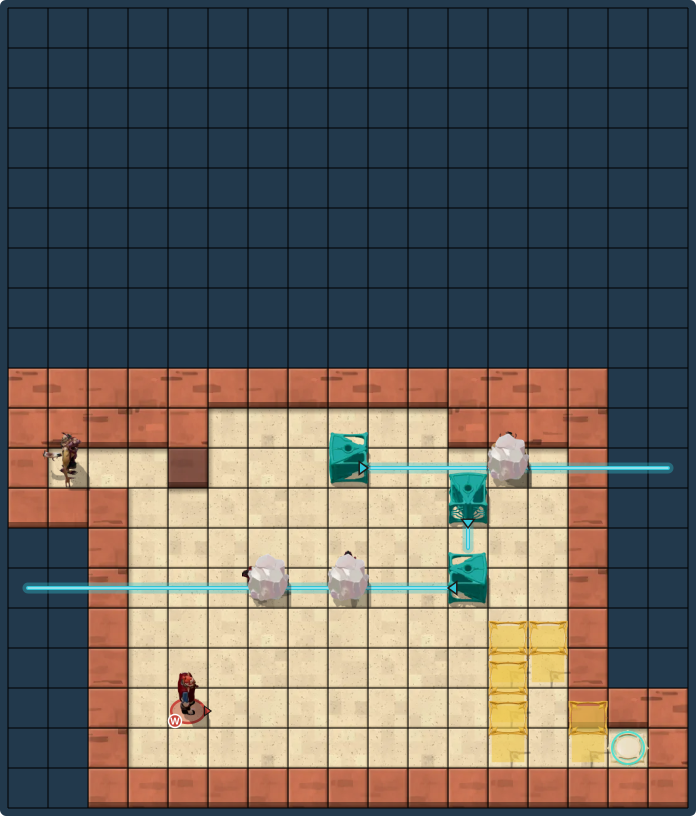
Strength puzzle 2 in game: Wizard, Gem, Beam source ×2, Gem pad, Crystal ×2, Goblin, Gate
  1. Hint 1

    A Goblin can carry two Crystals while strengthened by a Strong beam. Remove its last Strong beam and the stack crushes it.

  2. Hint 2

    The Wizard swaps with the first object in the direction he moves. Swap the sources into the stack's row before putting anyone underneath it.

  3. Hint 3

    Swap yourself under the stack with both Strong beams on you, replace yourself with the Goblin, then move the two sources out of its row in turn.

Full solution110 steps

Verified in the game · build 26006400 · Oct 24, 2026

Swap the Goblin beneath the Crystal stack while Strong light lets it survive, then remove the light so the stack crushes it and opens the exit gate.

    1. Wizard →×7 · ↓×5 · ←
    1. Wizard ↓ · →×5 · ↑ · ← · ↓ · ←×3 · →
    1. Wizard ↑ · ← · ↑×2 · ← · ↓ · →×3 · ↓ · ↑
    1. Wizard → · ↓×2 · ← · ↓ · ←×2 · ↑×2 · → · ↓ · ← · ↓ · ←×2 · ↑
    1. Wizard →×4 · ↓×3 · ← · ↑ · ← · ↓ · ← · ↓ · →×3 · ↑ · → · ↓ · ← · ↓ · →
    1. Wizard ↑×2 · → · ↑ · ↓
    1. Wizard ←×2 · ↓ · ← · ↑ · → · ↑×2 · → · ↓
    1. Wizard → · ← · ↑ · ←×2 · → · ↓ · ←×2 · ↑
    1. Wizard ↑×2 · →×4 · ↓
    1. Wizard ↓×3

Wizard: right 7, down 5, left 1, down 1, right 5, up 1, left 1, down 1, left 3, right 1, up 1, left 1, up 2, left 1, down 1, right 3, down 1, up 1, right 1, down 2, left 1, down 1, left 2, up 2, right 1, down 1, left 1, down 1, left 2, up 1, right 4, down 3, left 1, up 1, left 1, down 1, left 1, down 1, right 3, up 1, right 1, down 1, left 1, down 1, right 1, up 2, right 1, up 1, down 1, left 2, down 1, left 1, up 1, right 1, up 2, right 1, down 1, right 1, left 1, up 1, left 2, right 1, down 1, left 2, up 3, right 4, down 4.

Play this puzzle

3 Strength puzzle 3 solution

Warrior · Dragon ×2 · Gem · Beam source ×3 · Gem pad · Crystal ×6 · Goblin ×2 · Gate ×5 · AnnihilatorOpens after Strength 6

Strength puzzle 3 in game: Warrior, Dragon ×2, Gem, Beam source ×3, Gem pad, Crystal ×6, Goblin ×2, Gate ×5, Annihilator
  1. Hint 1

    The monster gate before the exit opens once no monster is left. A monster carrying two crystals survives only while a Strong beam lights it.

  2. Hint 2

    A dragon's fire burns whatever stands in the line it faces. The Warrior can push monsters, crystals and beam sources, even whole stacks.

  3. Hint 3

    Push the top beam source down to crush the right goblin, push the left dragon up into the left goblin's row so it burns it as it leaves the beam, then herd the right dragon down the right side and push it up off the last beam.

Full solution164 steps

Verified in the game · build 25882299 · Oct 13, 2026

Kill every monster so the monster gate before the exit opens: take the Strong beams off the crystal-carrying monsters so the crystals crush them, and let a dragon burn the left goblin.

    1. Warrior →×3 · ↑×7 · → · ↓
    1. Warrior ↓ · →×2 · ↓ · →×2 · ↑ · ←×5
    1. Warrior ↓×3 · ← · ↑×2
    1. Warrior → · ↑ · →×3 · ↓ · →×3 · ↑×2 · ←×3
    1. Warrior ↑ · ← · ↓×2 · → · ↓ · ← · ↓ · ← · ↓ · → · ↑×2 · ← · ↓ · ← · → · ↑ · ←
    1. Warrior ↓×2 · →×4 · ↑×2 · ↓ · ←×4 · ↑×2
    1. Warrior ←×3 · ↓ · ← · ↑
    1. Warrior →×7 · ↑ · → · ↓×2
    1. Warrior ← · ↓×2 · ←×5 · ↑ · →×6
    1. Warrior ↑×2 · ←×6 · ↑×2 · → · ↓×2
    1. Warrior ← · ↓ · →×6 · ↑ · → · ↓×3
    1. Warrior ↑×2 · ←×7 · ↓×3 · ← · ↓ · →×7
    1. Warrior ↓ · →×2 · ↑ · ↓ · →×2

Warrior: right 3, up 7, right 1, down 2, right 2, down 1, right 2, up 1, left 5, down 3, left 1, up 2, right 1, up 1, right 3, down 1, right 3, up 2, left 3, up 1, left 1, down 2, right 1, down 1, left 1, down 1, left 1, down 1, right 1, up 2, left 1, down 1, left 1, right 1, up 1, left 1, down 2, right 4, up 2, down 1, left 4, up 2, left 3, down 1, left 1, up 1, right 7, up 1, right 1, down 2, left 1, down 2, left 5, up 1, right 6, up 2, left 6, up 2, right 1, down 2, left 1, down 1, right 6, up 1, right 1, down 3, up 2, left 7, down 3, left 1, down 1, right 7, down 1, right 2, up 1, down 1, right 2.

Play this puzzle

4 Strength puzzle 4 solution

Hero ×2 · Gem pad · Gate ×2 · Button · Beam source ×2 · Crystal ×3 · GemOpens after Strength 6

Strength puzzle 4 in game: Hero ×2, Gem pad, Gate ×2, Button, Beam source ×2, Crystal ×3, Gem
  1. Hint 1

    A hero can carry one thing on his head; carrying more needs Strong. The two beam sources on the top level shine Strong straight down.

  2. Hint 2

    The crystal on Hero 2's head must reach the red button at the far left, one level up. Hero 2 gets there riding on Hero 1, inside a Strong beam.

  3. Hint 3

    Push both beam sources down and left over the button's row, walk Hero 2 there over the floor crystals, stand him on Hero 1's head in the left beam and step left onto the button.

Full solution107 steps

Verified in the game · build 26006400 · Oct 20, 2026

Route by 塞德莎 (Sedesha)

Hero 1 is the left hero. Hero 2 is the right hero.

Hero 1 aims the two Strong beams down from the top level; Hero 2 walks left on floor crystals with a crystal on his head, then rides Hero 1 one step left so the crystal lands on the red button and the exit gates open.

    1. Hero 1 ↑×2 · →×3 · ↑ · →×2 · ↓×2 · → · ↓ · ←×2 · ↑ · → · ↑ · ←×3 · ↑ · ← · ↓×2
    1. Hero 1 →×3 · ↓ · →×2 · ↓×3 · → · ↑×3
    1. Hero 2 ← · ↓×2 · ←
    1. Hero 1 ↑×2 · ← · ↓×3
    2. Hero 2 ←
    3. Hero 1 ↑ · ← · ↓
    4. Hero 2 ←
    5. Hero 1 ← · ↓×2 · →×2 · ↑×2 · → · ↑ · ← · ↑ · ← · ↓
    1. Hero 2 ↑
    2. Hero 1 → · ↓×2 · ← · ↓ · ← · ↑
    3. Hero 2 ←
    4. Hero 1 → · ↑ · → · ↑ · ←×2
    5. Hero 2 ↑ · ←
    1. Hero 1 ↑×3 · ←×2 · ↓×3
    2. Hero 2 ←
    1. Hero 1 ←
    1. Hero 1 ↓×2 · →×2
    1. Hero 2 ↓ · →×4
    2. Hero 1 ↓ · → · ↑ · →×3

Hero 1: up 2, right 3, up 1, right 2, down 2, right 1, down 1, left 2, up 1, right 1, up 1, left 3, up 1, left 1, down 2, right 3, down 1, right 2, down 3, right 1, up 3. Hero 2: left 1, down 2, left 1. Hero 1: up 2, left 1, down 3. Hero 2: left 1. Hero 1: up 1, left 1, down 1. Hero 2: left 1. Hero 1: left 1, down 2, right 2, up 2, right 1, up 1, left 1, up 1, left 1, down 1. Hero 2: up 1. Hero 1: right 1, down 2, left 1, down 1, left 1, up 1. Hero 2: left 1. Hero 1: right 1, up 1, right 1, up 1, left 2. Hero 2: up 1, left 1. Hero 1: up 3, left 2, down 3. Hero 2: left 1. Hero 1: left 1, down 2, right 2. Hero 2: down 1, right 4. Hero 1: down 1, right 1, up 1, right 3.

Play this puzzle

5 Strength puzzle 5 solution

Gemsman · Hero · Gem · Beam source ×2 · Gem pad · Crystal · Button ×2 · Gate · Boulder · TorcOpens after Strength 4

Strength puzzle 5 in game: Gemsman, Hero, Gem, Beam source ×2, Gem pad, Crystal, Button ×2, Gate, Boulder
  1. Hint 1

    The Crystal crushes the Gemsman unless Strong beam power gives him enough strength to carry it.

  2. Hint 2

    Both Buttons lower the gate supporting the Torc. The Hero can collect it after it falls.

  3. Hint 3

    Use the Torc to turn beams toward the bottom path, then push both sources north to light the approach to the exits.

Full solution148 steps

Verified in the game · build 26006400 · Oct 25, 2026

Keep the Gemsman under Strong beams while he carries a Crystal; turn the sources with the Torc to light the exit path.

    1. Hero ←×5 · ↑×2 · ← · ↑ · →×2 · ← · ↓×2
    2. Gemsman ↑
    3. Hero → · ↓ · →
    4. Gemsman → · ↑×3
    5. Hero ↑×2
    1. Hero → · ↑×4 · ↓ · →×2 · ↓×2
    2. Gemsman ↑ · →
    3. Hero ←×4
    1. Hero → · ↑×4 · ←×2 · ↓×2 · ←
    2. Gemsman ←×3 · ↓×2
    1. Gemsman ↑×2 · →×5
    1. Hero → · ↑×2 · →×2 · ↓×6 · ←×3 · ↓
    1. Hero ↑×3 · →×4 · ↑×2 · → · ↑ · →
    2. Gemsman ← · ↓×5
    1. Hero ↑×2 · → · ↓×5
    2. Gemsman →
    3. Hero ←×3 · → · activate
    1. Hero ↓
    2. Gemsman ↓ · →×3
    3. Hero activate · ← · ↓ · → · ↓ · →×2 · activate
    1. Hero ←
    2. Gemsman ↑
    3. Hero ↑×2 · ↓ · →
    4. Gemsman ↑
    5. Hero ↑×2 · ↓
    6. Gemsman ↑
    7. Hero ← · ↑ · → · ↑
    1. Hero ↓×3 · →×2 · ↑×2
    2. Gemsman ↑ · →
    3. Hero ↑×2

Hero: left 5, up 2, left 1, up 1, right 2, left 1, down 2. Gemsman: up 1. Hero: right 1, down 1, right 1. Gemsman: right 1, up 3. Hero: up 2, right 1, up 4, down 1, right 2, down 2. Gemsman: up 1, right 1. Hero: left 4, right 1, up 4, left 2, down 2, left 1. Gemsman: left 3, down 2, up 2, right 5. Hero: right 1, up 2, right 2, down 6, left 3, down 1, up 3, right 4, up 2, right 1, up 1, right 1. Gemsman: left 1, down 5. Hero: up 2, right 1, down 5. Gemsman: right 1. Hero: left 3, right 1, activate, down 1. Gemsman: down 1, right 3. Hero: activate, left 1, down 1, right 1, down 1, right 2, activate, left 1. Gemsman: up 1. Hero: up 2, down 1, right 1. Gemsman: up 1. Hero: up 2, down 1. Gemsman: up 1. Hero: left 1, up 1, right 1, up 1, down 3, right 2, up 2. Gemsman: up 1, right 1. Hero: up 2.

Play this puzzle

6 Strength puzzle 6 solution

Warrior · Gemsman · Hero · Crystal ×21 · Beam source ×2 · Gem · Gem pad

Strength puzzle 6 in game: Warrior, Gemsman, Hero, Crystal ×21, Beam source ×2, Gem, Gem pad
  1. Hint 1

    Strong light adds pushing strength. The Hero needs one beam to push these stacks; Gemsman needs both beams.

  2. Hint 2

    The beams pass through walls and Crystals, so the Warrior can aim the upper source into the rooms below.

  3. Hint 3

    Light the middle stacks from above, lower the right source into Gemsman's row, then shift both sources to help Gemsman clear his exit.

Full solution73 steps · shortest

Verified in the game · build 26006400 · Oct 25, 2026

Aim the Strong beams through the walls so the Hero and Gemsman can move the Crystal stacks, then reach all three exits.

    1. Warrior →×3 · ↑ · →×2 · ↓ · →×2 · ↑ · →×4 · ↓ · ←×6
    1. Warrior ↑ · ←×2 · ↓ · →×2
    1. Hero →×3 · ↑ · →×2 · ↓ · →×2
    1. Hero ↑ · →×5 · ↓×4
    1. Gemsman →×3 · ↑ · →×2 · ↓ · →×2 · ↑ · →
    1. Hero → · ↓×2 · ← · ↑
    1. Warrior →×3
    1. Warrior ↑ · →×3 · ↓ · →
    1. Gemsman → · ↓

Warrior: right 3, up 1, right 2, down 1, right 2, up 1, right 4, down 1, left 6, up 1, left 2, down 1, right 2. Hero: right 3, up 1, right 2, down 1, right 2, up 1, right 5, down 4. Gemsman: right 3, up 1, right 2, down 1, right 2, up 1, right 1. Hero: right 1, down 2, left 1, up 1. Warrior: right 3, up 1, right 3, down 1, right 1. Gemsman: right 1, down 1.

Other routes1
  1. Route 281 steps

    Verified in the game · build 25998871 · Oct 17, 2026

    Aim the Strong beams through the walls so the Hero and Gemsman can push the crystal stacks in their rooms aside, then all three reach their exits.

      1. Warrior →×3 · ↑ · →×2 · ↓ · →×2 · ↑ · →×2 · ↓ · ↑ · ← · ↓ · ↑ · →×3 · ↓
      1. Warrior ←×6 · ↑ · ←×2 · ↓ · →×2
      1. Hero →×3 · ↑ · →×2 · ↓ · →×2
      1. Hero ↑ · →×5 · ↓×4
      1. Gemsman →×3 · ↑ · →×2 · ↓ · →×2
      1. Hero → · ↓×2 · ← · ↑
      1. Warrior →×2
      2. Gemsman ↑ · → · ↓
      3. Warrior →
      1. Gemsman ↑ · → · ↓
      1. Warrior ↑ · →×3 · ↓ · →

    Warrior: right 3, up 1, right 2, down 1, right 2, up 1, right 2, down 1, up 1, left 1, down 1, up 1, right 3, down 1, left 6, up 1, left 2, down 1, right 2. Hero: right 3, up 1, right 2, down 1, right 2, up 1, right 5, down 4. Gemsman: right 3, up 1, right 2, down 1, right 2. Hero: right 1, down 2, left 1, up 1. Warrior: right 2. Gemsman: up 1, right 1, down 1. Warrior: right 1. Gemsman: up 1, right 1, down 1. Warrior: up 1, right 3, down 1, right 1.

Play this puzzle

By (Editor, WikiTactics) Edition published

Search Order of the Sinking Star

    Heroes (north)Mirror Isles (east)Skipping Stones (south)Beamcasters (west)Puzzle mapRules and itemsGold roomsSecrets and treasuresEndingsAchievements日本語Threads and activityPlayer guidesMy contributions

    Record