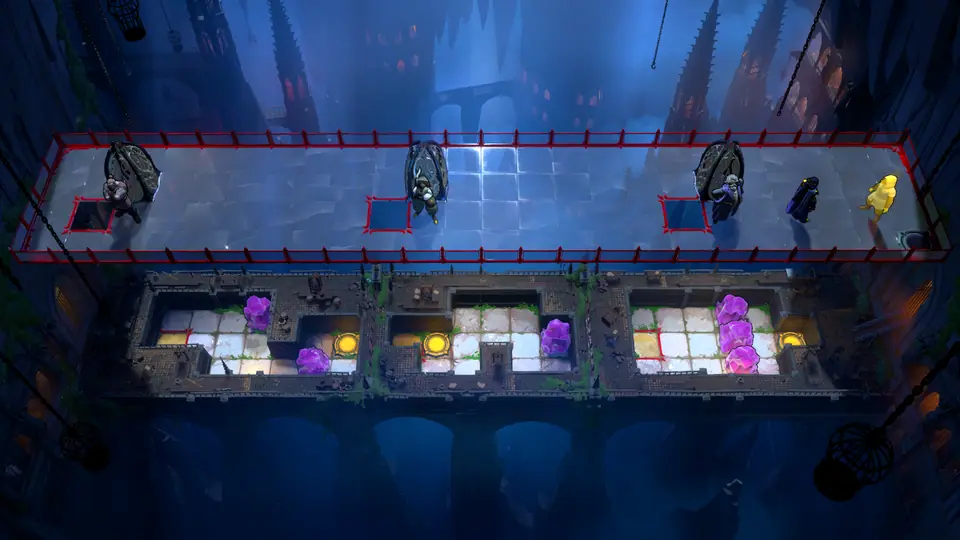
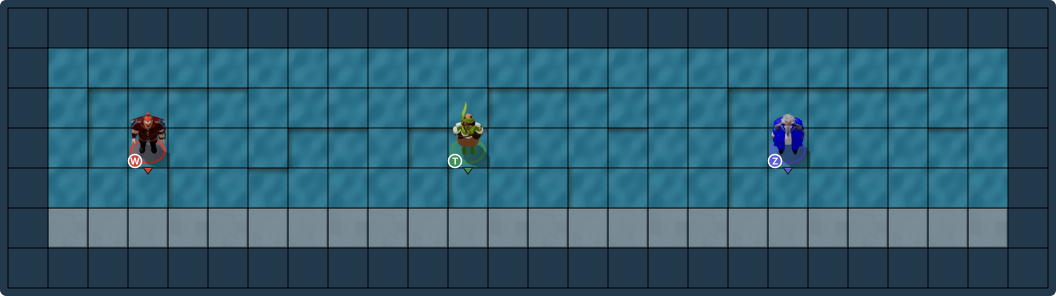
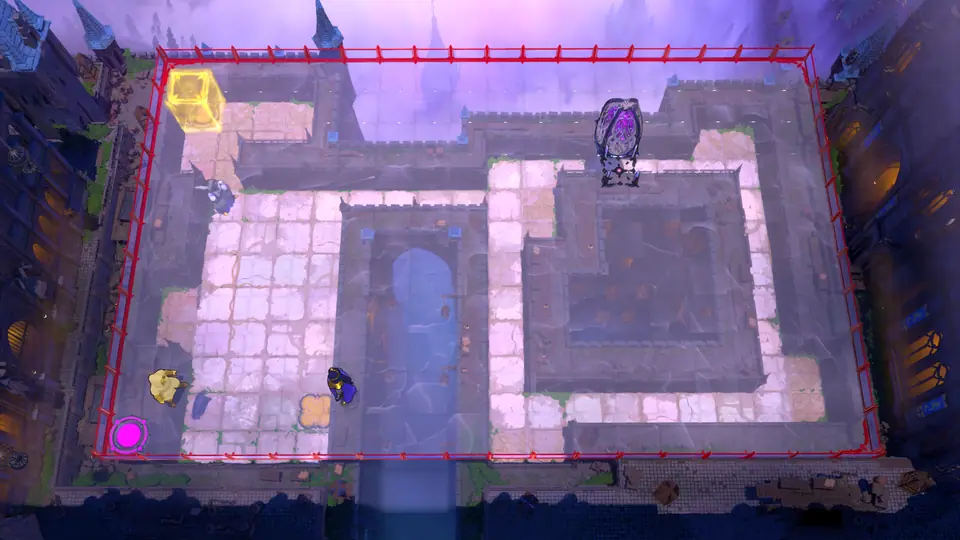
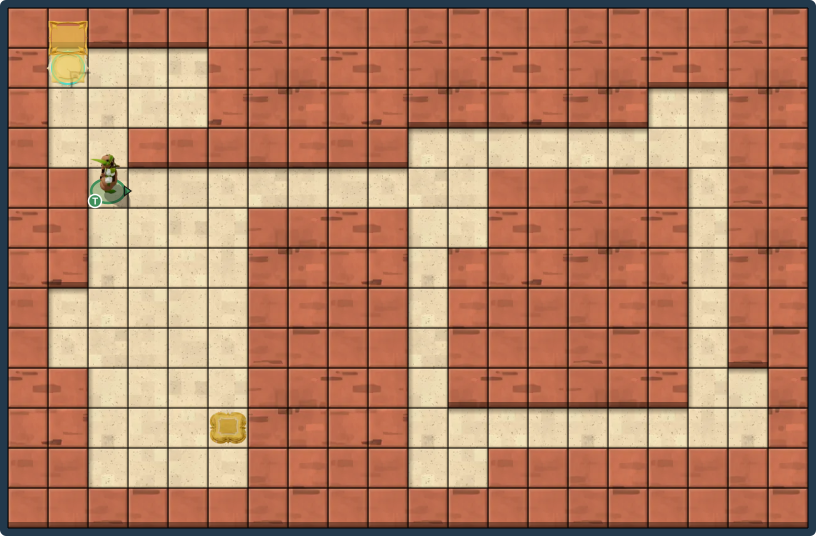
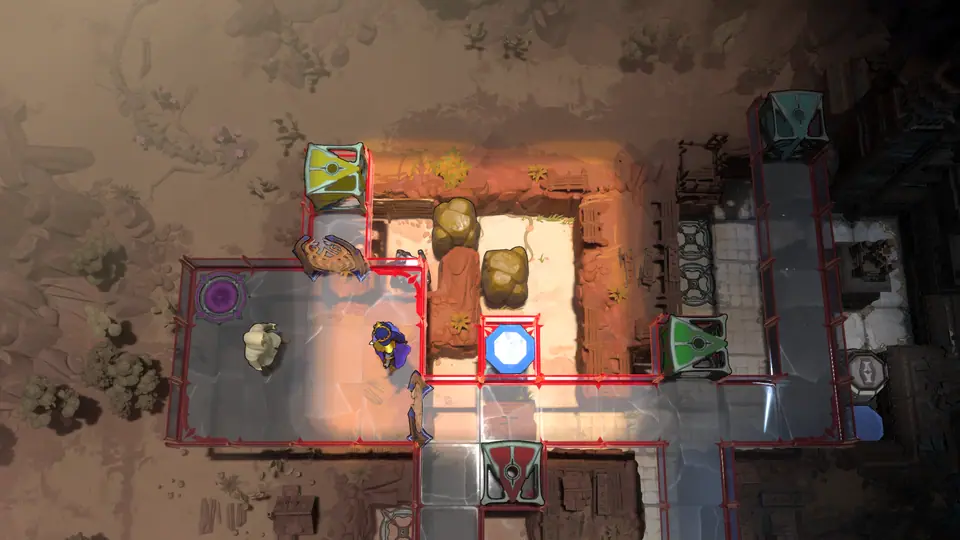
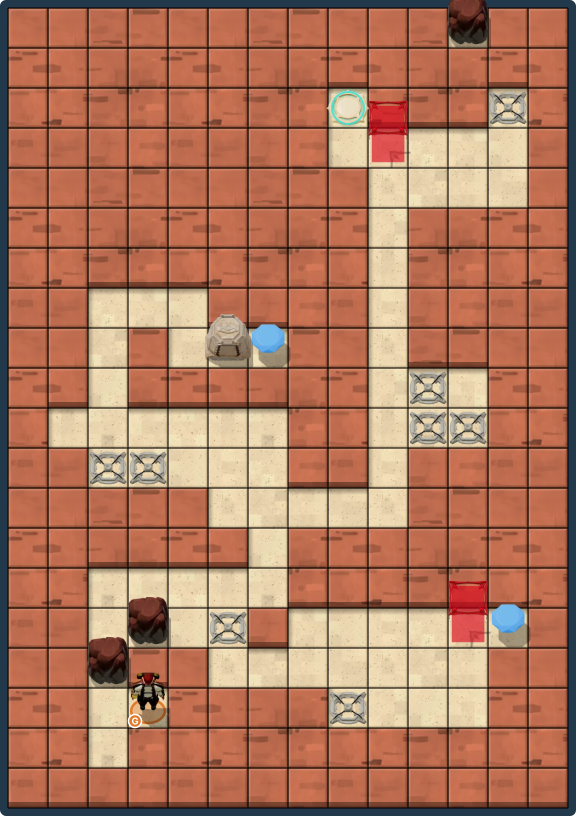
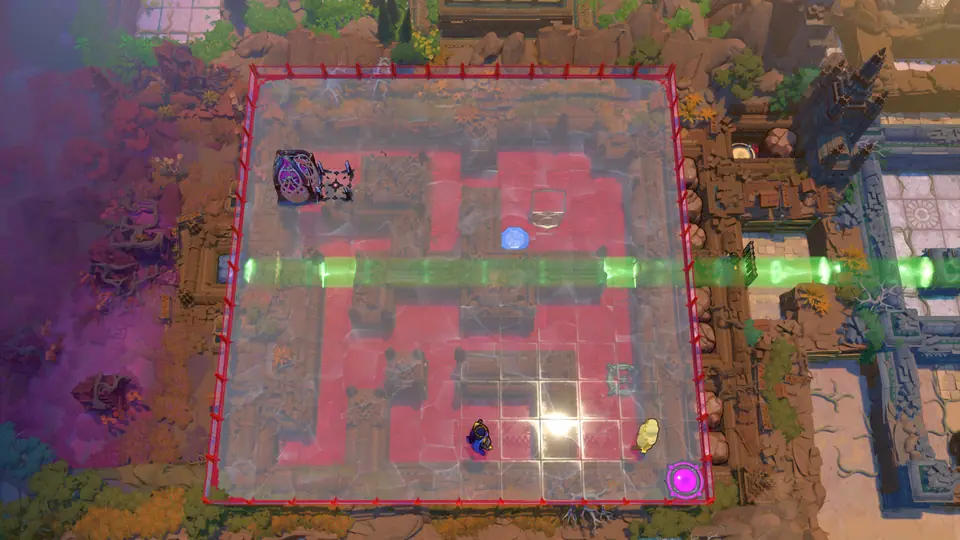
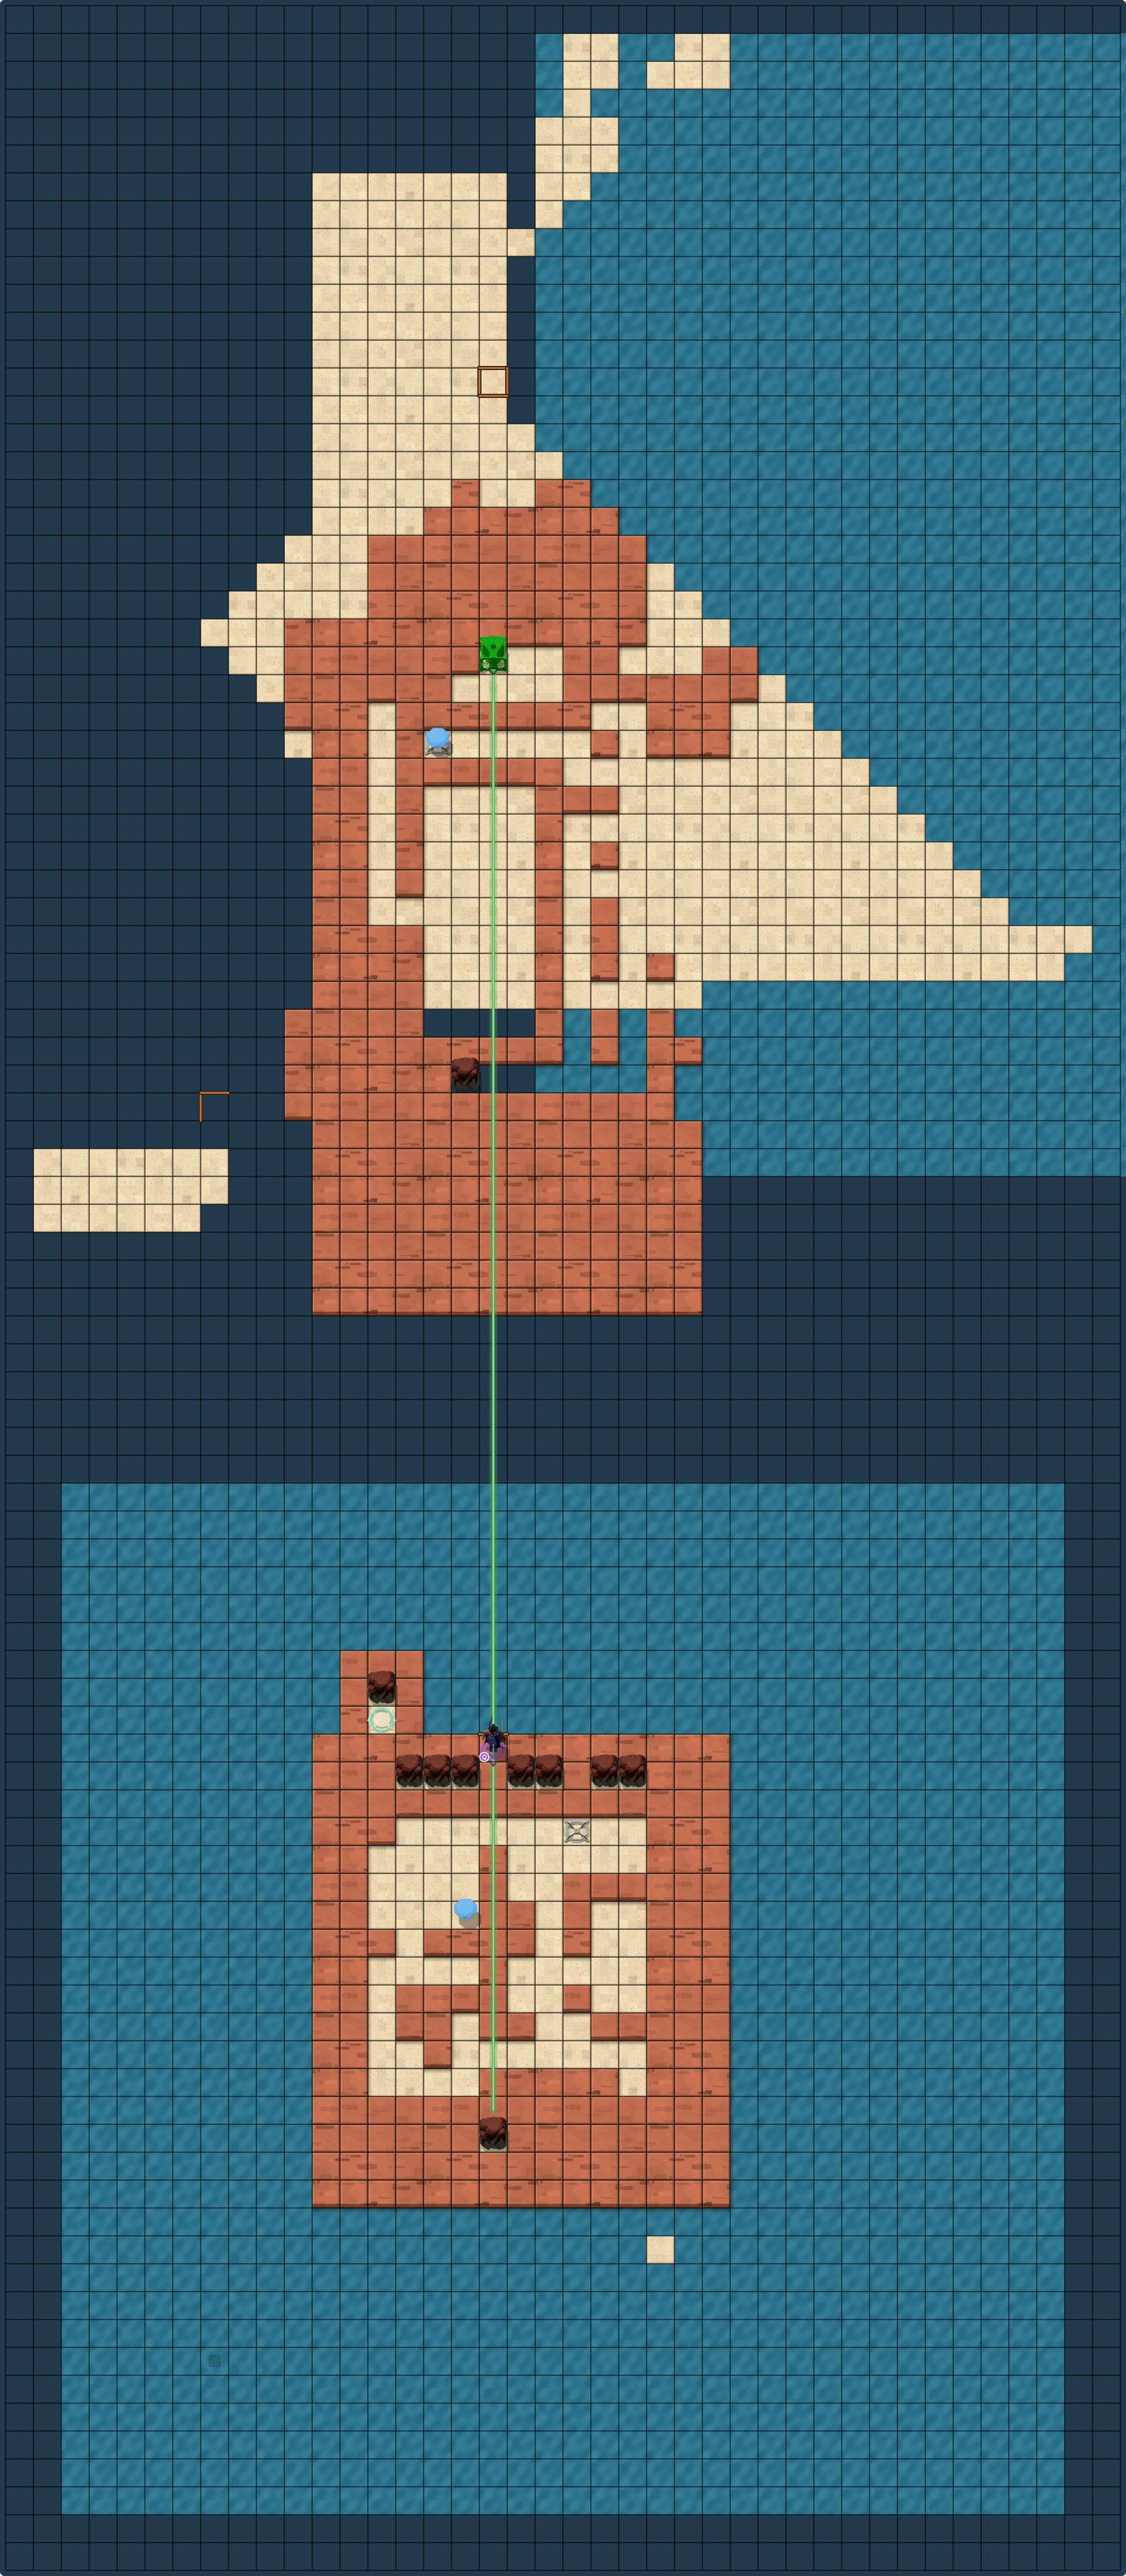
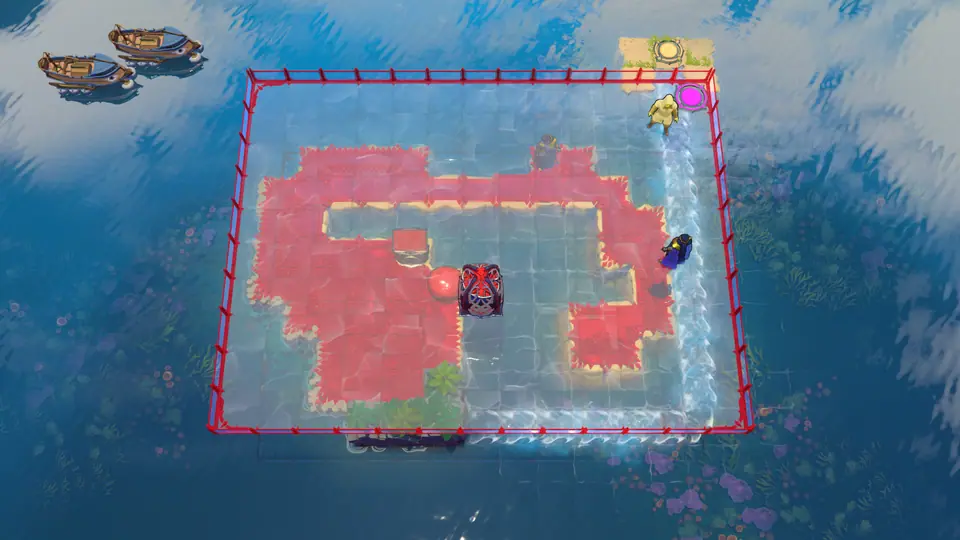
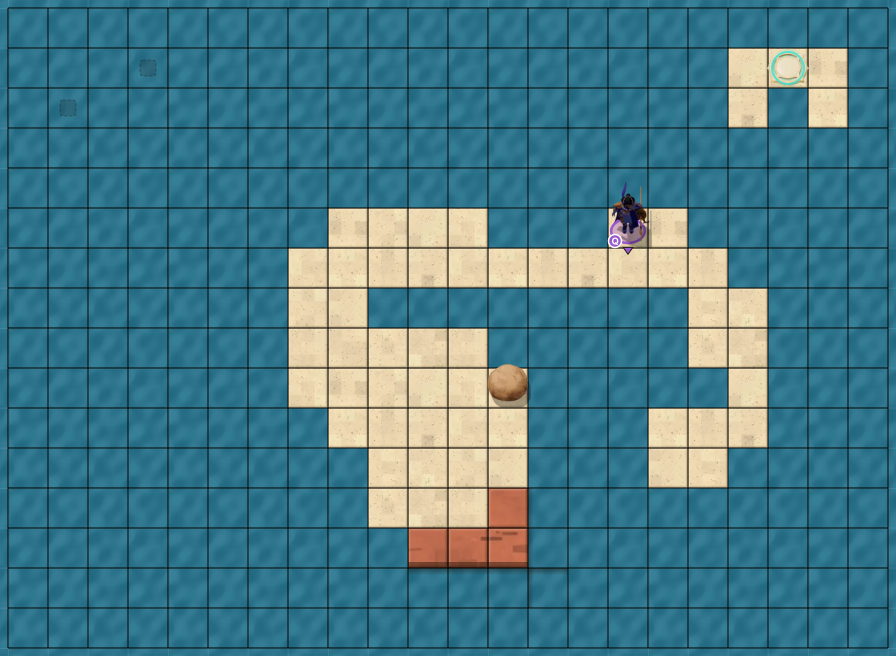
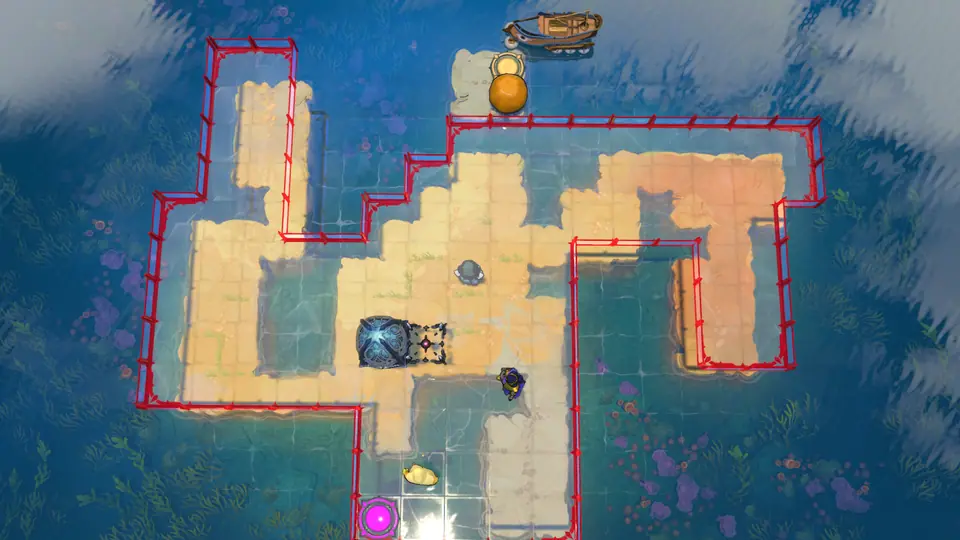
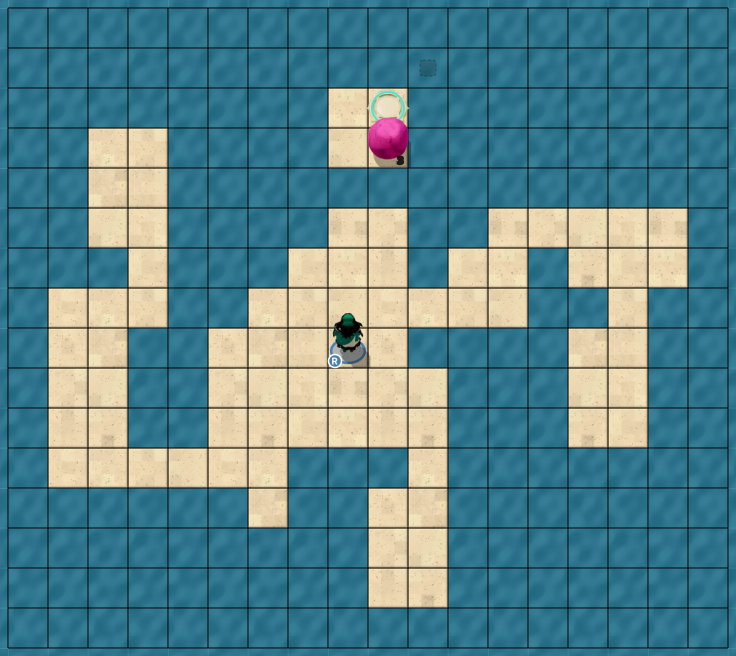
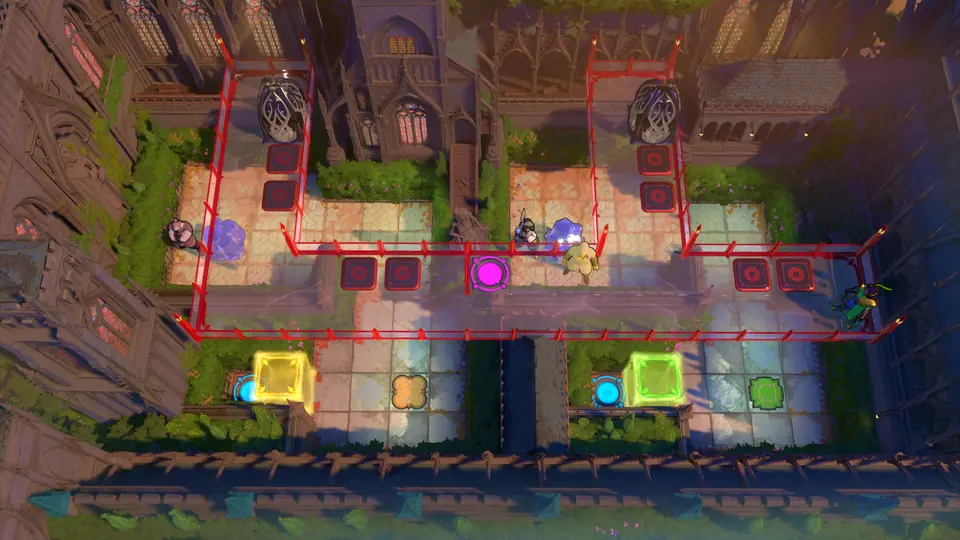
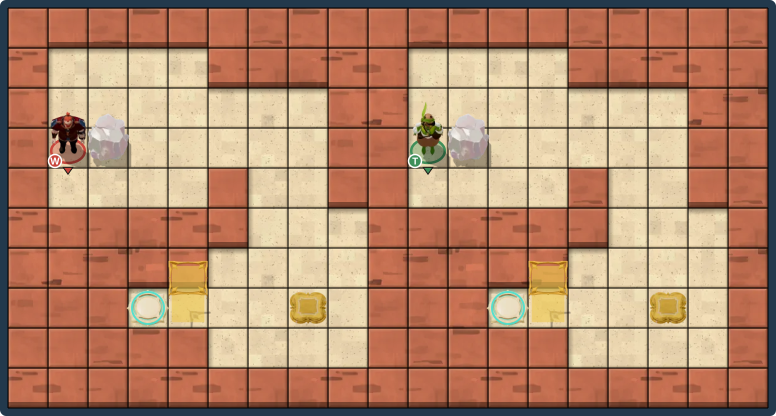
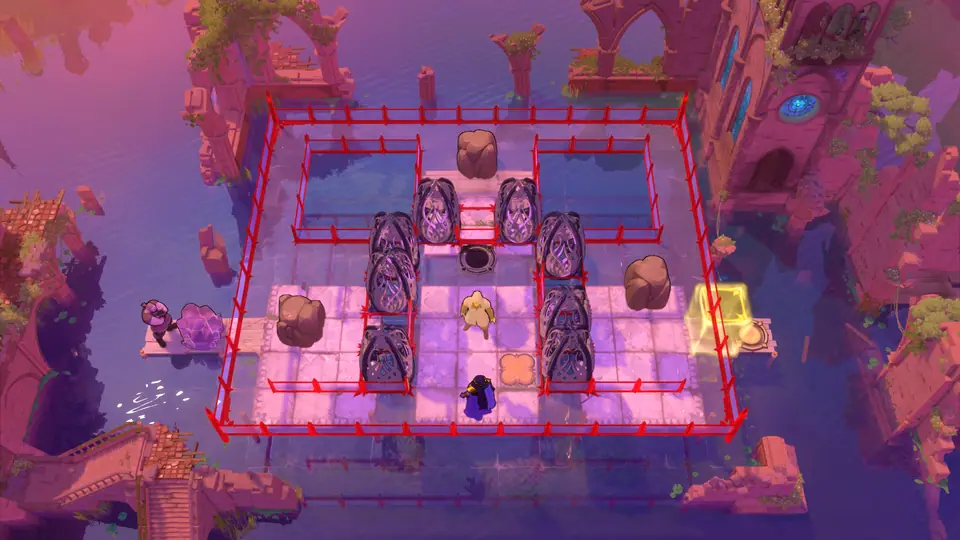
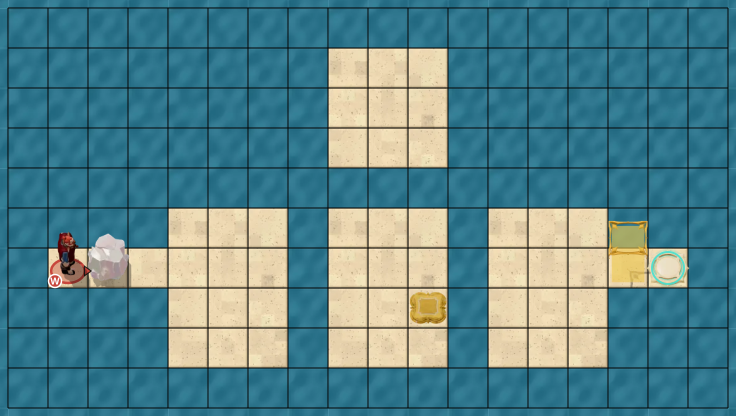
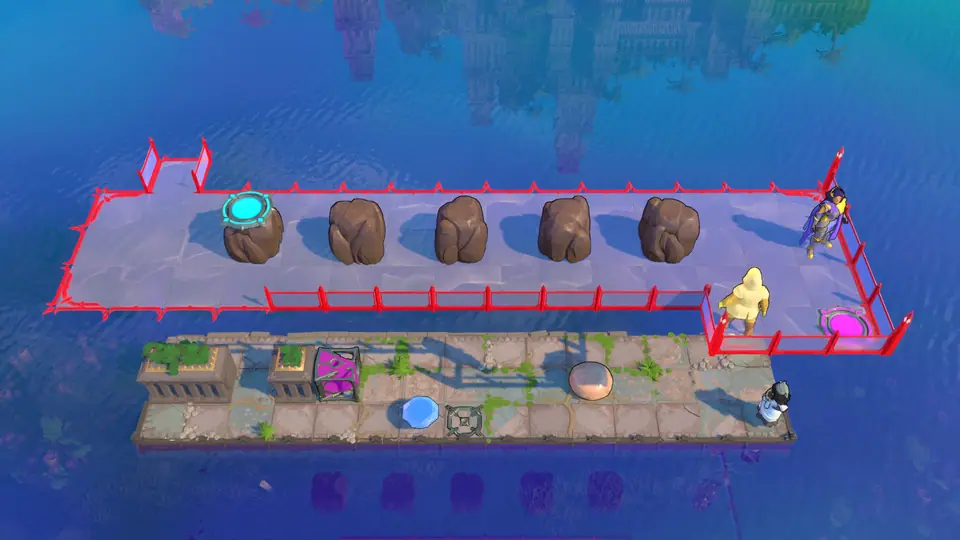
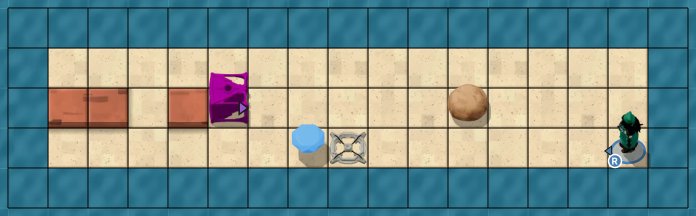
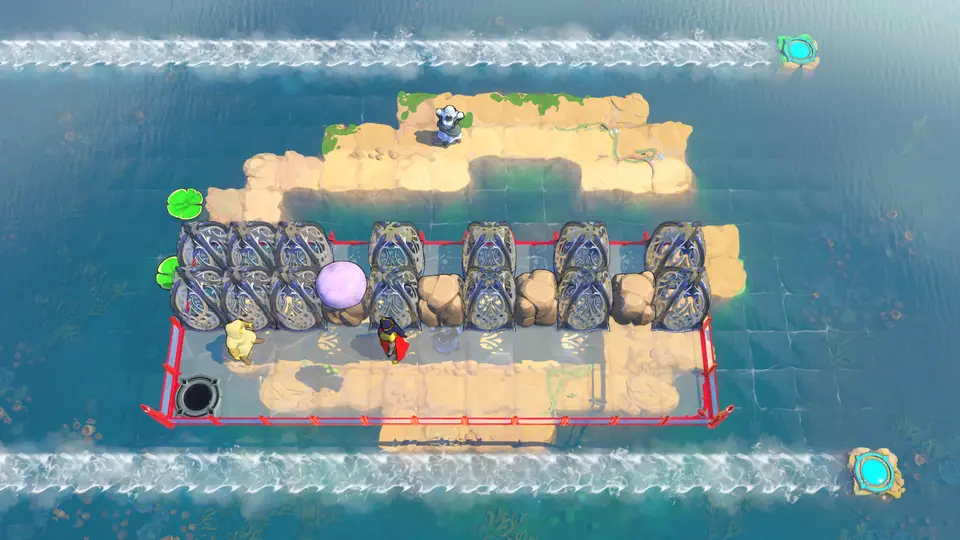
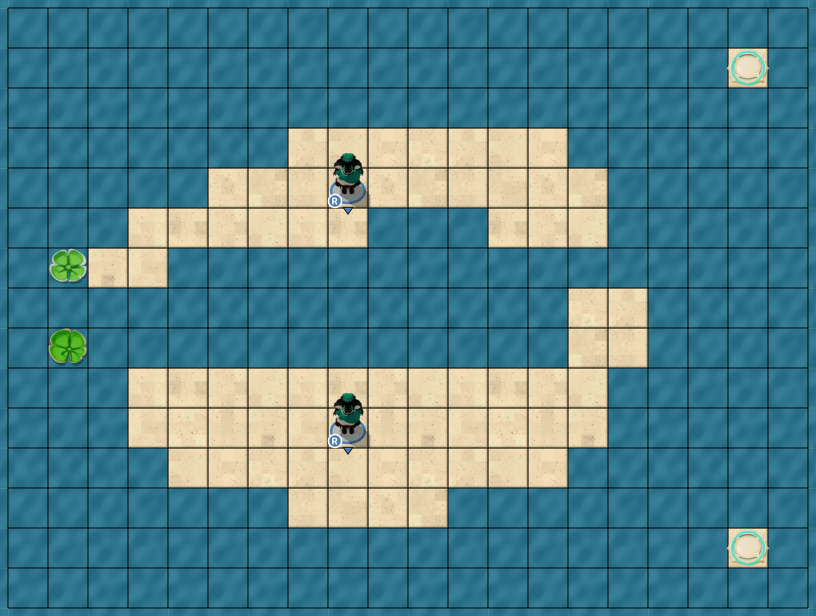
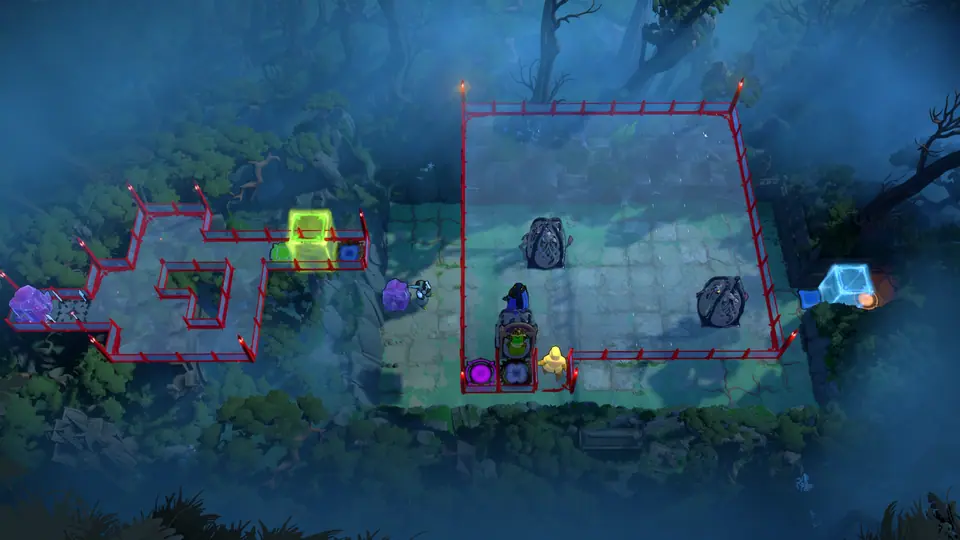
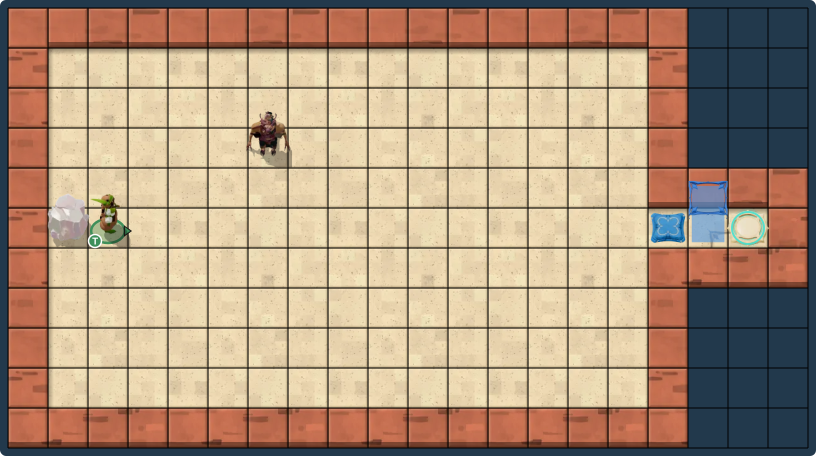
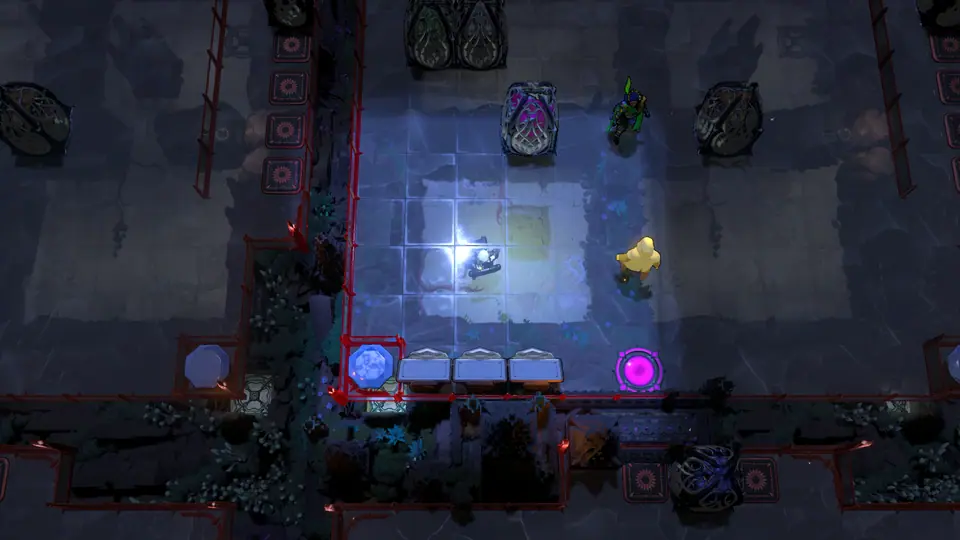
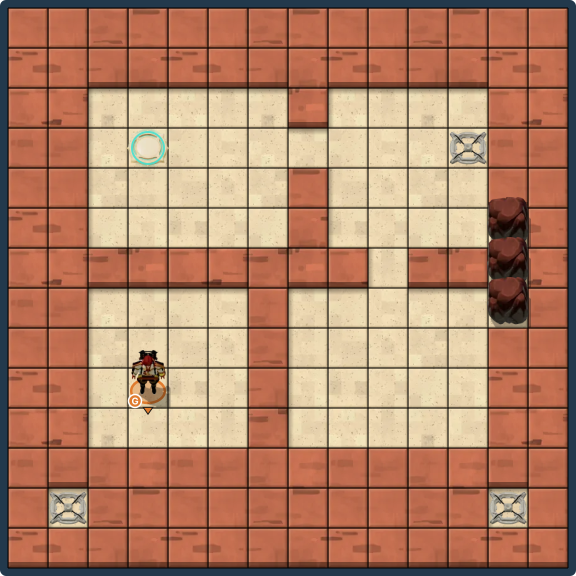
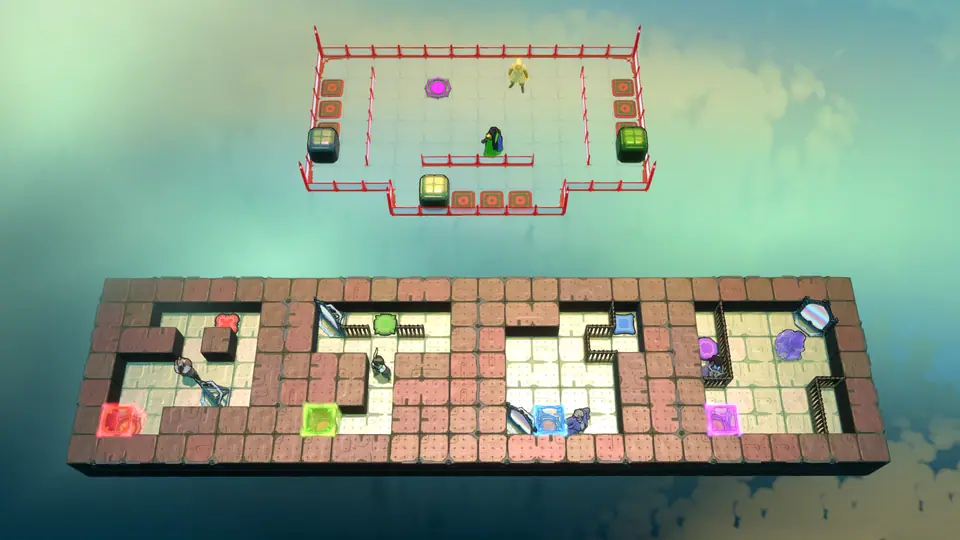
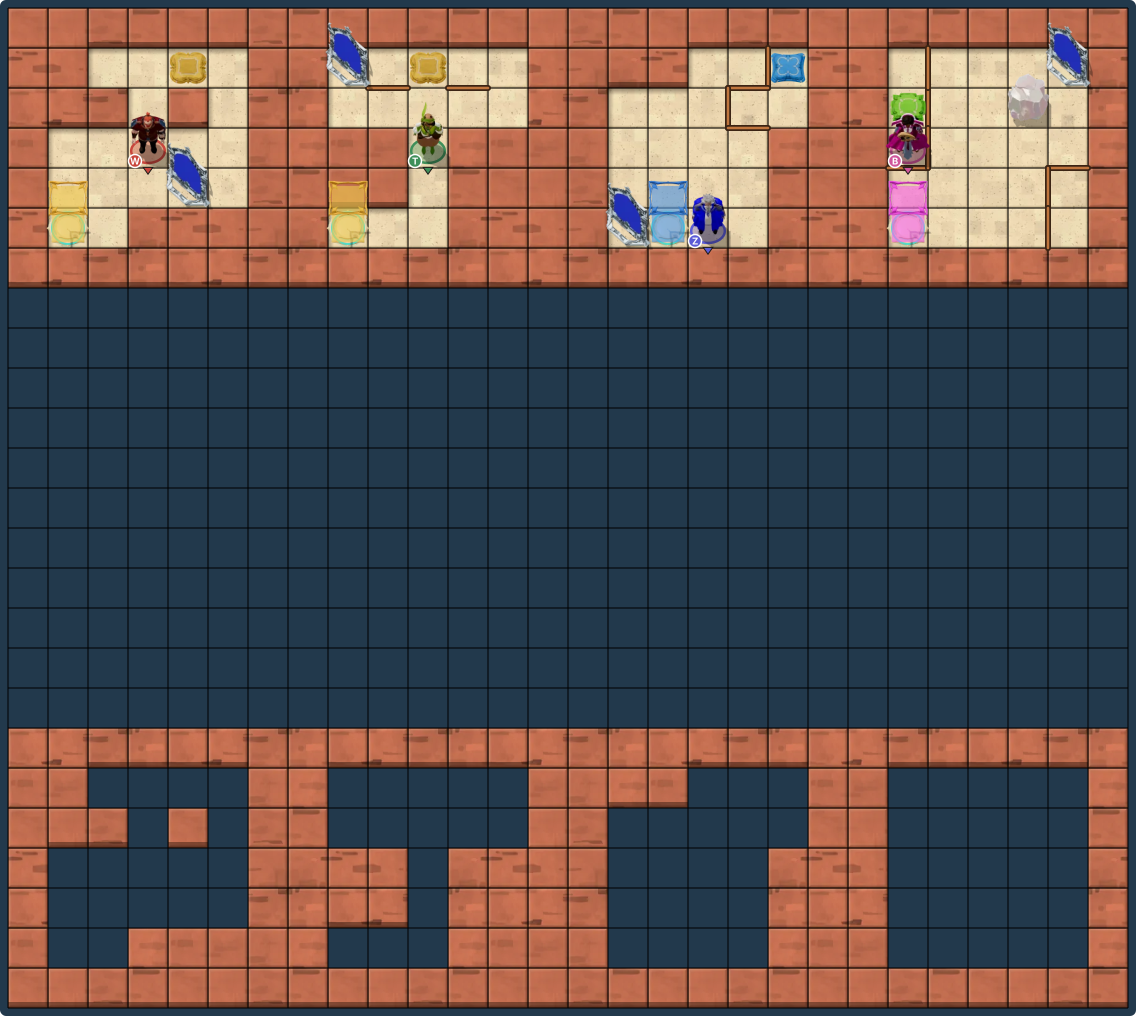
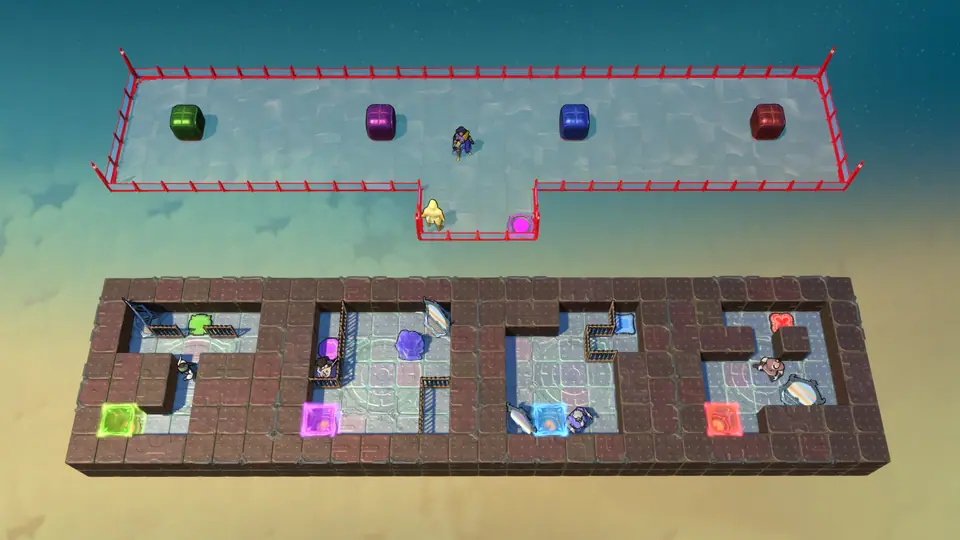
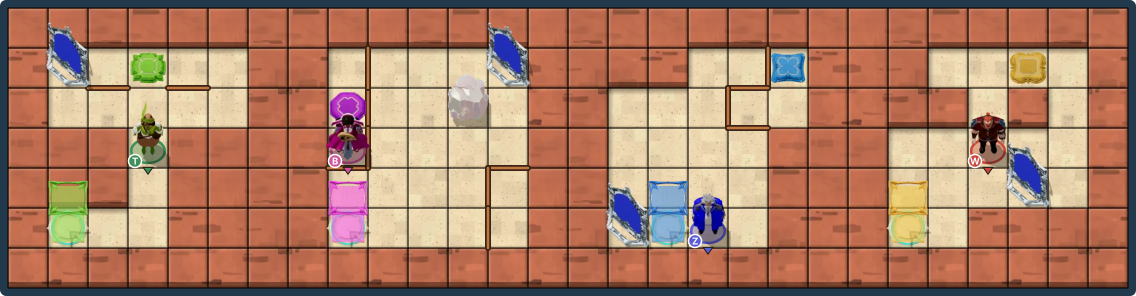
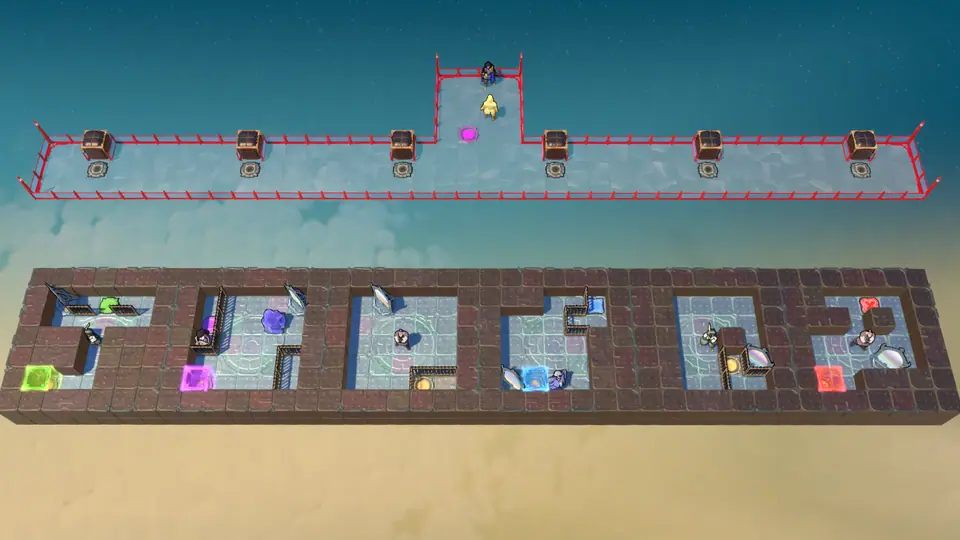
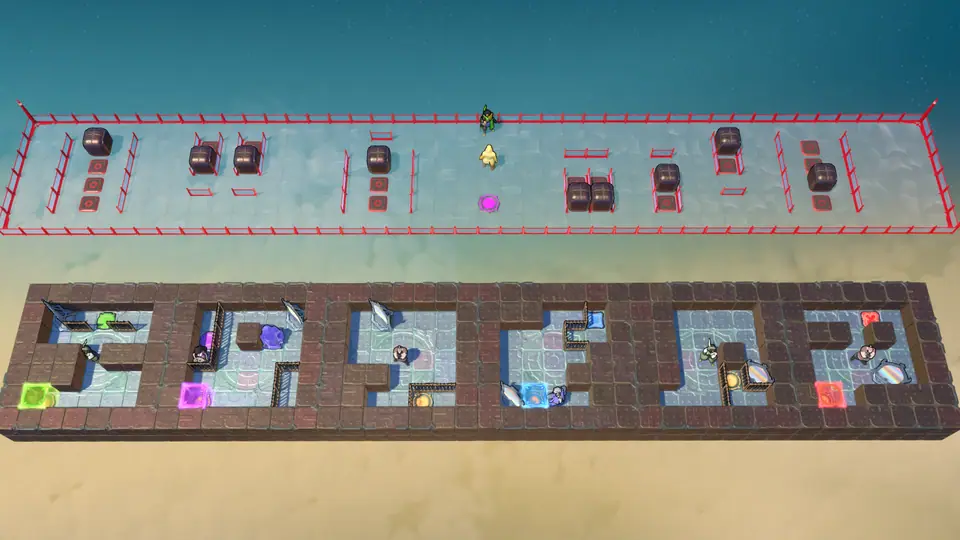
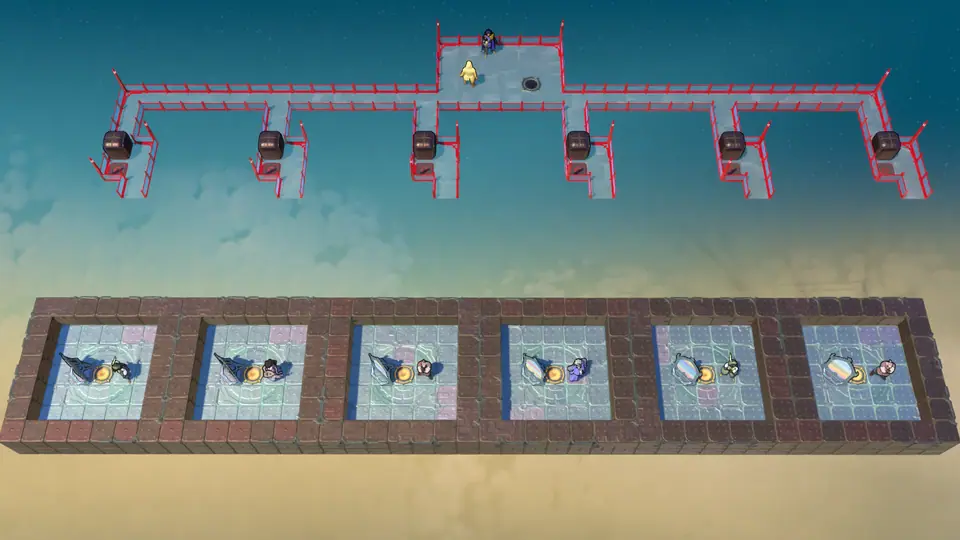
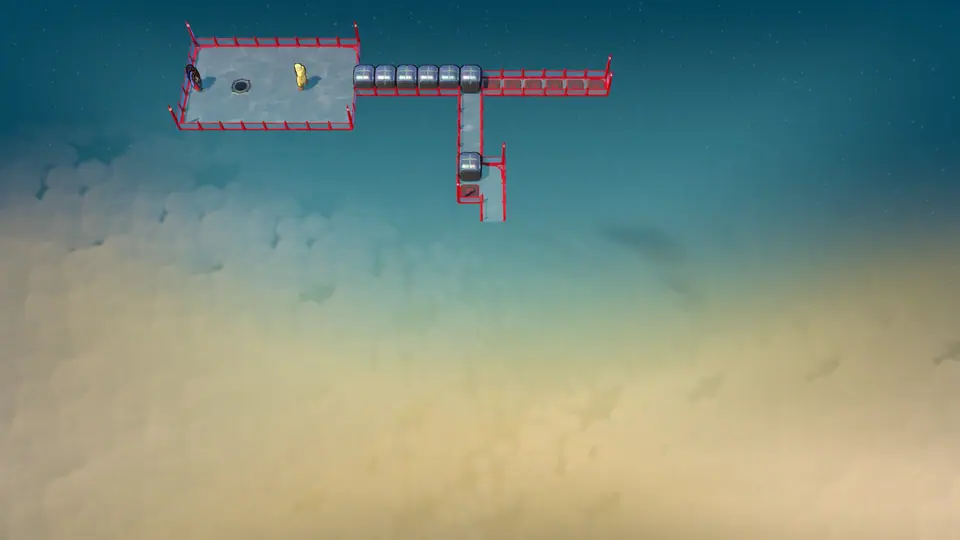
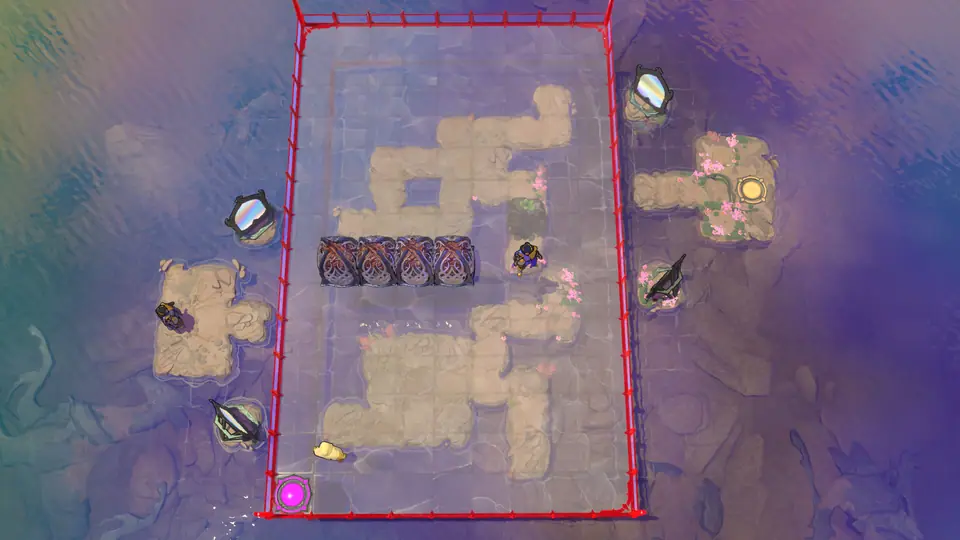
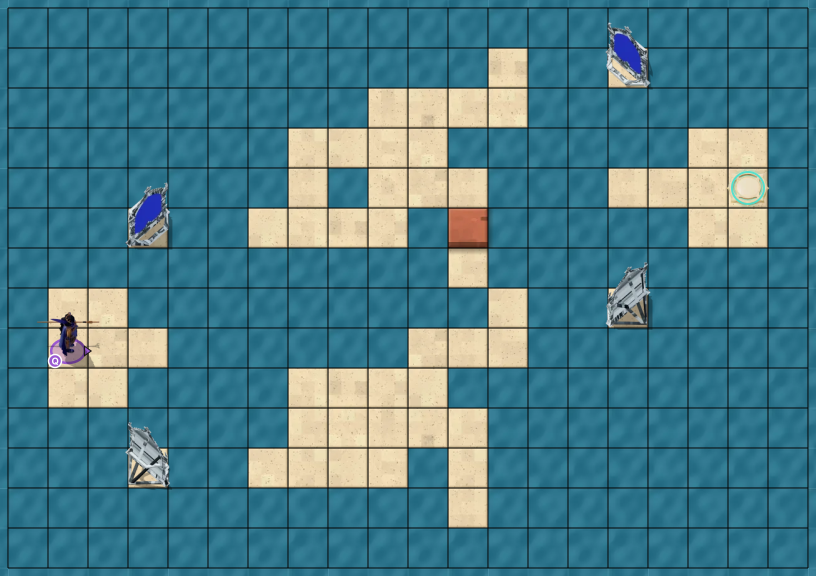
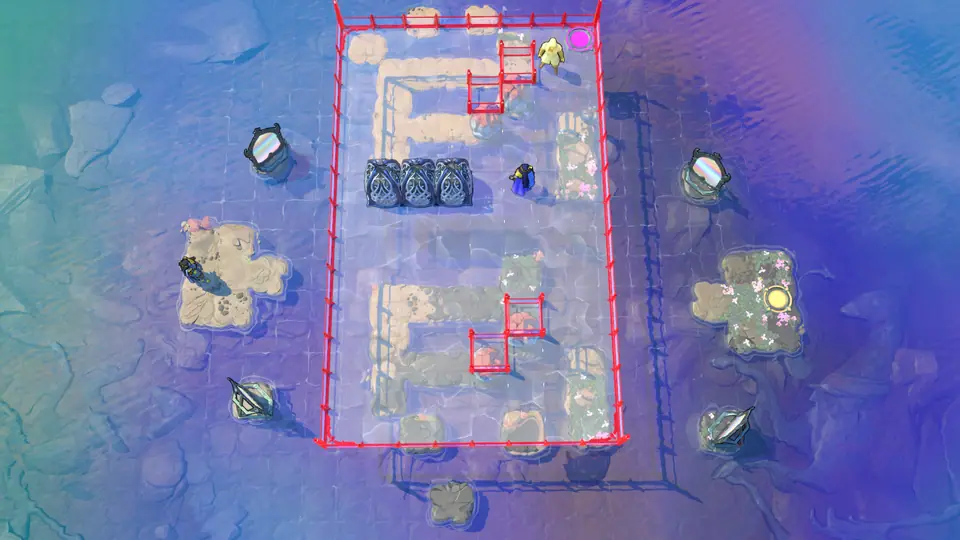
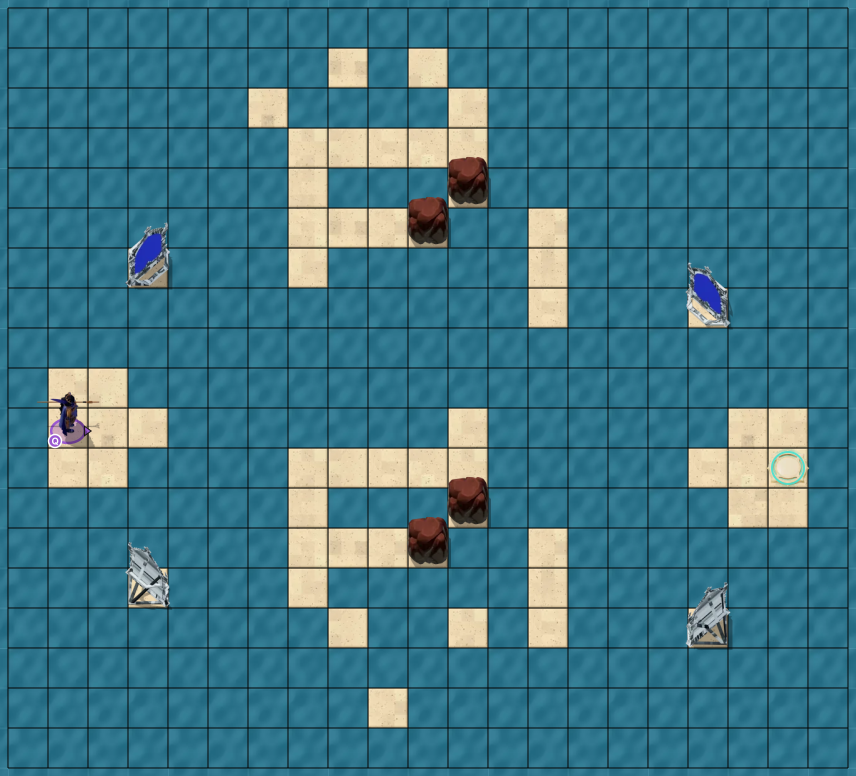
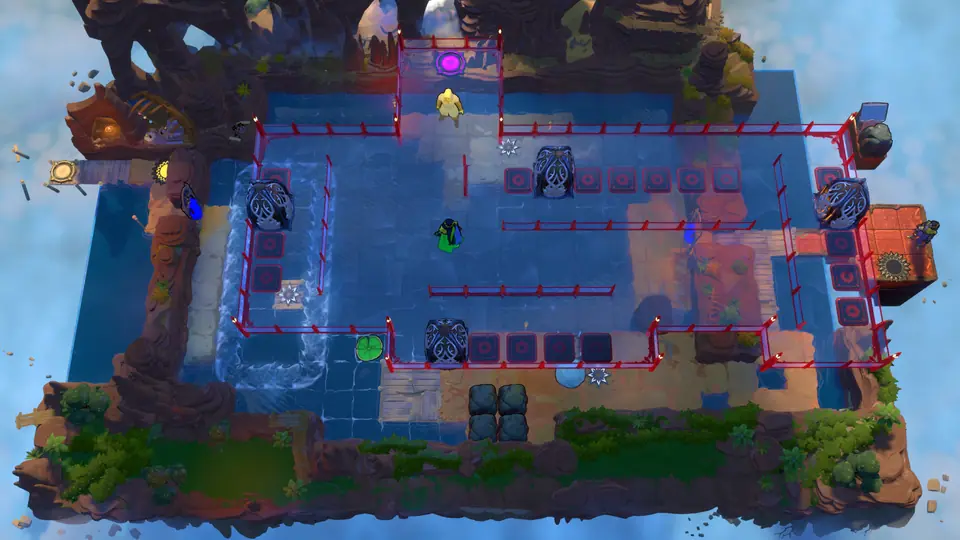
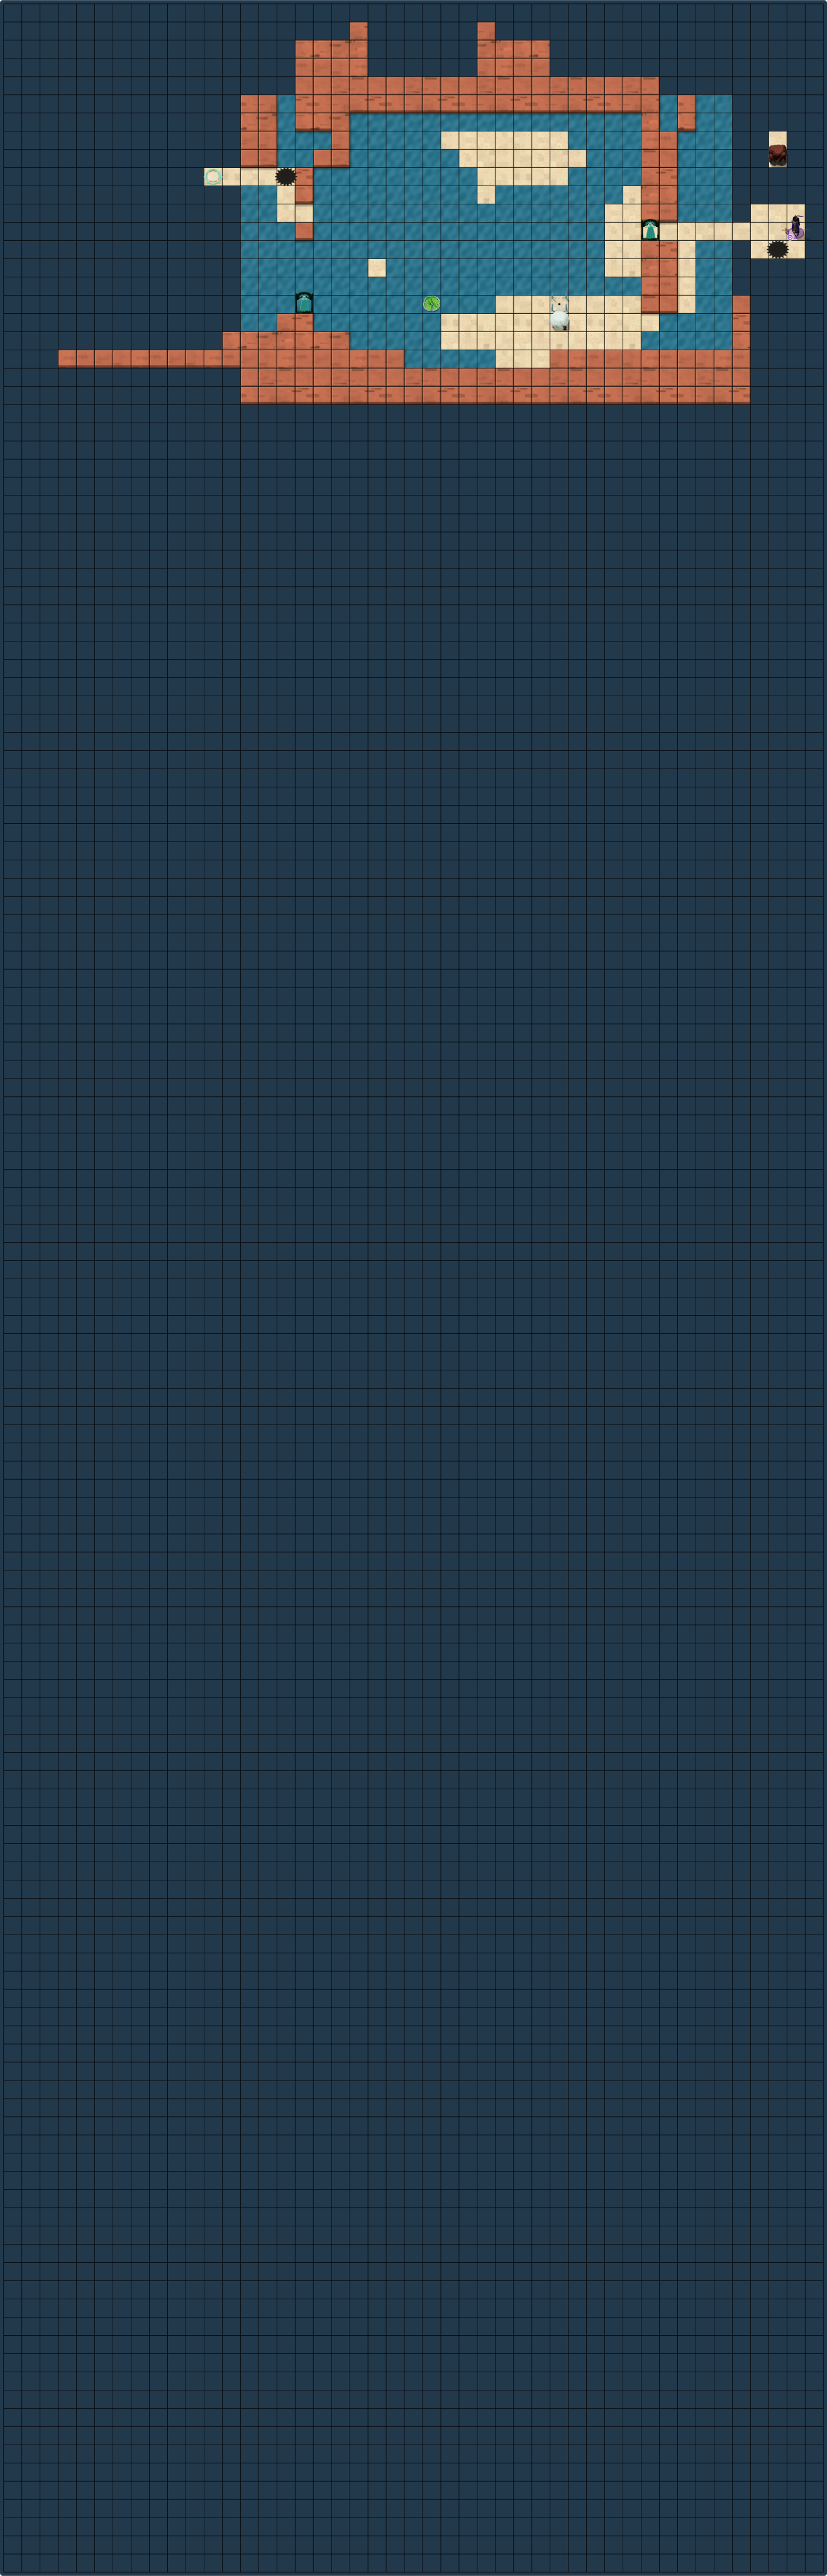
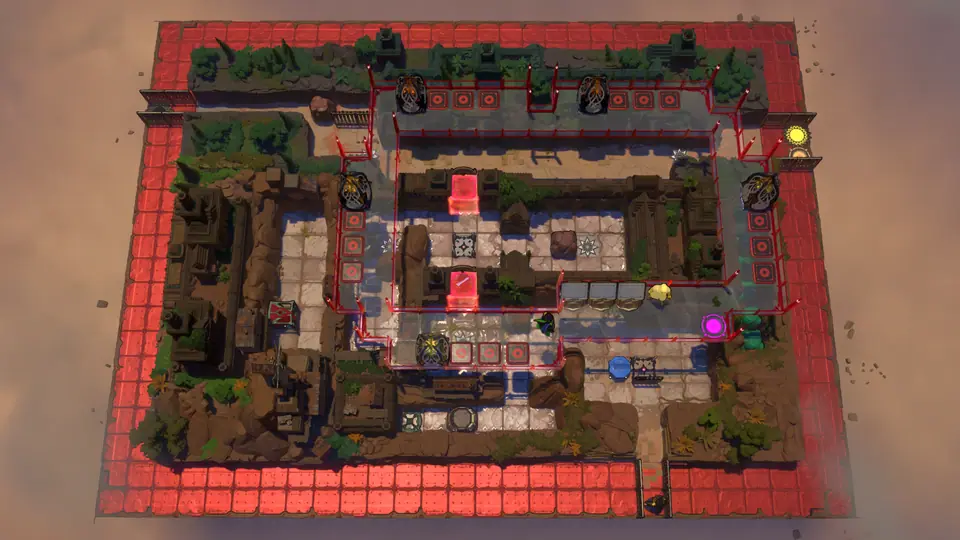
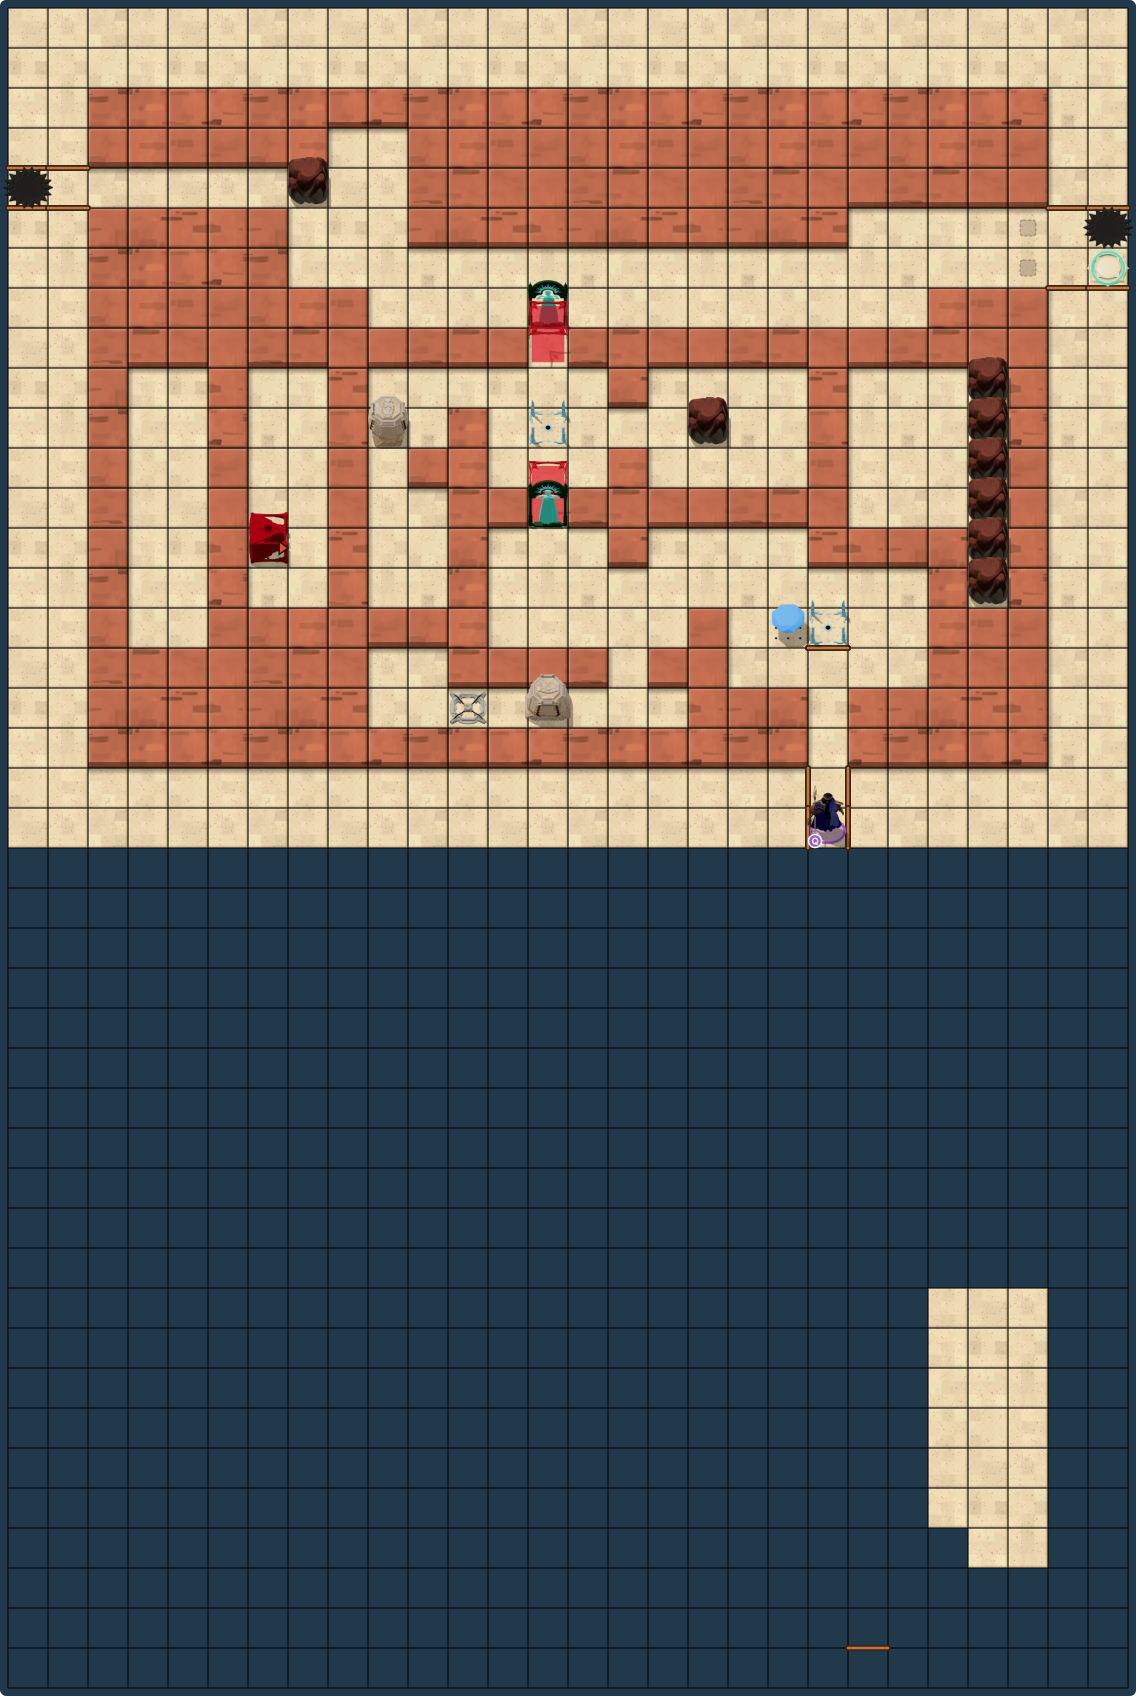
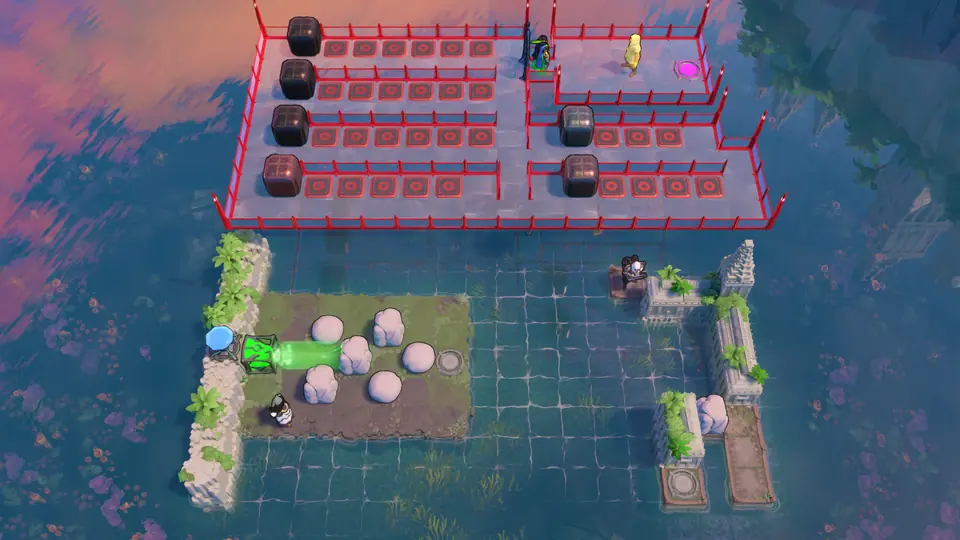
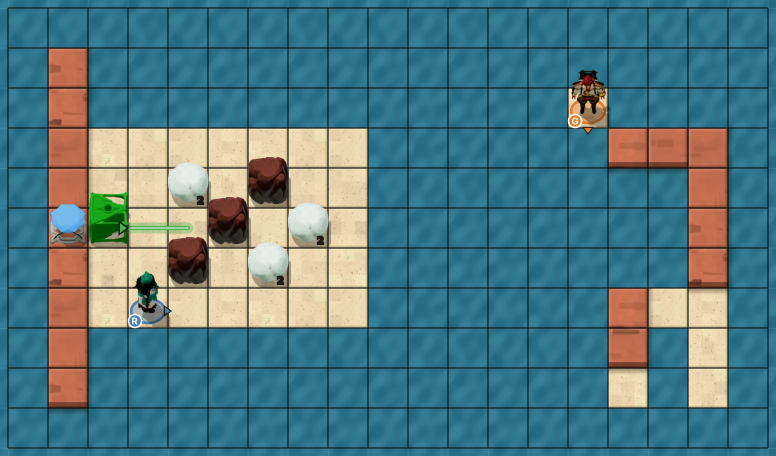
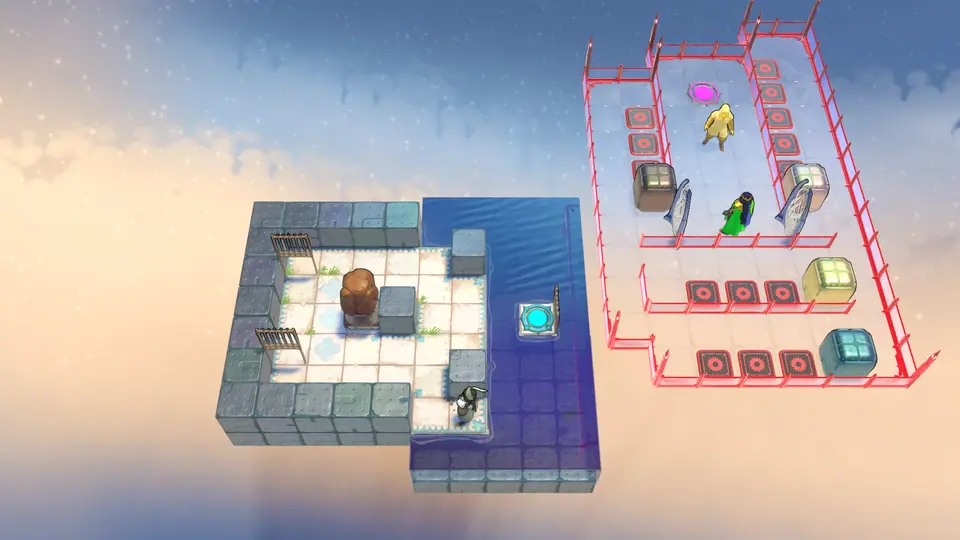
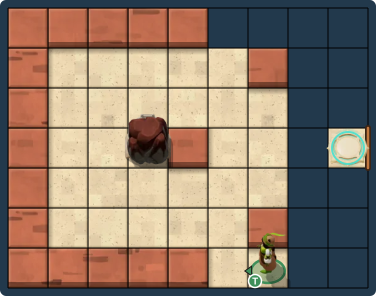
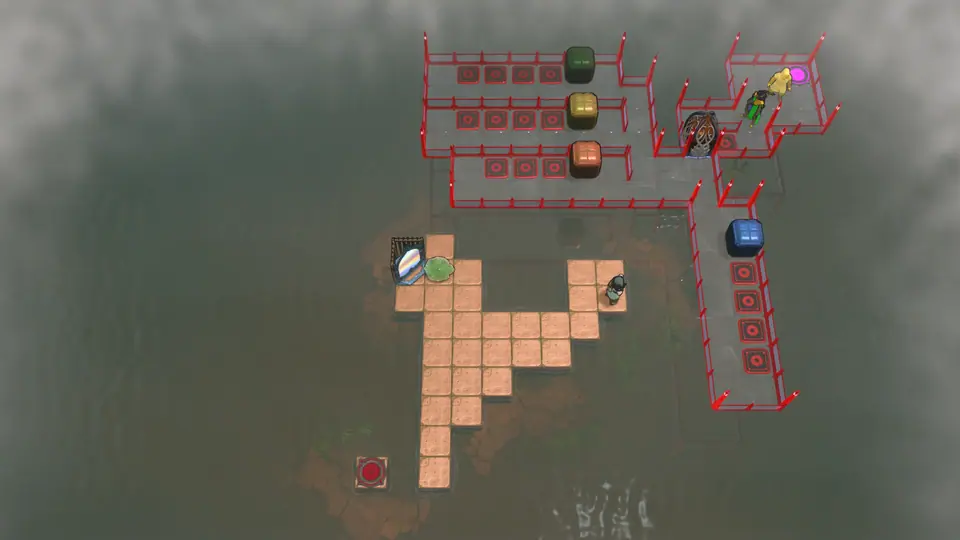
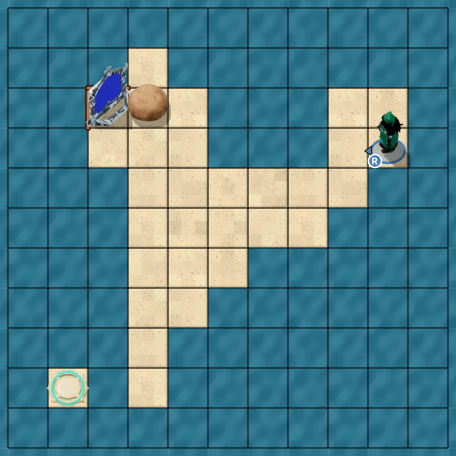
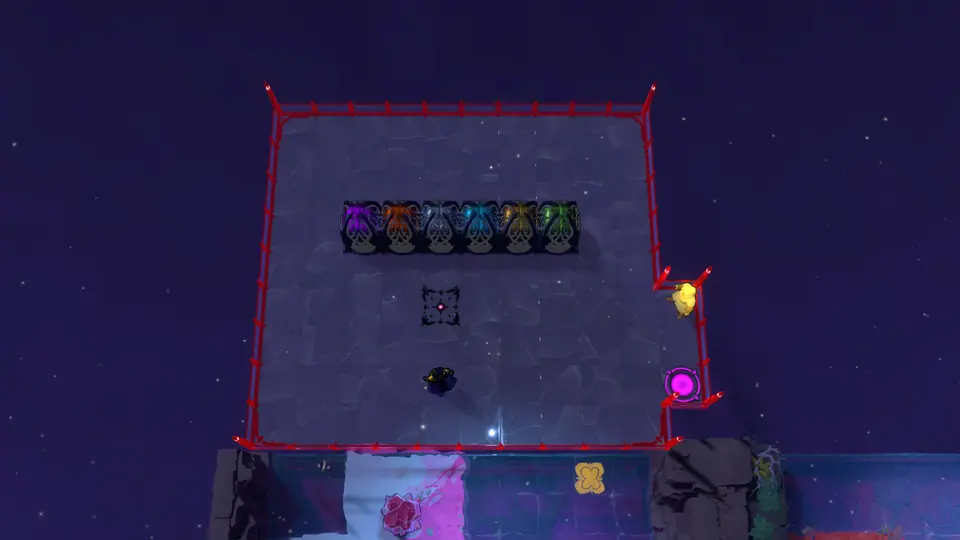
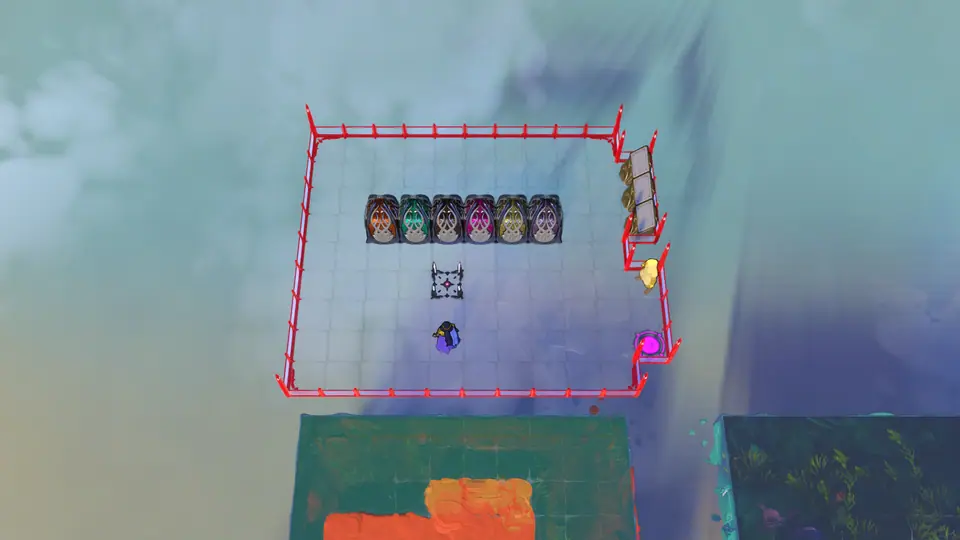
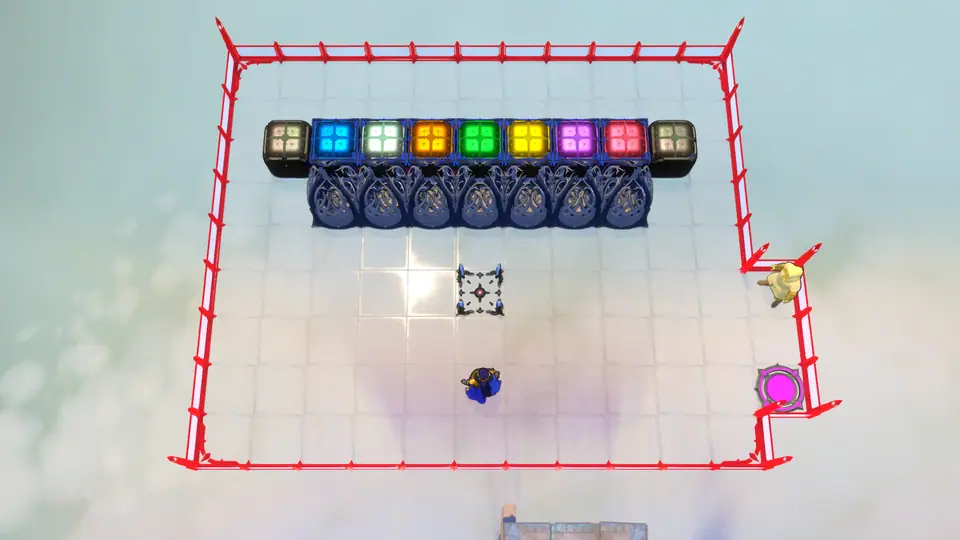
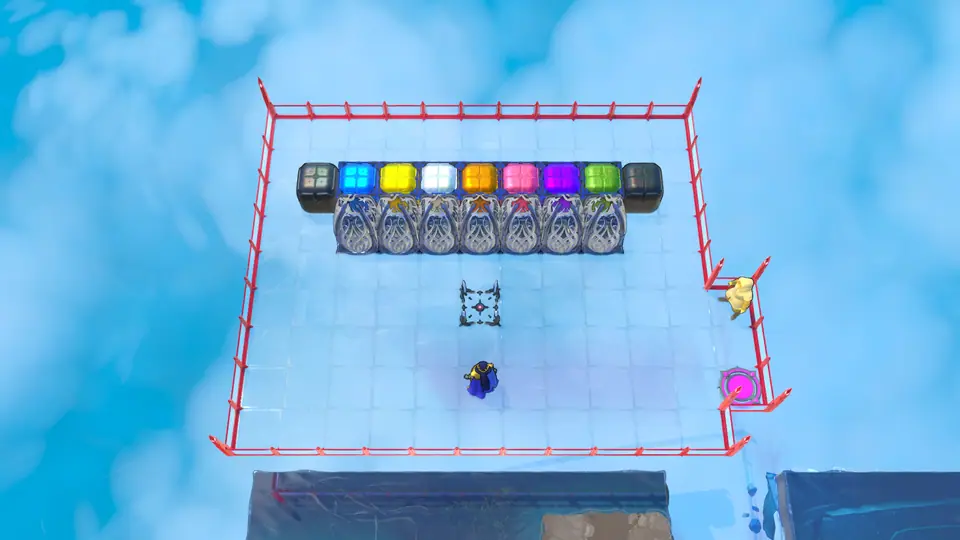
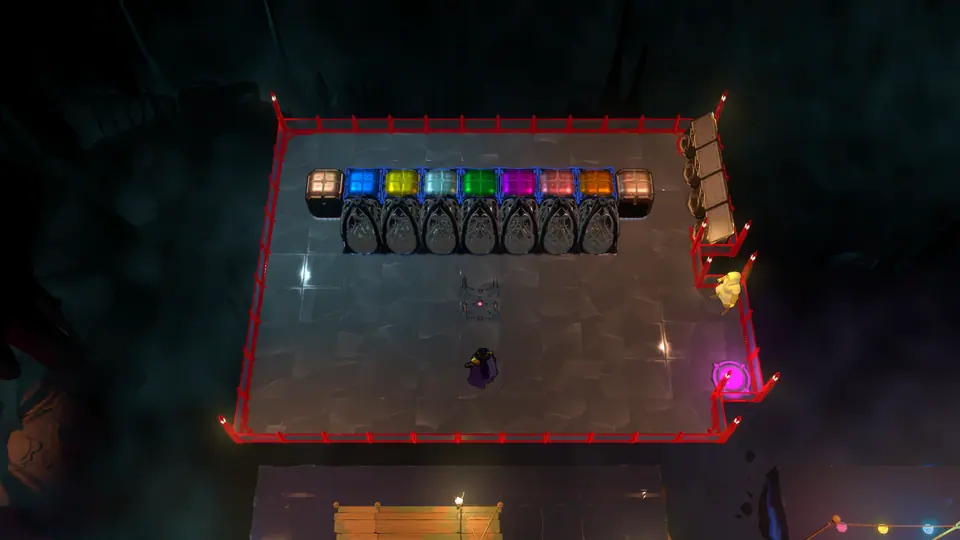
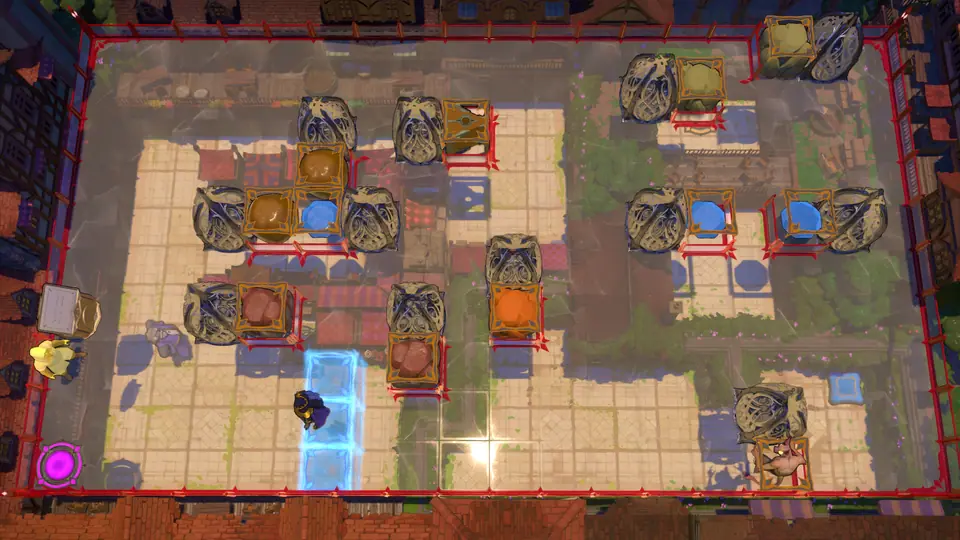
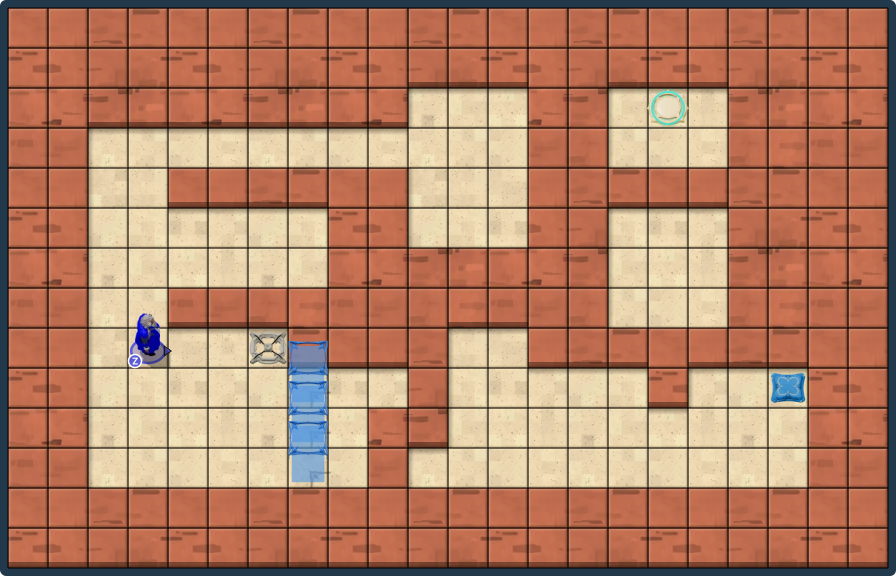
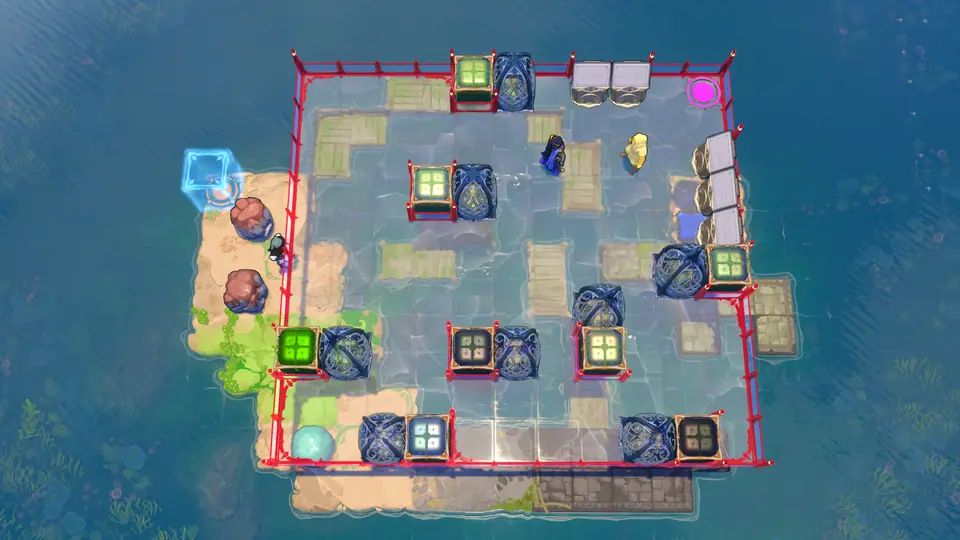
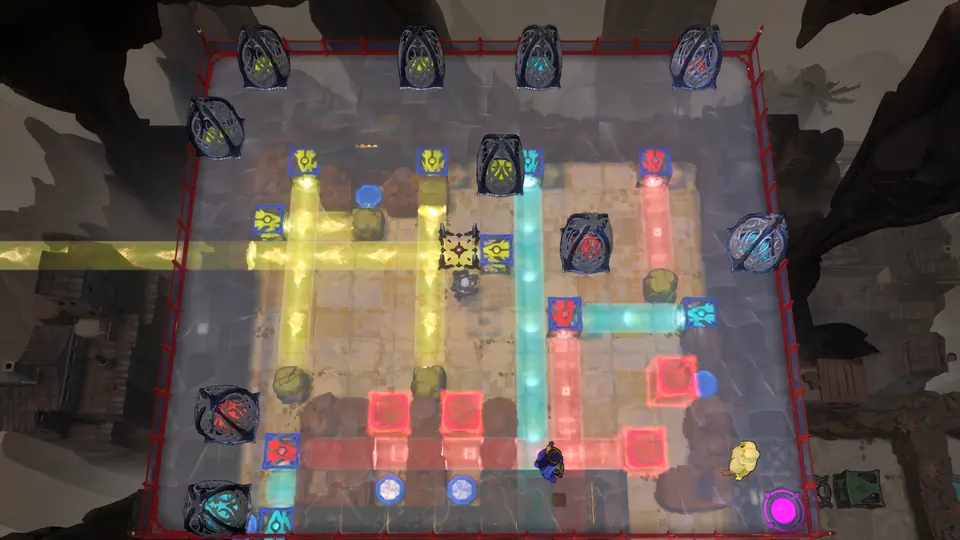
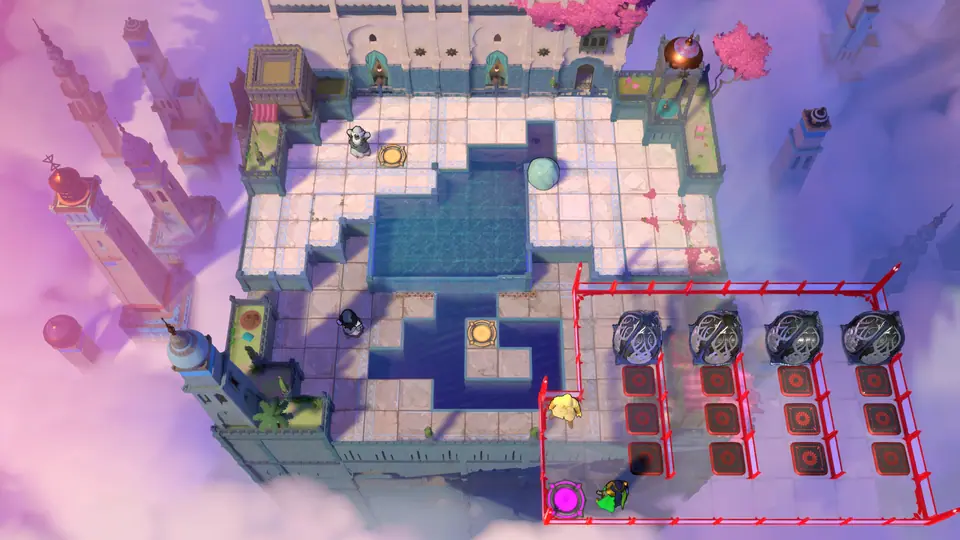
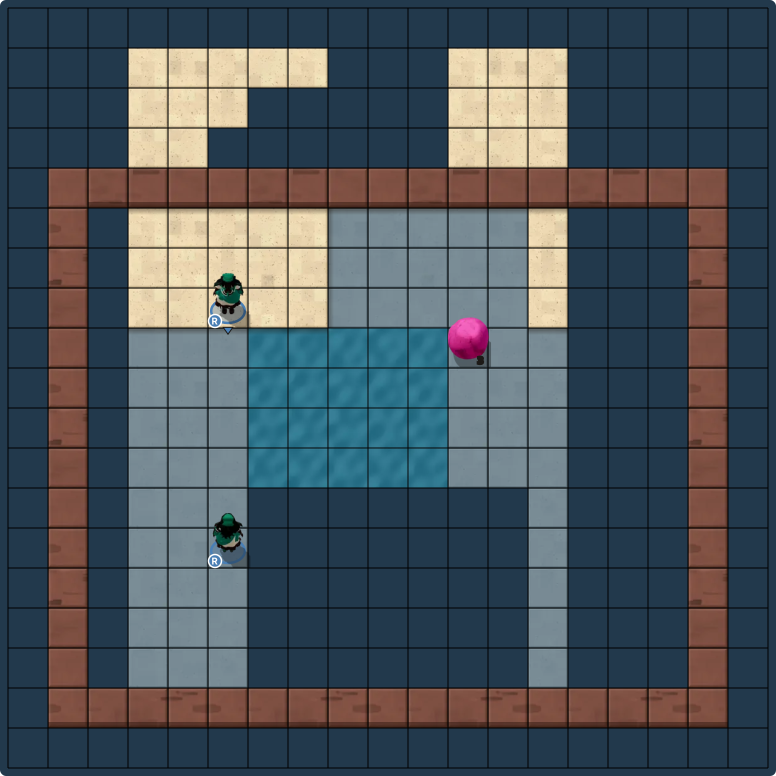
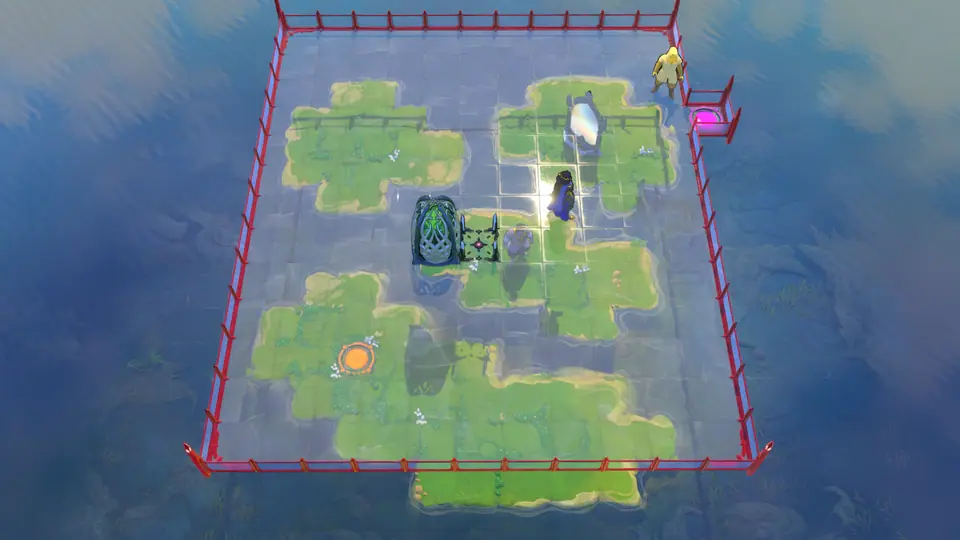
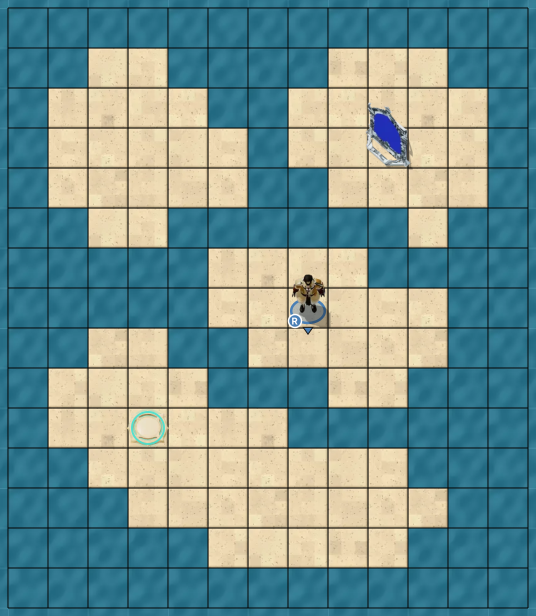
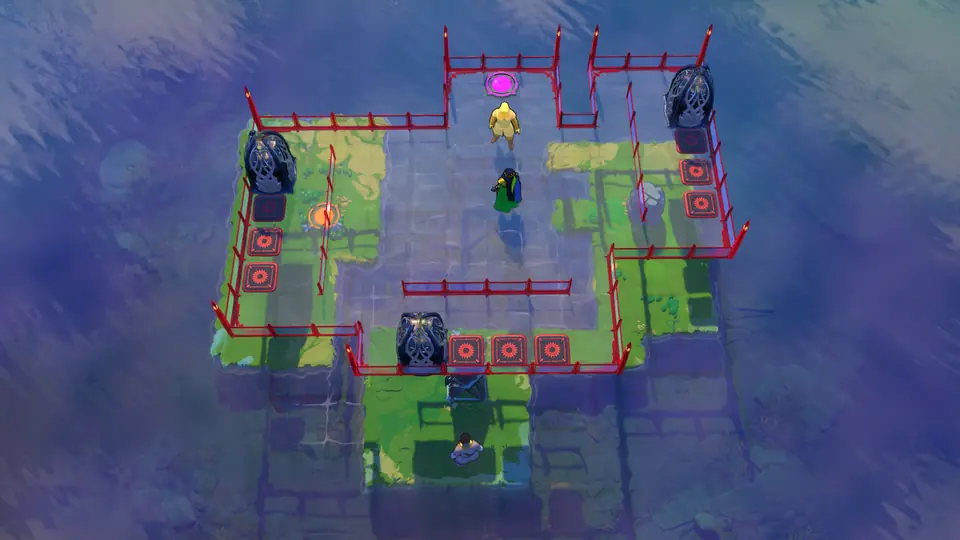
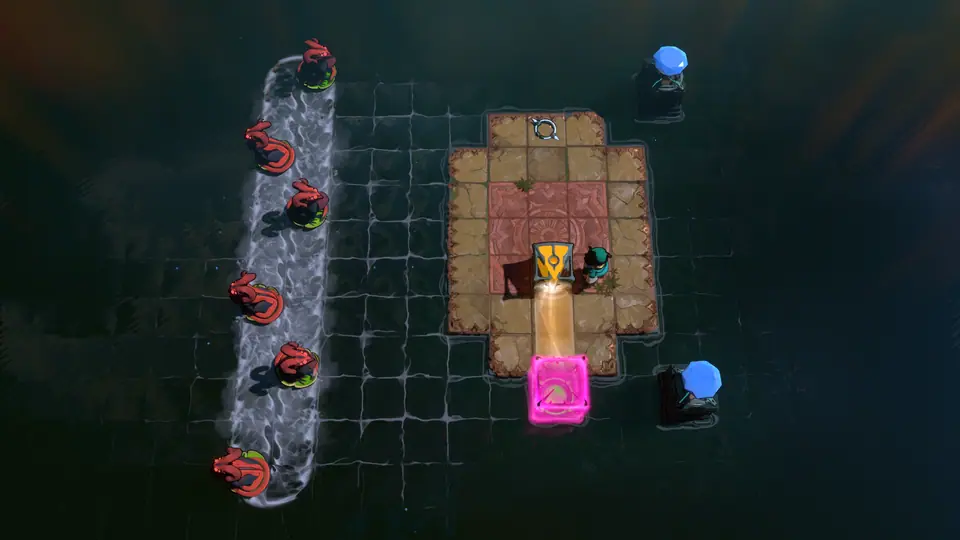
Each hole in the front room decides where one hero lands on the board. The Judge only accepts a layout where each hero sits where its own skill is needed.
Hint 2
Frozen freezers block the row just above the heroes, so at first the Queen can only push each hero into the hole beside it. After the first trial, bump the Judge: the freezers melt and the Queen can carry heroes past each other along that row.
Hint 3
Thief into the left hole to pull both left-room crystals aside; Wizard into the middle hole to swap with his room's crystal; Warrior into the right hole to push the right-room crystal line.
Full solution245 steps
Verified in the game · build 25998871 · Oct 17, 2026
Play one free trial, then reorder the heroes along the melted freezer row so each one lands where its skill is needed.
Queen: left 2, right 1, up 2, left 8, down 2, left 1, right 1, up 2, left 8, down 2, left 1, right 1, up 2, right 20, down 3. Warrior: right 2, down 1, right 3, up 1, right 1. Thief: right 1. Wizard: right 3. Queen: up 1, left 1, down 1, left 21, up 1, right 1, up 2, left 2, down 1, right 15, up 1, right 1, down 1, left 1, down 2, left 6, up 1, right 1, up 1, left 9, up 1, left 1, down 1, right 18, down 2, left 1, up 1, right 1, up 1, left 9, up 1, left 1, down 1, up 1, right 14, down 3. Thief: right 2, up 1, left 2, down 1, right 2, down 1, right 2, left 2, up 1, right 1, up 1, left 1, down 2, right 3, up 1, right 1. Wizard: right 1, down 1, left 1, up 2, left 2, down 2, left 1, up 1. Warrior: up 1, right 3, left 3, down 2, right 3, up 1, right 2.
Thief · Crystal · Button · GateScreen 1 of 8Opens after Exit Low 1
Hint 1
The crystal in the front room sits above the board: where you leave it is where the Thief finds it. It starts frozen, so play the board once first.
Hint 2
After the first trial, bump the Judge to melt the freezer. The Judge accepts only one crystal spot, and from there the Thief drags it round the whole loop.
Hint 3
Push the crystal to the tile just left of the switch. In trial 2 the Thief pulls it up the left side, round the loop clockwise and down onto the switch from above.
Full solution207 steps
Verified in the game · build 25998871 · Oct 20, 2026
Play the as-built board once, then move the crystal next to the switch so the Thief must haul it round the entire loop.
Queen↓ ·←×5
Thief→×9 ·↑ ·→ ·←×2 ·↓ ·→ ·↓ ·← ·↑ ·←×5
Thief← ·↓ ·→ ·↓×6
Thief← ·↑×7 ·←×2 ·↑×2 ·← ·↑
Queen↑ ·→
Queen↑ ·→×13 ·↑×6
Queen←×9 ·↑ ·← ·↓×7
Queen←×3 ·↓×2
Thief↓×5 ·→×2 ·↑×2 ·← ·↓ ·←×2 ·↑ ·→ ·↑×6 ·→ ·↓ ·→
Thief↑ ·←×2 ·↓ ·← ·↓ ·→ ·↓×2 ·→ ·↑ ·→×8
Thief↓ ·← ·↓×6
Thief→ ·↑ ·→×7 ·↑ ·← ·↑×7 ·← ·↓ ·←×3
Thief←×3 ·↓ ·→ ·↓ ·← ·↑ ·←×6 ·↓ ·→ ·↓×6
Thief← ·↑×7 ·←×2 ·↑×3 ·←
Queen: down 1, left 5. Thief: right 9, up 1, right 1, left 2, down 1, right 1, down 1, left 1, up 1, left 6, down 1, right 1, down 6, left 1, up 7, left 2, up 2, left 1, up 1. Queen: up 1, right 1, up 1, right 13, up 6, left 9, up 1, left 1, down 7, left 3, down 2. Thief: down 5, right 2, up 2, left 1, down 1, left 2, up 1, right 1, up 6, right 1, down 1, right 1, up 1, left 2, down 1, left 1, down 1, right 1, down 2, right 1, up 1, right 8, down 1, left 1, down 6, right 1, up 1, right 7, up 1, left 1, up 7, left 1, down 1, left 6, down 1, right 1, down 1, left 1, up 1, left 6, down 1, right 1, down 6, left 1, up 7, left 2, up 3, left 1.
Gemsman · Gem pad ×8 · Beam source ×7 · Cart · Gem ×4 · Gate ×2 · Boulder ×3 · PrismScreen 1 of 8Opens after Exit Low 1
Hint 1
Trial 1 is an exploit: the green Through beam lets the Gemsman walk through the wall beside the exit. The Queen's Prism moves each beam source to the next colour; recolour them so trial 2 has no shortcut and the Judge finds no fault.
Hint 2
Use Strong at top left; Double on the south-facing left source; Open on the east-facing left source; Double on the east-facing cart source; Smash on the south-facing top source; Double at bottom right; and Through on the bottom source.
Hint 3
Fill both top pads. Where Double crosses Smash, step right when the cart reaches the track's bottom. Double-step up and take the lower pad's gem to switch both beams off. Collect the cart gem and remaining pad gem. Fill the bottom pads; use the fourth gem on the left pad to open the right gate.
Full solution280 steps
Verified in the game · build 26249670 · Nov 10, 2026
Route by XZadare; 塞德莎 (Sedesha)
Set the east-facing top beam to Double and the south-facing top beam to Smash for the Judge's "I find no fault here" configuration. Hold slow time (Ctrl) and run (Shift) throughout. Smash the cart at the bottom of its track, then switch both top beams off before taking its gem.
Start holding Ctrl + Shift; step 1 is immediate. Move as soon as you can; wait only where marked.
Queen← ·↑ ·←×2
Gemsman wait about 2.5 s, ↑ · →×3 ·↓×2
Gemsman↓×2 ·→ ·↓ ·→×2 ·↓×3 ·→ · → while the cart crosses · →×4 · wait about 1.5 s, → · → ·↑ ·→×2
Queen wait about 2.5 s, → · ↓ · wait about 9 s, ↓ · wait about 9 s, → · ↑
Queen: left 1, up 1, left 2. Gemsman: wait about 2.5 s then up, right 3, down 4, right 1, down 1, right 2, down 3, right 1, right while the cart crosses, right 4, wait about 1.5 s then right, right 1, up 1, right 2. Queen: wait about 2.5 s then right, down 1, wait about 9 s then down, wait about 9 s then right, up 1, activate (2 times), down 1, right 1, down 2, right 2, down 1, activate (3 times), right 3, up 1, activate (2 times), right 2, up 4, activate (3 times), down 4, left 2, down 6, right 7, activate (2 times), left 4, up 1, activate (4 times), left 3, up 6, left 5, up 1, left 1, up 1, left 2. Gemsman: wait about 2.5 s then up, right 2, down 1, right 1, down 2, left 1, take or drop, left 1, down 3, left 1, take or drop, right 1, down 1, right 1, down 2, left 1, up 1, right 1, up 2, left 1, take or drop, right 1, down 3, right 1, down 1, take or drop, up 4, left 1, up 3, right 2, down 1, right 4, up 2, left 1, up 1, take or drop, up 1, take or drop, down 2, right 1, down 1, wait about 6 s then right, up 1, left 1, take or drop, right 1, up 1, right 3, down 2, left 1, down 2, take or drop, up 2, right 1, up 2, left 4, take or drop, down 4, left 1, down 3, right 2, down 1, take or drop, up 1, take or drop, right 1, take or drop, down 1, take or drop, left 1, down 1, take or drop, up 2, right 6, down 1, right 1, down 1, take or drop, left 1, up 1, left 1, up 2, left 5, take or drop, left 3, up 3, left 2, up 1, left 2, down 3, left 1, take or drop, right 1, up 3, right 2, down 1, right 2, down 3, right 10, up 1, right 1.
Queen · Boulder ×11 · Beam source ×2 · Gem ×2 · Gem pad ×2 · StairsScreen 1 of 8Opens after Exit Low 3
Hint 1
The purple beam source is an Endpoint beam: stepping along it jumps you to its far end, stepping against it jumps you back to the source. Left where it starts, it hands Queen 1 the exit at once.
Hint 2
After trial 1, bump the Judge to melt the freezer. The Judge only accepts the beam source on one of two tiles low in the room: five tiles left of the gem pad, in its row or one row below.
Hint 3
Push it down 5 and right 4. On the board, light it with the gem, jump back to it against the beam, put the beam out, drag it to the top-left corner, relight it and ride the top row to the exit.
Full solution281 steps
Verified in the game · build 25998871 · Oct 17, 2026
Queen 1 is the right queen. Queen 2 is the left queen.
Play the trivial board once, then hide the Endpoint beam source deep in the room so Queen 1 has to haul it back to the top-left corner.
Queen 2: right 3, down 1, right 2. Queen 1: left 10, up 1, left 2, up 2, right 1, up 1, right 3, down 1, right 2, up 1, right 2, down 1, right 1, down 3, left 3, up 2, down 1, right 3, down 1, left 5, up 3, right 3, up 1, right 1, down 2, up 1, left 2, down 2, right 2, up 1, right 1, down 4, up 5, left 1, up 1, right 1. Queen 2: up 2, left 1, down 1, up 7, left 9, down 5, left 1, down 1, right 4, down 1, right 7, down 2. Queen 1: left 5, down 2, left 3, down 1, up 1, right 3, up 1, right 2, up 1, left 3, up 2, down 1, right 3, down 1, left 5, up 3, right 3, up 1, right 1, down 2, up 1, left 2, down 2, right 2, up 1, right 1, down 4, left 1, down 2, left 1, down 1, left 1, up 3, right 5, up 2, left 5, down 1, left 1, down 1, right 4, up 1, right 2, down 2, up 1, left 7, down 1, left 1, up 3, right 1, up 1, left 1, down 1, left 1, up 3, right 1, up 1, right 3, down 1, right 2, up 1, right 2, down 1, right 1, down 5, left 1, down 3, right 1, up 6, left 1, up 2, right 1, down 5, up 5, left 1, up 1, right 1.
Hero · Boulder ×5 · MirrorScreen 1 of 8Opens after Exit Low 6
Hint 1
Activate teleports you across the magic mirror: from some tiles along one arm you land as many tiles along the other. Parked five tiles below the lower exit, it puts you on the exit in one teleport.
Hint 2
After trial 1, bump the Judge to melt the freezer. The Judge only accepts the mirror dropped onto the upper row of the board's top-left room.
Hint 3
Push the mirror left along the bottom, then straight up into the top-left room. On the board, fill the bottom holes, clear the middle boulders, then walk the mirror down to the bottom row by pushing and teleporting round it, and park it below the lower exit.
Full solution292 steps
Verified in the game · build 26006400 · Oct 20, 2026
Queen: right 3, down 1, right 2, up 1, right 1. Hero: left 5, down 1, right 1, up 1, right 1, down 2, up 1, left 1, activate, right 1, left 7, up 3, right 1, up 2, left 1, down 4, left 1, down 1, right 7, up 1, right 1, down 2, right 1, up 2, left 1, up 1, right 3, left 4, activate. Queen: up 1, left 3, down 1, right 1, left 1, down 8, right 1, down 1, left 9, down 1, left 1, up 15, right 13, down 5. Hero: left 4, down 1, left 1, down 1, right 1, up 1, right 1, down 1, left 8, up 3, right 1, up 2, left 1, down 4, left 1, down 1, right 7, up 1, right 1, down 1, left 7, up 3, right 1, up 7, left 1, down 1, left 1, down 1, left 1, up 1, right 1, up 1, left 4, up 4, right 4, up 1, left 5, down 1, left 2, up 1, activate, down 1, activate, right 2, activate, down 4, activate, right 6, activate, down 7, up 5, left 2, down 1, right 1, up 1, right 1, down 4, left 1, down 1, right 2, down 1, left 1, up 1, left 1, down 3, activate, right 8, down 1, right 1, up 2, left 1, up 1, right 3, left 4, activate.
Hero · Boulder ×4 · MirrorScreen 1 of 8Opens after Exit Low 1
Hint 1
Bridges are boulders pushed into the water, and Activate teleports you across the magic mirror. In trial 1 the last gap on the right needs a boulder hauled all the way from the top left.
Hint 2
After trial 1, bump the Judge to melt the freezer. The Judge wants the front-room boulder moved off the starting island, into the lower row of the right island, not at either end.
Hint 3
Push it right eight and down four. In trial 2, sink the boulder left of the start as the first bridge, redo the lower-left island, then teleport up to the right island and push the front-room boulder into the gap.
Full solution383 steps · shortest
Verified in the game · build 26006400 · Oct 24, 2026
Solve the board once, then move the front-room boulder onto the right island so it can bridge the last gap there.
Queen: right 3, down 1, right 2. Hero: down 2, right 1, down 1, left 5, right 3, up 2, right 1, up 1, right 1, down 2, right 1, down 1, left 5, up 1, left 1, down 5, up 2, activate, left 3, down 2, right 1, up 1, left 1, up 1, right 5, down 1, right 1, up 6, right 1, up 1, left 1, down 6, left 5, down 3, right 1, up 2, left 1, up 1, right 4, up 1, right 1, down 1, left 1, down 1, right 1, up 5, left 2, up 1, right 1, left 1, up 1, right 2, down 6, left 1, down 1, right 11, down 1, right 1, up 1, left 11, up 7, activate, down 1, activate, right 2, activate, right 1, down 1, left 3, up 1, left 1, down 6, left 1, down 1, right 11, down 1, right 1, up 3, left 1, up 1, right 4, left 4, activate, left 1, up 1. Queen: left 1, up 1, left 12, up 8, right 8, up 1, right 1, down 4, right 4, down 5. Hero: up 1, right 1, down 2, right 1, down 1, left 1, up 2, left 1, up 1, activate, left 1, down 1, right 5, up 1, left 1, up 1, left 1, down 1, right 1, down 1, left 3, up 1, left 1, down 5, up 4, activate, left 1, down 2, right 1, up 1, left 1, up 1, right 5, down 1, right 1, up 3, left 1, up 1, activate, down 1, activate, down 2, left 3, down 1, left 1, down 2, right 1, up 2, left 1, up 1, right 4, up 1, right 1, down 1, left 1, down 1, right 1, up 2, left 1, up 1, activate, down 3, activate, right 10, left 1, activate, up 1, right 3, down 1, left 1, up 1, left 1, down 1, left 1, activate, right 2, down 1, right 1, up 3, left 1, up 1, right 4, left 4, activate, left 1, up 1.
Other routes1
Route 2414 steps
Verified in the game · build 25882299 · Oct 13, 2026
Solve the board once, then move the front-room boulder onto the right island so it can bridge the last gap there.
Queen: down 1, right 5. Hero: right 2, down 3, left 6, right 3, up 2, right 1, up 1, right 2, down 1, left 1, up 1, left 1, down 1, right 1, down 1, left 1, up 1, left 1, down 1, right 1, down 1, left 3, up 1, left 1, down 5, up 4, activate, left 1, down 2, right 1, up 1, left 1, up 1, right 5, down 1, right 1, up 6, right 1, up 1, left 1, down 6, left 5, down 3, right 1, up 2, left 1, up 1, right 4, up 1, right 1, down 1, left 1, down 1, right 1, up 8, left 2, down 2, right 1, left 1, up 2, right 2, down 7, left 1, down 1, right 11, down 1, right 1, up 1, left 11, up 8, left 2, down 1, right 1, up 1, right 1, down 7, left 1, down 1, right 11, down 1, right 1, up 3, left 1, up 1, right 4, left 4, activate, left 1, up 1. Queen: left 1, up 1, left 12, up 8, right 8, up 1, right 1, down 4, right 4, down 5. Hero: up 1, right 1, down 2, right 1, down 1, left 1, up 2, left 1, up 1, activate, left 1, down 1, right 5, up 1, left 1, up 1, left 1, down 1, right 1, down 1, left 3, up 1, left 1, down 5, up 4, activate, left 1, down 2, right 1, up 1, left 1, up 1, right 5, down 1, right 1, up 6, right 1, up 1, left 1, down 6, left 5, down 3, right 1, up 2, left 1, up 1, right 4, up 1, right 1, down 1, left 1, down 1, right 1, up 8, left 2, down 1, right 1, up 1, right 1, down 7, left 1, down 1, right 10, left 1, activate, up 1, right 3, down 1, left 1, up 1, left 1, down 1, left 1, activate, right 2, down 1, right 1, up 3, left 1, up 1, right 4, left 4, activate, left 1, up 1.
Queen · Lily pad · Skipping stoneScreen 1 of 8Opens after Exit Low 8
Hint 1
A pushed skipping stone keeps skipping over water; a stone skipping right past a lily pad knocks it loose, and pads drift with the current. Queen 1 reaches the exit only by riding a drifting pad.
Hint 2
After trial 1, bump the Judge to melt the freezer. The Judge only accepts the pad two tiles higher than it starts.
Hint 3
Push the front-room block (with the pad on it) up two. In trial 2, keep the stone moving round the top loop until the pad drifts into the current toward the exit column, then ride it.
Full solution192 steps
Verified in the game · build 26006400 · Oct 22, 2026
Queen 1 is the upper queen. Queen 2 is the lower queen.
Play once, then raise the lily pad two tiles in the front room so Queen 1 has to herd it with the stone before riding it to the exit. Hold Shift throughout.
Start holding Shift; step 1 is immediate. Move as soon as you can; wait only where marked.
Queen 2→ ·↑×5
Queen 1 wait about 2.5 s, ↓ · ←×7 ·↓×2 ·→×2 ·↓ ·→
Queen 1→ · wait for the skipping stone to reach one tile right of its starting position, ← · ←×2
Queen 1← ·↑×3 ·→×9 ·↓×2
Queen 1→ · wait about 9 s, → onto the lily pad as it passes
Queen 1 wait for the lily pad to reach one tile below the upper exit, ↑
Queen 2 wait about 2.5 s, ↓ · ←
Queen 2 wait about 3 s, ↓ · ↓×3 ·←×5 ·↓×2 ·←
Queen 2↑×2
Queen 2→×6 ·↑×5
Queen 1 wait about 2.5 s, ↓ · ←×7 ·↓×4 ·→×4 ·↑ ·←
Queen 1←×3 ·↑×3 ·→×7
Queen 1↑ ·→ ·↓ ·→ ·↓
Queen 1↓ ·→ ·↓×2 ·←×2 ·↑ ·↓
Queen 1→×2 ·↑×2 ·← ·↑×2 ·←×8
Queen 1↑ ·← ·↓ ·← ·↓ ·→ ·↑ ·→×4
Queen 1→×5 ·↓×2 ·→ ·↓×2 ·← ·↓ ·← ·↑ ·→×2
Queen 1↑×2 ·← ·↑×2 ·←×8 ·↑ ·← ·↓ ·← ·↓ ·→ ·↑ ·→×4
Queen 1→×5 ·↓ ·→ ·↓ ·← ·→ ·↑
Queen 1 wait about 17 s, →
Queen 1 wait about 5 s, ↑
Frame-exact timing
Seconds from puzzle start · 60 fps · Start holding Shift; step 1 is immediate. · hold Shift throughout
Queen 2: right 1, up 5. Queen 1: wait about 2.5 s then down, left 7, down 2, right 2, down 1, right 2, wait for the skipping stone to reach one tile right of its starting position then left, left 3, up 3, right 9, down 2, right 1, wait about 9 s then right onto the lily pad as it passes, wait for the lily pad to reach one tile below the upper exit then up. Queen 2: wait about 2.5 s then down, left 1, wait about 3 s then down, down 3, left 5, down 2, left 1, up 2, right 6, up 5. Queen 1: wait about 2.5 s then down, left 7, down 4, right 4, up 1, left 4, up 3, right 7, up 1, right 1, down 1, right 1, down 2, right 1, down 2, left 2, up 1, down 1, right 2, up 2, left 1, up 2, left 8, up 1, left 1, down 1, left 1, down 1, right 1, up 1, right 9, down 2, right 1, down 2, left 1, down 1, left 1, up 1, right 2, up 2, left 1, up 2, left 8, up 1, left 1, down 1, left 1, down 1, right 1, up 1, right 9, down 1, right 1, down 1, left 1, right 1, up 1, wait about 17 s then right, wait about 5 s then up.
Hero · Skipping stone ×2Screen 1 of 8Opens after Exit Low 1
Hint 1
A skipping stone pushed onto water skips until it reaches ground; one pushed where it is blocked sinks as a bridge. The exit island needs one sunk stone below it.
Hint 2
After trial 1, bump the Judge to melt the freezer. The Judge only accepts the stone parked in the water just left of the bridge column (the tile left of the one below the gap is best).
Hint 3
Push the stone right two and up five. In trial 2, skip it west, then round the whole lake until it comes back along the top row from the right, and push it up into the gap.
Full solution151 steps
Verified in the game · build 25998871 · Oct 17, 2026
Play once, then park the skipping stone beside its goal so the Hero must send it round the whole lake to approach from the right side.
Move as soon as you can; wait only where marked.
Queen← · wait about half a second, ← · wait about half a second, ← · wait about half a second, ↓ · wait about half a second, ↓ · wait about half a second, ↓
Hero wait about 2 s, ← · ← right away · ← within 1.27 s of step 8 (Hero: ←) · wait about half a second, ↓ · wait about half a second, ↓ · wait about half a second, ↓ · wait about half a second, → · wait about half a second, ↑ · wait about half a second, ↑ · wait about half a second, ← · wait about half a second, ↑ · wait about half a second, → · wait about half a second, → · wait about half a second, →
Hero wait about half a second, ↓ · wait about half a second, → · wait about half a second, ↑ · wait about half a second, ↑ · wait about half a second, ↑ · wait about half a second, ↑
Hero wait about half a second, ↑ · wait about half a second, ↑ · brief pause, ↑
Queen wait about 2 s, → · ↑
Queen← ·↑×3 ·← ·↑ ·→×2 ·↓ ·→ ·↑×5
Queen↓×8 ·←×2
Hero wait about 2 s, → · ↑×3 ·← ·↓×2
Hero←×2 ·↓×4 ·←×4 ·↑×4 ·→ ·↑
Hero↑ ·← ·↑×2 ·→ ·↓×4 ·←
Hero↓×4 ·→×4 ·↑
Hero→×4 ·↓×2 ·← ·↓×2 ·→ ·↑×5
Hero← ·↑×2 ·→×3 ·↑
Hero↑ ·→×3 ·↓×3 ·← ·↓×2 ·→ ·↑×4
Hero→ ·↑ ·←×4 ·↓
Hero wait for the middle skipping stone to reach 3 tiles below the top exit, ← · ↓ ·←×2 ·↑×2
Queen: left 1, wait about half a second then left, wait about half a second then left, wait about half a second then down, wait about half a second then down, wait about half a second then down. Hero: wait about 2 s then left, left right away, left 1, wait about half a second then down, wait about half a second then down, wait about half a second then down, wait about half a second then right, wait about half a second then up, wait about half a second then up, wait about half a second then left, wait about half a second then up, wait about half a second then right, wait about half a second then right, wait about half a second then right, wait about half a second then down, wait about half a second then right, wait about half a second then up, wait about half a second then up, wait about half a second then up, wait about half a second then up, wait about half a second then up, wait about half a second then up, brief pause then up. Queen: wait about 2 s then right, up 1, left 1, up 3, left 1, up 1, right 2, down 1, right 1, up 5, down 8, left 2. Hero: wait about 2 s then right, up 3, left 1, down 2, left 2, down 4, left 4, up 4, right 1, up 2, left 1, up 2, right 1, down 4, left 1, down 4, right 4, up 1, right 4, down 2, left 1, down 2, right 1, up 5, left 1, up 2, right 3, up 2, right 3, down 3, left 1, down 2, right 1, up 4, right 1, up 1, left 4, down 1, wait for the middle skipping stone to reach 3 tiles below the top exit then left, down 1, left 2, up 5.
The front-room Buttons choose the positions of the two corner walls on the board.
Hint 2
After the first trial, approach the Judge and move the Blocks onto different Buttons.
Hint 3
Set the right Block on the second Button down and the left Block on the left Button of the middle pair, then solve both rooms again.
Full solution133 steps · shortest
Verified in the game · build 26249670 · Nov 10, 2026
Solve a first trial, move both corner walls with the front-room Buttons, then solve the changed board.
Queen←×8 ·↑
Warrior→
Warrior→×4 ·↑ ·→ ·↓×4
Warrior←×2 ·↓ ·←×2
Thief↓ ·→×2 ·↑ ·→×4
Thief↓ ·← ·↓×4 ·→ ·↑ ·→ ·↓ ·←×3 ·↑ ·←×2
Queen→ ·↓ ·→×3 ·↑×4 ·↓×2
Queen← ·↓×2 ·←×8 ·↑×4 ·↓×4 ·→ ·↑ ·→×2
Queen↓ ·→×2
Warrior↑ ·→×5 ·↑ ·→ ·↓×4
Warrior←×2 ·↓ ·←×2
Thief↓ ·→×2 ·↑ ·→ ·↑ ·← ·↑ ·→ ·↓ ·→×3
Thief↓ ·← ·↓×4 ·→ ·↑ ·→ ·↓ ·← ·↓
Thief←×2 ·↑ ·←×2
Queen: left 8, up 1. Warrior: right 5, up 1, right 1, down 4, left 2, down 1, left 2. Thief: down 1, right 2, up 1, right 4, down 1, left 1, down 4, right 1, up 1, right 1, down 1, left 3, up 1, left 2. Queen: right 1, down 1, right 3, up 4, down 2, left 1, down 2, left 8, up 4, down 4, right 1, up 1, right 2, down 1, right 2. Warrior: up 1, right 5, up 1, right 1, down 4, left 2, down 1, left 2. Thief: down 1, right 2, up 1, right 1, up 1, left 1, up 1, right 1, down 1, right 3, down 1, left 1, down 4, right 1, up 1, right 1, down 1, left 1, down 1, left 2, up 1, left 2.
Other routes1
Route 2197 steps
Verified in the game · build 25882299 · Oct 13, 2026
Play the board once, then use the front-room buttons to move both corner walls so the Thief has to work for her crystal.
Queen←×8 ·↑
Warrior→×5 ·↓×4
Thief↓
Warrior→
Thief→×3 ·↑ ·→×2 ·↓×4 ·→
Warrior← ·↑×5 ·→ ·↓×4 ·←×2 ·↓ ·←×2
Thief↑×4 ·←×4 ·→×4
Thief↓×4 ·← ·↑×3 ·↓×4 ·← ·→×2 ·↑ ·→
Thief↓ ·←×3 ·↑ ·←×2
Queen→
Queen↓ ·→×3 ·↑×4 ·↓×2
Queen← ·↓×2 ·←×8 ·↑×4 ·↓×4
Queen→ ·↑ ·→×2 ·↓ ·→×2 ·↑
Warrior↓
Thief↓
Warrior→×3 ·↑ ·→×3 ·↓×4
Thief→×2 ·↑
Thief→ ·↑ ·← ·↑ ·→ ·↓ ·→×3
Thief↓×4 ·← ·↑×3 ·↓×4
Thief→ ·↑ ·→ ·↓ ·←
Warrior↑
Thief↓
Warrior↑
Thief←
Warrior↑×2
Thief← ·↑
Warrior←×2
Thief←
Warrior←
Thief←
Warrior↓ ·←×3 ·↑
Warrior→×5 ·↑ ·→ ·↓×4
Warrior←×2 ·↓ ·←×2
Queen: left 8, up 1. Warrior: right 5, down 4. Thief: down 1. Warrior: right 1. Thief: right 3, up 1, right 2, down 4, right 1. Warrior: left 1, up 5, right 1, down 4, left 2, down 1, left 2. Thief: up 4, left 4, right 4, down 4, left 1, up 3, down 4, left 1, right 2, up 1, right 1, down 1, left 3, up 1, left 2. Queen: right 1, down 1, right 3, up 4, down 2, left 1, down 2, left 8, up 4, down 4, right 1, up 1, right 2, down 1, right 2, up 1. Warrior: down 1. Thief: down 1. Warrior: right 3, up 1, right 3, down 4. Thief: right 2, up 1, right 1, up 1, left 1, up 1, right 1, down 1, right 3, down 4, left 1, up 3, down 4, right 1, up 1, right 1, down 1, left 1. Warrior: up 1. Thief: down 1. Warrior: up 1. Thief: left 1. Warrior: up 2. Thief: left 1, up 1. Warrior: left 2. Thief: left 1. Warrior: left 1. Thief: left 1. Warrior: down 1, left 3, up 1, right 5, up 1, right 1, down 4, left 2, down 1, left 2.
Warrior · Boulder ×3 · Button · Gate · CrystalScreen 2 of 8Opens after Exit Low 9
Hint 1
Each front-room boulder pushed into a hole becomes a bridge on the board. Freezers cover most of the holes until you have played the board once.
Hint 2
After trial 1, face the Judge to melt the freezers. The Judge wants the left bridge two rows higher, the right bridge one row lower and the top bridge one tile further right.
Hint 3
With those bridges the Warrior must push the crystal up the right column, back down onto the button, then past it and back again to reach the gate.
Full solution224 steps
Verified in the game · build 25882299 · Oct 13, 2026
Build the trivial bridge layout once, then move all three bridges so the crystal needs a real sokoban route to the button.
Queen←×5 ·↑×2 ·→×2
Queen←×2 ·↓×2 ·→×10 ·↑×3 ·←×2
Queen→×2 ·↑×5 ·←×5 ·↓×2
Queen↑×2 ·→×5 ·↓×8
Queen←×5 ·↑ ·→ ·↑×2 ·← ·↑
Warrior→×3 ·↑ ·→ ·↓ ·← ·↓ ·→×5
Warrior↑ ·→×7
Queen↓
Queen→ ·↓×3 ·←×6 ·↑ ·→ ·↑×2 ·← ·↑ ·→×2
Queen←×2 ·↓×4 ·→×10 ·↑×4 ·←
Queen↓ ·→ ·↓ ·←×2
Queen→×2 ·↑×6 ·←×6 ·↓ ·→ ·↑ ·→ ·↓×2
Queen↑×2 ·→×4 ·↓×8 ·←×5 ·↑ ·→ ·↑×2 ·← ·↑
Warrior→×3 ·↓ ·→ ·↑ ·← ·↑ ·→×5
Warrior↓ ·→ ·↑×3
Warrior← ·↑×2 ·→ ·↓×5
Warrior← ·↓ ·→×3
Warrior↑ ·→×2 ·↓ ·←×3
Warrior→ ·↑ ·→×4
Queen: left 5, up 2, right 2, left 2, down 2, right 10, up 3, left 2, right 2, up 5, left 5, down 2, up 2, right 5, down 8, left 5, up 1, right 1, up 2, left 1, up 1. Warrior: right 3, up 1, right 1, down 1, left 1, down 1, right 5, up 1, right 7. Queen: down 1, right 1, down 3, left 6, up 1, right 1, up 2, left 1, up 1, right 2, left 2, down 4, right 10, up 4, left 1, down 1, right 1, down 1, left 2, right 2, up 6, left 6, down 1, right 1, up 1, right 1, down 2, up 2, right 4, down 8, left 5, up 1, right 1, up 2, left 1, up 1. Warrior: right 3, down 1, right 1, up 1, left 1, up 1, right 5, down 1, right 1, up 3, left 1, up 2, right 1, down 5, left 1, down 1, right 3, up 1, right 2, down 1, left 3, right 1, up 1, right 4.
Hero · Gem · Boulder ×5 · Skipping stone · Beam source · Gem padScreen 2 of 8Opens after Exit Low 12
Hint 1
The front room is a deck above the board. Boulders pushed off it sink into the water as stepping tiles, and the exit rides on the leftmost boulder.
Hint 2
Sink the exit's boulder at the top left with two boulders stepping down-left from it, and sink the last two at the top right. Then the purple Endpoint beam can carry the Hero across.
Hint 3
On the board, push the beam source onto the lowest left boulder, light it with the gem, skip the stone from the top right to finish the path, then step left against the beam to jump to the exit side.
Full solution143 steps
Verified in the game · build 25882299 · Oct 13, 2026
Design the board in one go: sink the exit and four boulders into the water, then let the Hero cross with the Endpoint beam and a skipping stone. Hold Ctrl throughout.
Hold slow time. Move as soon as you can; wait only where marked.
Queen↑ ·←×10 ·↓
Queen←×2 ·↓ ·← ·↑×3 ·↓ ·→
Queen→×4 ·↓ ·←×5 ·↓ ·← ·↑×2 ·→×2
Queen→×6 ·↓ ·←×7 ·↓ ·← ·↑ ·→ ·↑ ·← ·→×2
Queen→×8 ·↓ ·→×3 ·↓ ·→ ·↑×2 ·←×2
Queen←×4 ·↓ ·→×4 ·↓ ·→ ·↑×2 ·→ ·↓
Queen↓×2
Hero←×7 ·↑ ·←×2 ·↓ ·←
Hero↑ ·→ ·↑ ·←×5
Hero→×5 ·↓×2 ·→
Hero↑ ·→×6 ·↓ ·→ ·↑×2
Hero↓ ·→ ·↑×2 ·←
Hero wait for the skipping stone to reach two tiles above its starting position, ↓ · ←
Hero↑ ·→ ·↑
Frame-exact timing
Seconds from puzzle start · 60 fps · hold Ctrl throughout
Queen: up 1, left 10, down 1, left 2, down 1, left 1, up 3, down 1, right 5, down 1, left 5, down 1, left 1, up 2, right 8, down 1, left 7, down 1, left 1, up 1, right 1, up 1, left 1, right 10, down 1, right 3, down 1, right 1, up 2, left 6, down 1, right 4, down 1, right 1, up 2, right 1, down 3. Hero: left 7, up 1, left 2, down 1, left 1, up 1, right 1, up 1, left 5, right 5, down 2, right 1, up 1, right 6, down 1, right 1, up 2, down 1, right 1, up 2, left 1, wait for the skipping stone to reach two tiles above its starting position then down, left 1, up 1, right 1, up 1.
Hero ×2 · Lily pad ×2 · Skipping stone · Boulder ×4Screen 2 of 8Opens after Exit Low 10
Hint 1
Front-room boulders pushed off the ledge sink along the shore and become ground. The skipping stone rides on the leftmost boulder and lands where that boulder sinks.
Hint 2
After trial 1, bump the Judge to melt the freezers. The Judge wants the stone at the far right, and the sunk boulders at the far left and the two middle spots.
Hint 3
Sink the rightmost boulder at the far left, the third and second boulders in the middle, and the stack at the far right. The heroes then relay the stone across the lake before skipping it into the pads.
Full solution234 steps
Verified in the game · build 26249670 · Nov 3, 2026
Hero 1 is the upper hero. Hero 2 is the lower hero.
Play the shoreline once, then rebuild it so the stone starts far from the lily pads and the heroes must relay it back.
Hero 1←×2 ·↓ ·← · ← onto the upper lily pad as it passes
Hero 2↓×2 ·←×2 ·↑
Hero 2→×9
Hero 2↓ ·→ ·↑×2 ·→ ·↑
Hero 2← ·↓×2 · wait for the lower lily pad to reach one tile below its starting position and wait for the upper lily pad to reach one tile above its starting position, ← · ←
Hero 2←×2 ·↓×3 · wait about 3 s, ↓ onto the lower lily pad as it passes · wait about 8 s, →
Hero 1→
Queen wait about 1.5 s, ↑ · → ·↓ ·→
Queen→ ·↑ ·→×7 ·↑ ·↓ ·→ ·↑×2 ·←×7
Queen→ ·↓×2 ·←×2 ·↑×2 ·→
Queen→×5 ·↓×2 ·← ·↑ ·→ ·↑ ·← ·↓ ·← ·↑ ·↓
Queen↓ ·← ·↑×2
Queen← ·↓×2 ·←×2 ·↑ ·→×6 ·↓ ·→ ·↑×2
Queen↓×2 ·←×7 ·↓ ·←×2
Hero 2 wait about 1.5 s, → · →×3 ·↑×2
Hero 1→×5 ·↓ ·←
Hero 1↑ ·←×4 ·↓
Hero 2↓ ·←×3 ·↑ ·←
Hero 1←×4
Hero 2↓ ·←×3 ·↑
Hero 1→ ·↑ ·→ ·↓
Hero 1←×3 ·↓ ·←×2
Hero 2↓
Hero 2→×8
Hero 2↓ ·→ ·↑×2 ·→ ·↑
Hero 2← ·↓×2 ·←×2
Hero 2←×2 ·↓×3 · wait about 3 s, ↓ · wait about 8 s, →
Queen: left 1, up 2, down 2, right 2, up 2, down 2, right 2, up 2, down 2, right 2, up 2, down 2, left 7, down 1, left 2. Hero 2: wait about 1.5 s then left, left 1, up 2. Hero 1: left 1, down 1, left 1, up 1, left 1, down 1, left 2, down 1, left 1, left onto the upper lily pad as it passes. Hero 2: down 2, left 2, up 1, right 9, down 1, right 1, up 2, right 1, up 1, left 1, down 2, wait for the lower lily pad to reach one tile below its starting position and wait for the upper lily pad to reach one tile above its starting position then left, left 3, down 3, wait about 3 s then down onto the lower lily pad as it passes, wait about 8 s then right. Hero 1: right 1. Queen: wait about 1.5 s then up, right 1, down 1, right 2, up 1, right 7, up 1, down 1, right 1, up 2, left 7, right 1, down 2, left 2, up 2, right 6, down 2, left 1, up 1, right 1, up 1, left 1, down 1, left 1, up 1, down 2, left 1, up 2, left 1, down 2, left 2, up 1, right 6, down 1, right 1, up 2, down 2, left 7, down 1, left 2. Hero 2: wait about 1.5 s then right, right 3, up 2. Hero 1: right 5, down 1, left 1, up 1, left 4, down 1. Hero 2: down 1, left 3, up 1, left 1. Hero 1: left 4. Hero 2: down 1, left 3, up 1. Hero 1: right 1, up 1, right 1, down 1, left 3, down 1, left 2. Hero 2: down 1, right 8, down 1, right 1, up 2, right 1, up 1, left 1, down 2, left 4, down 3, wait about 3 s then down, wait about 8 s then right. Hero 1: right 1.
Thief · Crystal · Goblin ×3 · Button · GateScreen 2 of 8Opens after Exit Low 12
Hint 1
Leave at least one tile between the Thief and any Goblin. Plan where the Thief will stand after each pull.
Hint 2
In trial 1, pull the Crystal along the lower passage. Turn up the clear column before the second Goblin, then follow the button row to the exit.
Hint 3
After the thaw, push the nearer Goblin right four and up one. Push the farther Goblin right one and down one. In trial 2, use the top passage to get the Crystal past both.
Full solution106 steps
Verified in the game · build 26466613 · Nov 17, 2026
Clear the maze once to thaw the two movable Goblins. Move them in the Queen’s room, then guide the Thief and the Crystal through the maze again.
Queen← ·↓×2
Thief→×2 ·↓ ·← ·↓×3
Thief→ ·↑ ·→×5
Thief↑ ·← ·↑×3 ·→ ·↓
Thief→×9
Queen↑×2 ·→×2 ·↓ ·wait×3
Queen← ·↑×3 ·→×4 ·↓ ·→ ·↑
Queen↓ ·→ ·↑ ·→ ·↓ ·←×2 ·↓
Queen←×6 ·↓×2
Thief→×6 ·↓ ·← ·↓ ·→ ·↑
Thief→ ·↓ ·←×2 ·↑×2 ·→ ·↑×3
Thief→ ·↓ ·→×5
Thief→ ·↓ ·← ·↓×2 ·→
Thief↑ ·→×3
Queen: left 1, down 2. Thief: right 2, down 1, left 1, down 3, right 1, up 1, right 5, up 1, left 1, up 3, right 1, down 1, right 9. Queen: up 2, right 2, down 1, wait (3 times), left 1, up 3, right 4, down 1, right 1, up 1, down 1, right 1, up 1, right 1, down 1, left 2, down 1, left 6, down 2. Thief: right 6, down 1, left 1, down 1, right 1, up 1, right 1, down 1, left 2, up 2, right 1, up 3, right 1, down 1, right 6, down 1, left 1, down 2, right 1, up 1, right 3.
Gemsman · Gem ×2 · Beam source ×4 · Gem pad ×3 · Boulder ×3Screen 2 of 8Opens after Exit Low 12
Hint 1
Beam sources in the front room keep their places on the board; the blocks on the top and right buttons decide which walls stand. Trial 1 is a long walk through every room.
Hint 2
After trial 1, face the Judge to melt the freezers. Move all four beam sources and both blocks; the Judge wants a design the Gemsman can only cross one way.
Hint 3
Orange: left three, down three. Purple: up four, right three. White: down three, right seven. Green: right five, down two. Top block right one, right block down three. The Gemsman then rides the Double beam up and steps left onto the exit.
Full solution163 steps
Verified in the game · build 25998871 · Oct 20, 2026
Play once, then move every beam source and both wall blocks to build a one-way board that the Gemsman crosses in seven moves.
Queen: down 2, right 1, down 2, left 1, down 1. Gemsman: right 2, up 2, right 1, down 1, right 2, up 1, left 1, up 2, right 1, up 2, right 1, left 7. Queen: up 1, right 1, up 4, left 2, up 1, left 1, up 4, right 1, down 1, right 4, down 5, left 4, up 1, left 1, down 1, left 1, up 2, down 3, right 1, up 1, right 7, up 3, left 8, right 5, down 1, left 1, down 2, right 2, up 7, left 1, up 1, right 1, down 9, right 4, up 4, down 3, left 1, down 1, left 1, up 6, left 2, up 1, left 2, down 1, left 1, down 5, left 1, down 3, right 1, down 1. Gemsman: up 2, right 2, up 2, left 1.
The front-room buttons choose the board's art: walls on the left, floor along the bottom, background on the right. On the board, Activate teleports heroes around their mirrors so they can put a mirror or crystal on each gate's button.
Hint 2
There is a single trial. The Judge wants the third wall button, the last floor button and the second background button.
Hint 3
Pull the floor block right three, the right block up one and the left block up two. On the board each hero opens its own gate with a mirror or the crystal and walks onto its exit.
Full solution147 steps
Verified in the game · build 25998871 · Oct 20, 2026
Pick the right wall, floor and background art with the three front-room blocks, then bring each of the four heroes to its exit.
Queen: right 2, down 2, left 3, right 3, up 1, right 2, up 2, right 1, up 1, left 1, up 2, left 10, down 3, up 2, right 1, up 1, right 3, down 1. Warrior: right 2, down 1, left 2, up 1, left 2, down 1, activate, up 1, activate, right 1, activate, up 2, activate, right 1, down 2, left 2, down 2. Thief: up 2, left 1, right 3, down 1, left 2, up 1, left 1, activate, left 2, up 1, activate, down 2, left 2. Wizard: up 1, left 2, up 1, down 1, up 1, right 2, up 1, left 1, down 1, right 3, up 1, left 1, up 2, right 1, down 1, left 1, up 2, activate, right 1, up 1, left 2, down 4, left 1. Bard: up 2, activate, up 1, activate, right 1, down 3, right 1, up 2, activate, left 2, activate, down 1, right 1, down 1, activate, up 2, down 1, right 1, down 2, left 3.
Each front-room block stands for one hero's room. Lift it off its button and the room vanishes; set it on another button and the room appears there.
Hint 2
The Judge wants the rooms from left to right in the order Warrior, Thief, Wizard, Bard.
Hint 3
Move the Thief's block to the second button, the Warrior's to the first and the Bard's to the last; the Wizard's stays. Then walk onto the exit.
Full solution109 steps
Verified in the game · build 25882299 · Oct 13, 2026
Reorder the four hero rooms with the front-room blocks, then walk onto the exit.
Queen↑×2 ·←×3 ·↓
Queen→ ·↑ ·←×9 ·↓ ·→×7
Queen↑ ·→×16 ·↓×2 ·← ·↑
Queen→ ·↑ ·←×21
Queen↑ ·← ·↓
Queen→ ·↓×2 ·→×19 ·↓ ·→ ·↑
Queen←×9 ·↓×3
Queen: up 2, left 3, down 1, right 1, up 1, left 9, down 1, right 7, up 1, right 16, down 2, left 1, up 1, right 1, up 1, left 21, up 1, left 1, down 1, right 1, down 2, right 19, down 1, right 1, up 1, left 9, down 3.
Each front-room block stands for one room of the board, and each sits in a gate. A button below each block shuts its gate, and a closing gate crushes the block, cutting that room out.
Hint 2
The pipeline has six rooms but only four heroes are wanted: a Warrior and a Thief appear twice. The Judge wants the Warrior room left of the Wizard and the Thief room right of him cut.
Hint 3
Step on the button under the third block and off again, do the same under the fifth block, then walk onto the exit.
Full solution40 steps
Verified in the game · build 25882299 · Oct 13, 2026
Thief 1 is the left thief. Thief 2 is the right thief. Warrior 1 is the left warrior. Warrior 2 is the right warrior.
Cut the two repeated hero rooms out of the pipeline, then walk onto the exit.
Queen←×2 ·↓×5 ·←×2
Queen↓
Queen→×14 ·↑
Queen↓
Queen←×11 ·↑×3
Queen: left 2, down 5, left 2, down 1, right 14, up 1, down 1, left 11, up 3.
Each front-room block sits on one of a column of buttons, and each button gives its room a different layout. The Queen pulls blocks like a Thief.
Hint 2
Move one block per room, one or two tiles, onto the button that gives the clean version of that room.
Hint 3
Bard's right block up one, Thief down two, first Warrior down two, Wizard's left block up one, second Thief's left block down one, second Warrior up one.
Full solution98 steps
Verified in the game · build 25882299 · Oct 13, 2026
Warrior 1 is the left warrior. Warrior 2 is the right warrior. Thief 1 is the left thief. Thief 2 is the right thief.
Clean up every room of the pipeline by pulling its block onto the right button, then walk onto the exit.
Queen←×11 ·↓ ·↑
Queen←×8 ·↓×2 ·→ ·↓×2
Queen→ ·↓ ·→×11 ·↑×2 ·→ ·↓×2
Queen→×8 ·↑×3 ·→ ·↓ ·↑
Queen→×3 ·↓×3 ·→ ·↑ ·↓
Queen→×6 ·↑×3 ·→ ·↑
Queen← ·↓×4 ·←×14 ·↑
Queen: left 11, down 1, up 1, left 8, down 2, right 1, down 2, right 1, down 1, right 11, up 2, right 1, down 2, right 8, up 3, right 1, down 1, up 1, right 3, down 3, right 1, up 1, down 1, right 6, up 3, right 1, up 1, left 1, down 4, left 14, up 1.
Push each top block south to replace its room and expose a design row. Enter a design row to take Thief form and pull its block to move that room's button or exit.
Hint 2
In the design rows, move Thief 1, Warrior 1, Wizard 1 and Thief 2 right once; Bard 1 left twice; Warrior 2 left once.
Hint 3
Every Activate also teleports the Bard. Solve the other rooms before leaving the Bard on her exit.
Full solution449 steps
Verified in the game · build 26006400 · Oct 27, 2026
Thief 3 is the left thief. Thief 4 is the right thief. Warrior 3 is the left warrior. Warrior 4 is the right warrior.
Replace all six hero rooms, adjust their design buttons and solve each mirror room, finishing the Bard last.
Queen: right 2, down 3, left 19, down 3, up 3, right 7, down 3, up 3, right 7, down 3, up 3, right 7, down 3, up 3, right 7, down 3, up 3, right 7, down 3, up 3, left 14, down 3, right 1, down 3, left 1, down 1, right 1, up 4, left 1, up 3, left 7, down 3, right 1, down 3, left 1, down 1, right 1, up 4, left 1, up 3, left 7, down 3, right 1, down 3, left 2, down 1, left 2, up 1, right 4, up 3, left 1, up 3, left 7, down 3, right 1, down 3, left 2, down 1, right 1, up 1, right 1, up 3, left 1, up 3, right 28, down 3, right 1, down 3, left 2, down 1, right 1, up 1, right 1, up 3, left 1, up 3, right 7, down 3, right 1, down 3, left 2, down 1, left 1, up 1, right 3, up 3, left 1, up 3, left 16, up 1. Thief 1: up 2, left 1, right 3, down 1, left 2, up 1, left 1, activate, left 2, up 1, activate, down 2, left 2. Bard 1: up 2, activate, up 1. Warrior 1: right 1, down 1, left 1, down 1. Wizard 1: up 4, right 1. Warrior 1: up 3, left 2, up 1, right 3, left 3, activate, left 1. Wizard 1: left 1, down 2, left 2, down 1, up 1, right 2, up 1, right 1, left 1, right 2, up 2, right 1, down 1, left 1, up 2, activate, right 1, up 1, left 2, down 4, left 1. Thief 2: left 1, up 2, right 3, down 2, up 2, left 3, down 1, activate, left 1, up 1. Warrior 2: right 2, down 1, left 2, up 1, left 2, down 1, activate, up 1, left 1, up 1, right 1, down 1, right 1, up 2, activate, right 1, down 2, left 2, down 2. Bard 1: right 2, down 3, activate, left 1, up 1, left 1, activate, right 1, down 1, activate, up 1, left 1, up 1, down 1, right 2, down 2, left 3.
Six blocks on the six top buttons, plus one on the middle button, bring every piece of the pipeline out onto a shelf above the board.
Hint 2
Each room needs three pieces dropped off the shelf into the row below: its hero, the block that carries its exit, and its mirror.
Hint 3
Push each hero, exit block and mirror straight down off the shelf, room by room from left to right; then every hero steps left onto their exit.
Full solution180 steps
Verified in the game · build 25882299 · Oct 13, 2026
Set up the whole pipeline from the front room: switch every room on, drop each hero, exit and mirror into place, then step each hero onto their exit.
Queen→×2 ·↑ ·→×4 ·↓ ·→×7
Queen↓×5
Queen→ ·↓×3 ·←×17
Queen↓ ·↑ ·← ·↓ ·↑ ·← ·↓
Queen↑ ·→×9 ·↓ ·↑ ·← ·↓ ·↑ ·← ·↓
Queen↑ ·→×9 ·↓ ·↑ ·← ·↓ ·↑ ·← ·↓
Queen↑ ·→×9 ·↓ ·↑ ·← ·↓ ·↑ ·← ·↓
Queen↑ ·→×9 ·↓ ·↑ ·← ·↓ ·↑ ·← ·↓
Queen↑ ·→×9 ·↓ ·↑ ·← ·↓ ·↑ ·← ·↓
Queen↑ ·←×16
Queen↑×3 ·← ·↑×5 ·←×7 ·↑ ·←×4 ·↓
Thief 1←
Bard←
Warrior 1←
Wizard↑ ·← ·↓
Thief 2←
Warrior 2←
Queen: right 2, up 1, right 4, down 1, right 7, down 5, right 1, down 3, left 17, down 1, up 1, left 1, down 1, up 1, left 1, down 1, up 1, right 9, down 1, up 1, left 1, down 1, up 1, left 1, down 1, up 1, right 9, down 1, up 1, left 1, down 1, up 1, left 1, down 1, up 1, right 9, down 1, up 1, left 1, down 1, up 1, left 1, down 1, up 1, right 9, down 1, up 1, left 1, down 1, up 1, left 1, down 1, up 1, right 9, down 1, up 1, left 1, down 1, up 1, left 1, down 1, up 1, left 16, up 3, left 1, up 5, left 7, up 1, left 4, down 1. Thief 1: left 1. Bard: left 1. Warrior 1: left 1. Wizard: up 1, left 1, down 1. Thief 2: left 1. Warrior 2: left 1.
Queen · Mirror ×4 · Boulder ×4Screen 4 of 8Opens after Exit Low 26
Hint 1
Activate where both left mirrors see Queen 1 and she is cloned; clone and Queen copy each other's moves. Where both right mirrors reflect them onto one tile, Activate merges them again.
Hint 2
After trial 1, bump the Judge to melt the freezers. Boulders in the front room drop onto the board where they stand; the Judge wants all four on exact spots in the paths of Queen 1 and her clone.
Hint 3
Rightmost boulder down one, third boulder up three, second boulder right four and down five, leftmost boulder right five and down four.
Full solution125 steps
Verified in the game · build 26249670 · Nov 2, 2026
Queen 1 is the left queen. Queen 2 is the right queen.
Play the clone-and-merge board once, then drop four boulders into the paths of Queen 1 and her clone.
Queen 2↓×6 ·←×6
Queen 1→×4 ·activate
Queen 1→×2 ·↑×2 ·→ ·↑×2 ·→ ·↑ ·→×2 ·↑
Queen 1activate
Queen 1→×5
Queen 2↑ ·→
Queen 2↑ ·→×5 ·↑×5 ·← ·↓
Queen 2→ ·↓×2 ·←×2 ·↑×4
Queen 2←×2 ·↓×2
Queen 2→×4 ·↑ ·→ ·↓×5
Queen 2← ·↑×2 ·←×4 ·↑ ·← ·↑ ·→×5 ·↑ ·→ ·↓×4
Queen 2← ·↓×3 ·←×5
Queen 1→×4 ·activate
Queen 1→×2 ·↑×2 ·→ ·↑ ·→×3 ·↑
Queen 1activate
Queen 1→×5
Queen 2: down 6, left 6. Queen 1: right 4, activate, right 2, up 2, right 1, up 2, right 1, up 1, right 2, up 1, activate, right 5. Queen 2: up 1, right 1, up 1, right 5, up 5, left 1, down 1, right 1, down 2, left 2, up 4, left 2, down 2, right 4, up 1, right 1, down 5, left 1, up 2, left 4, up 1, left 1, up 1, right 5, up 1, right 1, down 4, left 1, down 3, left 5. Queen 1: right 4, activate, right 2, up 2, right 1, up 1, right 3, up 1, activate, right 5.
Queen · Mirror ×4 · Boulder ×7Screen 4 of 8Opens after Exit Low 21
Hint 1
Activate where both left magic mirrors see Queen 1 to teleport her and create a clone. Both copies follow every move and each pushes its own boulders. The right mirrors teleport and merge them beside the exit.
Hint 2
Each copy sinks two boulders side by side as a bridge to the right column. After trial 1, bump the Judge to melt the freezers; the three front-room boulders drop into the water where you leave them, and the Judge accepts one layout of them.
Hint 3
Right boulder up one and right two, middle boulder up one, left boulder down one and right three. In trial 2, push the top boulder down first, then push the other one over it.
Full solution132 steps
Verified in the game · build 26249670 · Nov 2, 2026
Queen 1 is the left queen. Queen 2 is the right queen.
Play the clone board once, set the three front-room boulders on the Judge's spots, then play the board again.
Queen 2: right 2, up 5. Queen 1: right 4, activate, up 1, right 3, left 3, up 2, right 4, down 1, up 1, left 4, down 2, right 6, down 2, activate, right 4. Queen 2: left 1, down 1, left 3, down 4, right 2, down 2, left 2, up 1, right 1, up 2, left 2, down 1, right 2, down 2, left 2, up 1, right 1, up 2, left 2, down 2, left 1, down 1, right 3, down 1, right 4, up 7. Queen 1: right 4, activate, up 3, right 4, down 1, up 1, left 4, down 2, right 6, down 2, activate, right 4.
Each front-room block holds down a button that raises one tile of shore on the board at the same spot: the top row is the far bank, the bottom row the near bank. The three lily pads drift east once the skipping stone knocks them loose.
Hint 2
After trial 1, bump the Judge. It wants the far bank moved two tiles left and the near bank two tiles right, so the Hero has to cross the whole raft of pads.
Hint 3
Pull the top block left two and the bottom block right two. In trial 2, knock all three pads loose again, board them from the near bank on the right and walk left along them to the far bank.
Full solution151 steps
Verified in the game · build 26006400 · Oct 22, 2026
Queen: right 1, down 1, right 2. Hero: wait about 2.5 s then up, up 1, left 1, up 2, right 2, down 1, left 1, up 1, left 1, down 4, right 1, down 1, left 1, down 1, left 2, wait for the right lily pad of the bottom-left pair to reach one tile above its starting position then left, left 2, up 1, left 1, up 1, right 1, down 2, right 5, up 2, right 1, up 1, left 1, up 3, right 2, up 1, wait about 7 s then up onto the left lily pad as it passes, right 2, up 2, left 2, up 1. Queen: wait about 2.5 s then left, up 1, wait about 2 s then left, left 1, up 3, left 3, down 1, left 2, up 1, right 5, down 4, left 5, right 2, up 1, right 2, down 1, right 1, up 1, right 3. Hero: wait about 2.5 s then up, up 1, left 1, up 2, right 2, down 1, left 1, up 1, left 1, down 4, right 1, down 1, left 1, down 1, left 5, up 1, left 1, up 1, right 1, down 2, right 5, up 2, right 1, up 1, left 1, up 3, right 4, up 1, wait about 6 s then up onto the right lily pad of the bottom-left pair as it passes, left 2, up 3.
Hero · Lily pad · Skipping stone ×2 · BoulderScreen 4 of 8Opens after Exit Low 23
Hint 1
A pushed skipping stone skips over water until it lands; a blocked one sinks as a bridge. In trial 1 the two stones, skipped along the top row, build a bridge to the exit: an exploit.
Hint 2
After trial 1, bump the Judge. It wants the front-room boulder sunk in the top row's water so that bridge can no longer be built; the lily pad has to carry the Hero instead.
Hint 3
Push the boulder right seven and up two. In trial 2 skip the lower stone onto the lily pad, send the other stone away, walk round the top and push the stone off the pad as you step onto it.
Full solution114 steps
Verified in the game · build 26006400 · Oct 20, 2026
Play the stone-bridge exploit once, then plug the top row with the front-room boulder so the Hero has to use the lily pad. Hold Ctrl throughout.
Hold slow time. Move as soon as you can; wait only where marked.
Queen←×2 ·↑
Hero wait about 7 s, ↑ · →×2 ·↓ ·→ ·↑×5
Hero← ·↑ ·→×4
Hero↓ ·←×6 ·↓×5
Hero→×2 ·↓ ·→ ·↑×6
Hero← ·↑ ·→×4
Hero↓ ·→×3 ·↑ ·→×2 ·↑
Queen wait about 7 s, ↓ · ← ·↓ ·←
Queen← ·↓ ·→×7
Queen↓ ·→ ·↑×2
Queen←×6 ·↑×2
Hero wait about 7 s, ↑ · →×2 ·↑ ·→ ·↓×2
Hero↑ ·←×3 ·↓ ·→×3
Hero wait for the lower skipping stone to reach 6 tiles right of its starting position, ← · wait for the lily pad to reach one tile right of its starting position, ↓ · → ·↑×6
Hero→×6
Hero → onto the lily pad as it passes
Hero↑ ·→ ·↑
Frame-exact timing
Seconds from puzzle start · 60 fps · hold Ctrl throughout
Queen: left 2, up 1. Hero: wait about 7 s then up, right 2, down 1, right 1, up 5, left 1, up 1, right 4, down 1, left 6, down 5, right 2, down 1, right 1, up 6, left 1, up 1, right 4, down 1, right 3, up 1, right 2, up 1. Queen: wait about 7 s then down, left 1, down 1, left 2, down 1, right 7, down 1, right 1, up 2, left 6, up 2. Hero: wait about 7 s then up, right 2, up 1, right 1, down 2, up 1, left 3, down 1, right 3, wait for the lower skipping stone to reach 6 tiles right of its starting position then left, wait for the lily pad to reach one tile right of its starting position then down, right 1, up 6, right 6, right onto the lily pad as it passes, up 1, right 1, up 1.
Queen · Wardrobe ×2 · Lily pad · Skipping stone · Spawner ×2 · Boulder · Annihilator · Teleporter ×2 · ResetScreen 4 of 8Opens after Exit Low 24
Hint 1
The right wardrobe gives Queen 1 the Wizard’s skill. As the Wizard, moving toward the stone in a straight line swaps places with it.
Hint 2
Send the stone up the hallway so you can swap over to the thaw tile. Step on it in each trial, then swap back and reset the stone before launching it onto the lily pad.
Hint 3
After the first trial, pull the left block up one tile, the bottom and middle blocks right three each, and the right block down two. In the lower room, let the lily pad carry the stone around, then swap onto the pad from the wardrobe.
Full solution370 steps
Verified in the game · build 26466613 · Nov 17, 2026
Queen 1 is the right queen. Queen 2 is the left queen.
Queen 1 is the right queen and Queen 2 the left. Clear the lower room twice. Between trials, use Queen 2 to set the Judge’s four blocks. Hold Run and Slow Time the whole way (Shift and Ctrl by default).
Start holding Ctrl + Shift; step 1 is immediate. Move as soon as you can; wait only where marked.
Queen 2: right 1, up 6, left 1. Queen 1: brief pause then left, left 7, right 2, down 4, right 1, down 2, left 2, up 1, left 11, down 1, left 2, up 1, right 1, down 1, right 1, up 1, right 10, down 1, right 2, up 2, left 1, up 4, left 3, up 2, left 1, up 1, right 2, up 1, wait about 10 s then left, left 1, down 2, right 1, down 2, right 3, down 4, right 1, down 2, left 2, up 1, left 6, up 1, activate, right 1, down 2, left 1, up 1, right 1, up 1, left 4, right 7, down 1, right 2, down 1, right 2, up 2, left 1, up 4, left 3, wait about 33 s then left, wait about 43 s then left, left 2, up 2, left 4. Queen 2: brief pause then down, down 1, wait a moment, left 1, down 2, left 4, down 1, up 1, right 5, down 4, left 1, down 1, right 2, down 1, right 3, up 1, right 1, up 2, left 4, up 1, right 3, up 1, right 3, down 1, right 2, up 2, right 1, down 3, right 1, down 2, left 1, up 5, left 9, up 3, down 1, left 1, down 1, wait a moment, right 1, up 1, left 1. Queen 1: brief pause then left, left 7, right 2, down 4, right 1, down 2, left 2, up 1, left 10, down 1, left 2, up 1, right 1, down 1, right 1, up 1, right 10, down 1, right 2, up 2, left 1, up 4, left 3, up 2, left 1, up 1, right 2, up 1, wait about 10 s then left, left 1, down 2, right 1, down 2, right 3, down 4, right 1, down 2, left 2, up 1, left 5, brief pause then up, activate, right 1, down 2, left 1, up 1, right 1, up 1, left 4, right 7, down 1, right 2, down 1, right 2, up 2, left 1, up 4, left 3, wait about 33 s then left, wait about 43 s then left, left 2, up 2, left 4.
The lower cart can deliver the gem to its socket. Load the gem into its track while the cart is at the right stop, then step clear for its leftward pass.
Hint 2
The lower gate’s wardrobe gives Queen 1 the Displacer Rod. Use it to send the upper cart over the wall, then send the boulder into that cart when it reaches the bottom of its new track. The cart can now raise the beam source.
Hint 3
Set the middle block two tiles right, the top-left three right and the top-right two right. Pull the left column’s block down one and the right column’s down two. On the return trip, wait for the Open beam and go up around the final wall.
Full solution377 steps
Verified in the game · build 26466613 · Nov 17, 2026
Queen 1 is the lower queen. Queen 2 is the upper queen.
Queen 1 is the lower queen and Queen 2 the upper queen. Clear the gate room twice, and set the Judge’s five blocks between trials. Hold Run and Slow Time throughout (Shift and Ctrl by default).
Start holding Ctrl + Shift; step 1 is immediate. Move as soon as you can; wait only where marked.
Queen 2: right 6. Queen 1: up 1, wait about 2 s then up, up 3, left 2, up 1, down 1, right 3, up 1, left 2, down 1, left 1, up 1, right 1, up 1, left 4, down 1, left 2, up 2, right 1, down 1, left 1, wait about 2 s then down, right 1, up 1, right 1, down 1, brief pause then down, up 2, wait about 3 s then left, left 2, up 1, right 1, up 1, wait about 3.5 s then up, brief pause then up, up 1, left 1, up 2, left 2, down 1, wait about 2.5 s then left, wait about 2 s then down, down 1, right 1, down 2, left 1, activate, up 2, left 1, up 3, right 5, down 1, right 2, up 1, right 2, down 1, wait about 40 s then left, left 4, up 1, wait about 17 s then left, down 1, right 1, down 1, left 1, activate, up 2, left 4, down 4, right 1, down 1, left 1, activate, up 2, left 1, up 3, right 4, up 2, brief pause then up, up 3, brief pause then up, up 2, right 9, wait about 39 s then right, right 4. Queen 2: wait about 2.5 s then left, up 1, left 1, down 1, left 8, down 1, right 2, up 1, left 5, up 8, right 2, up 1, right 3, down 1, right 4, up 1, right 2, down 1, left 11, down 4, left 1, down 1, right 1, up 5, right 13, down 4, right 1, down 2, left 1, down 1, left 1, down 1. Queen 1: wait about 2.5 s then up, up 3, left 1, wait about 9 s then left, wait about 19 s then up, down 1, right 3, up 1, left 2, down 1, left 1, up 1, wait about 23 s then right, wait about 4 s then up, left 4, down 1, left 1, wait about 15 s then left, wait about 14 s then up, wait about 28 s then up, right 1, down 1, left 1, wait about 28 s then down, right 1, up 1, right 1, down 1, wait about 4 s then down, up 1, wait about 13 s then up, left 2, wait about 9.5 s then left, up 1, right 1, up 3, left 1, up 2, left 2, down 1, wait about 10 s then left, down 2, right 1, down 2, left 1, activate, wait about 21 s then up, up 1, left 1, up 3, right 5, down 1, right 2, up 1, right 2, down 1, wait about 9.5 s then left, left 4, up 1, left 1, down 1, right 1, down 1, left 1, activate, up 2, left 4, down 4, right 1, down 1, left 1, wait about 25 s then activate, up 2, left 1, up 3, right 4, up 2, brief pause then up, up 3, brief pause then up, up 2, right 9, wait about 39 s then up, right 3, down 1, right 2.
Gemsman · Hero · Skipping stone ×3 · Beam source · Gem · Gem pad · Boulder ×3Screen 5 of 8Opens after Exit Low 28
Hint 1
The front room only restyles the board: each button row picks the look of one set of board pieces or exits. The Judge accepts one look; the board is solved the same way both times.
Hint 2
On the board the Hero skips stones east to sink a path for the Gemsman, and walks the green Through beam source down one row at a time so the Gemsman can step through the walls beside him.
Hint 3
In the front room pull the blocks right five, four, three, three, three and two. Then repeat the trial 1 solution.
Full solution421 steps
Verified in the game · build 26006400 · Oct 25, 2026
Play the board once, restyle it in the front room by pulling all six blocks along their button rows, then play it again.
Queen: right 1, up 1, right 3, down 1, right 1. Hero: wait about 1.5 s then right, right 3, up 2, down 1, left 1, up 1, right 1, up 1, left 1, up 1, right 2, down 2, left 4, right 1, up 1, right 1, up 1, left 3, down 1, left 1, up 1, down 1, right 2, down 2, left 1, up 3, down 3, left 1, up 2. Gemsman: wait a moment, down 1, right 3, down 1. Hero: right 1, up 2, left 1, down 1, right 4, down 1, left 2, down 2, right 4, wait for the left skipping stone of the bottom pair to reach 3 tiles above the bottom right exit then left, left 2, down 1, left 1, up 4, left 1, down 1, right 1, down 2, left 2, up 1, right 1, up 1, right 1, down 1. Gemsman: down 1. Hero: up 2, left 2, down 1. Gemsman: down 1. Hero: right 3, down 3, left 1, up 1, down 1, left 1, up 1, left 1, down 1, right 1, up 3, left 1, down 1. Gemsman: left 1. Hero: right 1, up 1, right 1, down 1, left 1, down 1, right 5, wait for the left skipping stone to reach 3 tiles above the bottom right exit then left, left 4. Gemsman: left 1, down 1. Hero: up 2, left 1, down 2. Gemsman: down 1. Hero: down 1, right 1, up 2, right 5. Gemsman: down 1. Queen: wait about 1.5 s then left, up 1, left 2, down 1, left 9, up 1, right 5, down 1, right 1, down 2, left 6, up 1, right 4, down 1, right 2, down 2, left 6, up 1, right 3, down 1, right 3, down 2, left 6, up 1, right 3, down 1, right 6, up 1, right 3, down 1, left 6, up 2, right 3, up 1, right 2, down 1, left 5, up 4, right 2, up 1, right 3, down 1, right 1. Hero: wait about 1.5 s then right, right 3, up 2, down 1, left 1, up 1, right 1, up 1, left 1, up 1, right 2, down 2, left 4, right 1, up 1, right 1, up 1, left 3, down 1, left 1, up 1, down 1, right 2, down 2, left 1, up 3, down 3, left 1, up 2. Gemsman: wait a moment, down 1, right 3, down 1. Hero: right 1, up 2, left 1, down 1, right 4, down 1, left 2, down 2, right 4, left 3, down 1, left 1, up 4, left 1, down 1, right 1, down 2, left 2, up 1, right 1, up 1, right 1, down 1. Gemsman: down 1. Hero: up 2, left 2, down 1. Gemsman: down 1. Hero: right 3, down 3, left 1, up 1, down 1, left 1, up 1, left 1, down 1, right 1, up 3, left 1, down 1. Gemsman: left 1. Hero: right 1, up 1, right 1, down 1, left 1, down 1, right 5, left 5. Gemsman: left 1, down 1. Hero: up 2, left 1, down 2. Gemsman: down 1. Hero: down 1, right 1, up 2, right 5. Gemsman: down 1.
Thief · Boulder · CartScreen 5 of 8Opens after Exit Low 29
Hint 1
The front-room buttons only pick the board's background art. The Judge accepts a single look; the board is played the same way both times.
Hint 2
On the board the Thief steers the rolling cart by pulling it. At the end of its run the boulder it carries drops off, and she pulls that boulder into the gap by the exit as a bridge.
Hint 3
Front room: pull the right block up four, the middle block up two, the upper bottom-right block left three and the lower one left two.
Full solution188 steps
Verified in the game · build 26006400 · Oct 21, 2026
Thief wait for the cart to reach one tile right and two tiles below its starting position and wait for the boulder to reach one tile right and two tiles below its starting position, ↑ · ←×4 ·↑ ·←×2 ·↑
Thief→ · wait about half a second, ↓ · ↓ ·→ ·↑×2 ·← · wait about 3 s, ↓ · ↑ ·→ ·↑ ·→×3 ·↓ · brief pause, ↑ · ← ·↓ · wait about half a second, ↑
Queen: up 2, right 1, up 3, left 1. Thief: wait about 2 s then left, up 2, left 2, brief pause then down, right 1, wait about 4 s then up, right 1, down 2, up 6, up while the cart crosses, wait for the cart to reach one tile right and two tiles below its starting position and wait for the boulder to reach one tile right and two tiles below its starting position then up, left 4, up 1, left 2, up 1, right 1, wait about half a second then down, down 1, right 1, up 2, left 1, wait about 3 s then down, up 1, right 1, up 1, right 3, down 1, brief pause then up, left 1, down 1, wait about half a second then up, right 1, wait about 4.5 s then down, right 2. Queen: wait about 2.5 s then right, down 2, left 1, down 3, right 2, up 2, left 1, up 4, right 1, down 3, left 1, down 3, left 1, up 1, left 2, down 1, left 2, up 2, right 1, up 2, left 1, down 3, right 1, down 1, right 5, down 1, left 2, down 1, left 3, up 1, right 4, down 1, right 1, down 1, left 2, down 1, left 2, up 1, left 2, up 3, right 2, up 4, right 1, up 1. Thief: wait about 4.5 s then left, up 2, left 2, wait about 2 s then down, right 1, wait about 4 s then up, right 1, down 2, up 8, left 4, up 1, left 2, up 1, right 1, wait about half a second then down, down 1, right 1, up 2, left 1, wait about 3 s then down, up 1, right 1, up 1, right 3, down 1, brief pause then up, left 1, down 1, wait about half a second then up, right 1, wait about 4.5 s then down, right 2.
The front-room buttons only pick the board's grid art. The Judge accepts a single look; the board is played the same way both times.
Hint 2
On the board, Activate teleports whatever each arm of the magic mirror sees to the same distance along the other arm. Line the skipping stone up so its reflection lands in the water beside the exit.
Hint 3
Front room: top-right block right one, top block left three, second and third blocks left two, right block down two.
Full solution158 steps
Verified in the game · build 26006400 · Oct 22, 2026
Play the mirror board once, choose the grid art with the five front-room blocks, then play it again. Hold Shift throughout, and Ctrl too until the Hero first pushes the skipping stone right.
Start holding Ctrl + Shift; step 1 is immediate. Move as soon as you can; wait only where marked.
Queen→×2 ·↑×2
Hero brief pause, ← · ↓ ·←×4 ·↑ ·←
Heroactivate ·↑×2 ·activate ·↓ ·activate
Hero→ ·↓ ·→ ·↑ ·← ·↑ · release Ctrl, wait about 1 s, → · wait for the crystal to reach two tiles right of its starting position, ↓
Hero activate as the crystal skips · wait about half a second, activate as the crystal skips · wait about 2 s, activate
Hero← ·↓×6 ·←×2
Queen wait about 2.5 s, ← · ↓ · wait a moment
Queen← ·↓×3 ·← ·→
Queen↑ ·←×2 ·↓×2 ·←×2 ·↑×3 ·←×3 ·↑ ·←×3
Queen↓ ·→×6 ·↓×2 ·←×3 ·↑ ·←×2
Queen↓ ·→×5 ·↓×2 ·←×3 ·↑ ·←×2
Queen↓ ·→×7 ·↓×3 ·→ ·↓×2
Queen← ·↑×8 ·→×4 ·↑ ·← · wait a moment · ↑
Hero wait about 2.5 s, ← · ↓ ·←×4 ·↑ ·←
Heroactivate ·↑×2 ·activate ·↓ ·activate
Hero→ ·↓ ·→ ·↑ ·← ·↑ ·→ ·↓
Hero activate as the crystal skips · wait about half a second, activate as the crystal skips · wait about 2 s, activate
Hero← ·↓×6 ·←×2
Frame-exact timing
Seconds from puzzle start · 60 fps · Start holding Ctrl + Shift; step 1 is immediate.
Queen: right 2, up 2. Hero: brief pause then left, down 1, left 4, up 1, left 1, activate, up 2, activate, down 1, activate, right 1, down 1, right 1, up 1, left 1, up 1, release Ctrl then wait about 1 s then right, wait for the crystal to reach two tiles right of its starting position then down, activate as the crystal skips, wait about half a second then activate as the crystal skips, wait about 2 s then activate, left 1, down 6, left 2. Queen: wait about 2.5 s then left, down 1, wait a moment, left 1, down 3, left 1, right 1, up 1, left 2, down 2, left 2, up 3, left 3, up 1, left 3, down 1, right 6, down 2, left 3, up 1, left 2, down 1, right 5, down 2, left 3, up 1, left 2, down 1, right 7, down 3, right 1, down 2, left 1, up 8, right 4, up 1, left 1, wait a moment, up 1. Hero: wait about 2.5 s then left, down 1, left 4, up 1, left 1, activate, up 2, activate, down 1, activate, right 1, down 1, right 1, up 1, left 1, up 1, right 1, down 1, activate as the crystal skips, wait about half a second then activate as the crystal skips, wait about 2 s then activate, left 1, down 6, left 2.
Hero · AnnihilatorScreen 6 of 8Opens after Exit Low 31
Hint 1
The six front-room blocks are the six rooms of the board, and the button under each block is that room's place along the corridor. Trial 1 plays them in a jumbled order.
Hint 2
After trial 1, face the Judge to melt the freezers. The Judge wants the rooms in this order: one crystal, three crystals, mirror and crystal, mirror and gap, mirror in the water, toggle bridge.
Hint 3
Push all six blocks off, then bring them back round the loop onto the buttons in the order 2nd, 4th, 6th, 5th, 1st, 3rd. Each room is then solved exactly as in trial 1.
Full solution912 steps
Verified in the game · build 25998871 · Oct 17, 2026
Play the six mirror rooms once in their jumbled order, then reorder them for the Judge and play them again.
Queen: right 6. Hero: right 3, up 1, right 2, up 2, right 1, down 2, left 1, down 1, right 2, up 1, left 4, down 2, right 1, up 1, left 1, up 1, right 2, down 1, right 1, up 2, left 1, up 1, right 2, activate, left 2, down 3, left 2, down 5, right 8, up 4, right 3, up 1, right 2, up 1, right 1, down 2, left 1, down 1, right 6, down 1, right 1, up 1, left 1, up 1, right 1, down 1, right 1, up 2, down 1, right 3, up 1, right 4, up 1, right 2, down 2, left 1, up 1, down 1, left 1, up 1, left 2, down 2, right 1, up 1, left 1, up 1, right 3, down 1, right 1, up 3, left 2, down 1, right 1, activate, up 1, right 1, down 4, up 4, activate, left 4, down 1, left 2, up 1, right 2, down 1, right 1, up 1, activate, right 3, up 2, activate, right 2, up 1, right 3, down 1, left 1, down 1, right 5, down 1, right 1, up 1, left 3, up 1, left 1, down 1, left 1, up 1, left 1, up 2, right 2, down 2, left 1, down 1, right 1, up 1, right 1, down 1, left 1, down 1, right 4, up 1, left 5, up 1, left 1, up 2, right 1, down 2, left 1, down 1, right 6, down 1, right 1, up 1, left 1, up 1, right 1, down 1, right 1, up 2, down 1, right 3, up 1, right 2, down 1, right 1, up 2, left 1, up 1, right 1, down 1, right 1, down 4, right 1, activate, down 1, left 1, activate, down 3, right 3, up 1, right 2, up 1, right 1, down 2, up 1, right 1, down 2, activate, right 1, up 1, right 1, down 2, up 1, left 1, up 2, left 2, down 1, right 2, activate, down 1, right 1, down 1, activate, right 1, up 1, right 1, down 1, left 3, activate, left 1, up 1, right 4, up 1, right 2, down 1, activate, up 1, left 1, up 1, right 1, down 1, right 1, up 2, down 1, right 3, up 1, right 2. Queen: up 1, left 1, up 4, left 7, down 2, up 2, right 1, down 2, up 2, right 1, down 2, up 2, right 1, down 2, up 2, right 1, down 2, up 2, right 1, down 2, left 4, down 2, right 1, down 1, left 2, down 1, left 1, up 5, left 1, up 1, right 1, up 1, right 1, down 1, left 2, down 2, right 5, down 2, right 1, down 1, left 4, down 1, left 1, up 5, left 1, up 1, right 2, up 1, right 1, down 1, left 3, down 2, right 7, down 2, right 1, down 1, left 6, down 1, left 1, up 5, left 1, up 1, right 3, up 1, right 1, down 1, left 4, down 2, right 6, down 2, right 1, down 1, left 5, down 1, left 1, up 5, left 1, up 1, right 4, up 1, right 1, down 1, left 5, down 2, right 2, down 2, right 1, down 1, left 1, down 1, left 1, up 5, left 1, up 1, right 5, up 1, right 1, down 1, left 6, down 2, right 4, down 2, right 1, down 1, left 3, down 1, left 1, up 5, left 1, up 1, right 6, up 1, right 1, down 1, right 2, down 5, right 1. Hero: right 3, up 1, right 1, down 2, left 1, down 1, right 6, down 1, right 1, up 1, left 1, up 1, right 1, down 1, right 1, up 2, down 1, right 3, up 1, right 3, down 1, left 1, down 1, right 5, down 1, right 1, up 1, left 3, up 1, left 1, down 1, left 1, up 1, left 1, up 2, right 2, down 2, left 1, down 1, right 1, up 1, right 1, down 1, left 1, down 1, right 4, up 1, left 5, up 1, left 1, up 2, right 1, down 2, left 1, down 1, right 6, down 1, right 1, up 1, left 1, up 1, right 1, down 1, right 1, up 2, down 1, right 3, up 1, right 2, up 1, right 1, down 2, up 1, right 1, down 2, activate, right 1, up 1, right 1, down 2, up 1, left 1, up 2, left 2, down 1, right 2, activate, down 1, right 1, down 1, activate, right 1, up 1, right 1, down 1, left 3, activate, left 1, up 1, right 4, up 1, right 2, down 1, activate, up 1, left 1, up 1, right 1, down 1, right 1, up 2, down 1, right 3, up 1, right 2, down 1, right 1, up 2, left 1, up 1, right 1, down 1, right 1, down 4, right 1, activate, down 1, left 1, activate, down 3, right 3, up 1, right 2, up 1, right 2, up 2, right 1, down 2, left 1, down 1, right 2, up 1, left 4, down 2, right 1, up 1, left 1, up 1, right 2, down 1, right 1, up 2, left 1, up 1, right 2, activate, left 2, down 3, left 2, down 5, right 8, up 4, right 3, up 1, right 4, up 1, right 2, down 2, left 1, up 1, down 1, left 1, up 1, left 2, down 2, right 1, up 1, left 1, up 1, right 3, down 1, right 1, up 3, left 2, down 1, right 1, activate, up 1, right 1, down 4, up 4, activate, left 4, down 1, left 2, up 1, right 2, down 1, right 1, up 1, activate, right 3, up 2, activate, right 2, up 1, right 2.
Hero · AnnihilatorScreen 6 of 8Opens after Exit Low 32
Hint 1
The six front-room blocks are the six rooms of the board, and the button under each block is that room's place along the corridor. A block lifted off its button removes its room.
Hint 2
After trial 1, the Judge wants the rooms in this order: one stone, one stone with more skips, stone and boulder, stone and two boulders, two stones and a boulder, four stones.
Hint 3
In every room the goal is the same: skip stones and push boulders so they sink in the gap in front of the room's way out. Each room is solved the same way whatever its place.
Full solution1331 steps
Verified in the game · build 26006400 · Oct 22, 2026
Play the six skipping-stone rooms in their jumbled order, slide the front-room blocks to sort them for the Judge, then play them again. Hold Shift throughout.
Start holding Shift; step 1 is immediate. Move as soon as you can; wait only where marked.
Hero→ ·↑ ·→ ·↓×5 ·← ·↓ ·→×2 · wait for the left skipping stone of the left pair to reach 4 tiles right and 5 tiles below its starting position, ↓ · →×3 ·↑ ·↓ ·←
Hero←×2 ·↑×4 ·← ·↑×4 ·→×4 ·↓×3 ·→×5 ·↓ ·→
Hero→×2 ·↑×3 ·→ ·↓ · wait for the right skipping stone of the left pair to reach two tiles below its starting position, ← · ↓×4 ·→×2 ·↑
Hero→×2 ·↑×3 ·← ·↑ ·→×4 ·↑ ·→ ·↓×2 · wait for the upper skipping stone in the bottom group's leftmost column to reach 4 tiles right of its starting position, ↑ · ←
Queen: right 6. Hero: wait about 2.5 s then right, right 3, down 2, right 1, up 5, left 1, up 1, right 4, up 1, right 1, down 1, left 5, down 1, left 1, down 1, right 1, up 1, right 1, down 5, left 1, down 1, right 2, wait for the left skipping stone of the left pair to reach 4 tiles right and 5 tiles below its starting position then down, right 3, up 1, down 1, left 3, up 4, left 1, up 4, right 4, down 3, right 5, down 1, right 3, up 3, right 1, down 1, wait for the right skipping stone of the left pair to reach two tiles below its starting position then left, down 4, right 2, up 1, left 1, down 1, left 1, up 2, left 1, up 2, right 1, down 4, right 1, down 3, left 2, up 1, right 1, down 1, right 1, up 2, right 1, up 2, left 2, down 1, right 2, down 1, right 3, up 1, down 1, left 3, up 2, right 1, up 2, right 7, down 1, right 3, up 3, left 1, up 1, right 4, up 1, right 1, down 2, wait for the upper skipping stone in the bottom group's leftmost column to reach 4 tiles right of its starting position then up, left 4, down 4, left 1, down 2, right 1, up 5, left 1, up 1, right 4, up 1, right 1, down 2, up 1, left 3, down 6, right 1, down 2, left 1, up 7, left 1, up 1, right 3, up 1, right 1, down 1, left 4, down 4, left 1, down 4, right 7, up 1, right 2, down 1, left 7, down 1, left 1, up 1, left 1, up 1, right 3, down 1, right 2, up 1, down 1, left 4, up 8, right 4, down 3, right 6, down 1, right 2, down 1, right 1, up 3, left 1, up 1, right 2, up 1, right 3, down 1, up 1, left 4, down 5, left 1, down 2, right 1, up 5, left 1, up 1, right 2, up 1, right 3, down 1, up 1, left 3, down 5, right 1, down 3, left 1, up 6, left 1, up 1, right 1, down 8, left 1, up 2, left 1, up 1, right 2, up 1, right 1, down 1, left 1, down 1, right 1, down 1, right 2, up 1, down 1, right 2, up 1, right 2, down 1, left 7, down 1, left 1, up 1, left 1, up 1, right 2, up 7, right 3, down 1, up 1, left 3, down 7, right 1, down 1, right 2, up 1, down 1, left 2, up 3, left 1, up 5, right 3, down 3, right 6, down 1, right 2, up 1, right 1, up 2, right 2, down 1, left 1, down 1, left 2, down 1, right 1, down 1, right 1, up 3, right 1, up 2, left 2, down 1, right 4, left 3, down 2, left 1, down 2, left 1, down 1, right 1, down 1, right 1, up 6, left 1, up 1, right 4, left 4, down 1, left 1, down 1, right 1, up 1, right 1, down 4, left 1, down 1, right 1, up 1, right 1, down 1, left 1, down 1, right 1, down 1, right 3, up 1, down 1, left 3, up 3, left 1, up 3, right 1, up 1, right 2, up 1, right 1, down 3, right 5, down 1, right 4, left 1, up 3, right 1, down 4, left 1, down 1, right 2, down 1, right 3, up 1, down 1, left 4, up 3, right 2, up 1, right 7, down 1, right 2. Queen: wait about 2.5 s then left, wait a moment, up 1, right 1, up 1, wait a moment, left 1, down 1, up 3, left 4, up 1, down 1, left 2, up 1, right 1, up 1, right 2, down 1, up 1, left 2, down 1, right 1, up 1, left 1, up 1, left 1, down 1, right 2, down 3, right 2, up 1, left 1, down 1, left 1, up 1, left 1, up 2, right 3, up 1, right 1, down 1, left 1, down 1, up 1, left 3, down 2, right 2, down 1, right 2, up 1, left 5, right 6, up 1, left 1, down 1, left 6, down 1, left 1, up 1, right 1, up 1, down 1, left 2, up 1, right 1, up 1, right 2, up 1, right 1, down 1, right 5, down 5, right 1. Hero: wait about 2.5 s then right, right 4, left 1, up 3, right 1, down 4, left 1, down 1, right 2, down 1, right 3, up 1, down 1, left 4, up 3, right 2, up 1, right 7, down 1, right 3, up 3, right 1, down 1, left 1, down 4, right 2, up 1, left 1, down 1, left 1, up 2, left 1, up 2, right 1, down 4, right 1, down 3, left 2, up 1, right 1, down 1, right 1, up 2, right 1, up 2, left 2, down 1, right 2, down 1, right 3, up 1, down 1, left 3, up 2, right 1, up 2, right 7, down 1, right 3, down 2, right 1, up 5, left 1, up 1, right 4, up 1, right 1, down 1, left 5, down 1, left 1, down 1, right 1, up 1, right 1, down 5, left 1, down 1, right 2, down 1, right 3, up 1, down 1, left 3, up 4, left 1, up 4, right 4, down 3, right 1, left 1, right 5, down 1, right 2, up 1, right 1, up 2, right 2, down 1, left 1, down 1, left 2, down 1, right 1, down 1, right 1, up 3, right 1, up 2, left 2, down 1, right 4, left 3, down 2, left 1, down 2, left 1, down 1, right 1, down 1, right 1, up 6, left 1, up 1, right 4, left 4, down 1, left 1, down 1, right 1, up 1, right 1, down 4, left 1, down 1, right 1, up 1, right 1, down 1, left 1, down 1, right 1, down 1, right 3, up 1, down 1, left 3, up 3, left 1, up 3, right 1, up 1, right 2, up 1, right 1, down 3, right 5, down 1, right 3, up 3, left 1, up 1, right 4, up 1, right 1, down 2, up 1, left 4, down 4, left 1, down 2, right 1, up 5, left 1, up 1, right 4, up 1, right 1, down 2, up 1, left 3, down 6, right 1, down 2, left 1, up 7, left 1, up 1, right 3, up 1, right 1, down 1, left 4, down 4, left 1, down 4, right 7, up 1, right 2, down 1, left 7, down 1, left 1, up 1, left 1, up 1, right 3, down 1, right 2, up 1, down 1, left 4, up 8, right 4, down 3, right 6, down 1, right 2, down 1, right 1, up 3, left 1, up 1, right 2, up 1, right 3, down 1, up 1, left 4, down 5, left 1, down 2, right 1, up 5, left 1, up 1, right 2, up 1, right 3, down 1, up 1, left 3, down 5, right 1, down 3, left 1, up 6, left 1, up 1, right 1, down 8, left 1, up 2, left 1, up 1, right 2, up 1, right 1, down 1, left 1, down 1, right 1, down 1, right 2, up 1, down 1, right 2, up 1, right 2, down 1, left 7, down 1, left 1, up 1, left 1, up 1, right 2, up 7, right 3, down 1, up 1, left 3, down 7, right 1, down 1, right 2, up 1, down 1, left 2, up 3, left 1, up 5, right 3, down 3, right 6, down 1, right 2.
Warrior · Priest · AnnihilatorScreen 6 of 8Opens after Exit Low 33
Hint 1
The Priest keeps every hero next to her safe from goblins, so the Warrior can walk up to a goblin and push it while she stands beside him. Each front-room block is one room of the board.
Hint 2
After trial 1, the Judge wants the off-topic rooms cut: the goblin-blocker and kill-goblins rooms must go, the mirror-goblin room may go too.
Hint 3
Step on and off the buttons under the 4th room's block, then the kill-goblins block and the mirror-goblin block: each gate crushes its block and that room is cut. Then replay the five rooms left.
Full solution1121 steps
Verified in the game · build 26006400 · Oct 21, 2026
Play all eight goblin rooms once, cut the off-topic ones in the front room, then play the five that remain. Hold Ctrl and Shift throughout.
Start holding Ctrl + Shift; step 1 is immediate. Move as soon as you can; wait only where marked.
Queen→×6
Warrior→ · wait about 2 s, → · →×2
Priest↓
Warrior↓ ·→ ·↓×2 ·→×2
Priest↓ ·→
Warrior↑ ·←×2 ·↑×2
Priest← ·↑
Warrior→×2
Priest↑
Warrior↑
Priest→
Warrior→×5
Priest↓
Warrior→ ·↓
Priest→×2
Warrior↓ ·→
Priest↑
Warrior→
Priest→
Warrior↑
Priest→ ·↓×3 ·→ ·↓ ·→×2
Warrior→×2
Warrior↓×3 ·→ ·↓ ·→×2 ·↓
Priest←
Warrior↑
Priest←
Warrior←
Priest↑
Warrior← ·↑×2 ·→×3
Priest↓
Warrior↓×2 ·→×2
Priest→
Warrior↑ ·←
Priest←×5
Warrior←×5 ·↑
Priest↑
Warrior↑
Warrior→×2
Priest↓
Warrior↓
Priest→
Warrior↓ ·→×2 ·↑
Priest→
Warrior→ ·↑×3
Priest→×3 ·↓ ·→ ·↓×2 ·→×2 ·↑ ·→
Warrior→×2
Warrior→×2 ·↓×2 ·→×2 ·↑
Priest→ ·↓×2 ·→ ·↓
Warrior→
Warrior→ ·↓×2 ·→ ·↓×2
Priest→ ·↑
Warrior→×2
Priest↑
Warrior→ ·↑×3
Priest←
Warrior← ·↑
Priest←
Warrior←×3
Priest↓
Warrior↓
Priest← ·↓
Warrior→
Priest↑×2 ·→
Warrior↑ ·→ ·↑ ·→×3 ·←×2
Priest←×2 ·↓×3 ·←
Warrior← ·↓ ·← ·↓×2 ·→×3
Priest↓
Warrior↓×2
Priest←×2 ·↑
Warrior← ·↑
Warrior↑
Priest←
Warrior← ·↑ ·← ·↑ ·→
Priest↓ ·→
Warrior↓ ·→ ·↓ ·→ ·↑
Priest←
Warrior↑ ·←
Priest↑
Warrior↑ ·↓
Priest→
Warrior← ·↑ ·→
Priest↓×5 ·←×3
Warrior↓ ·← ·↓ ·← ·↓×3
Priest→
Warrior↓
Priest↑
Warrior→
Warrior↑×2
Priest←
Warrior←
Priest↑
Warrior← ·↑×2 ·→×4
Warrior↑
Priest↑ ·→
Warrior→×4
Priest↓ ·→×2 ·↑ ·→
Warrior↓ ·→×3 ·↑ ·→
Warrior→×2
Priest↓
Warrior↓×2
Priest↓
Warrior→×2
Priest↓
Warrior→ ·↓
Priest→
Warrior↓
Priest↑
Warrior→ ·↑×3
Priest→
Warrior↑ ·→
Priest→ ·↓ ·→×3 ·↑ ·→
Warrior→×2 ·↓ ·→×3 ·↑
Priest→ ·↓×2 ·→ ·↓
Warrior→
Warrior→ ·↓×2 ·→ ·↓
Priest→
Warrior↓
Priest↑
Warrior→ ·↑
Priest←
Warrior←
Priest↑
Warrior← ·↑×2 ·→×3
Priest↓ ·→
Warrior↓ ·→×2 ·↓ ·→
Priest←
Warrior↑
Priest↓ ·↑ ·← ·↑×2 ·→×2 ·↓
Warrior↑×2
Priest→×3 ·↓×2 ·→×2 ·↑ ·→
Warrior↑ ·→×3 ·↓×2 ·→×2 ·↑ ·→
Warrior→×4 · brief pause, ↓
Priest←×2 ·↓
Warrior←×2
Priest↓
Warrior←
Priest→
Warrior↓ ·→
Priest wait about 2 s, ↓ · →×7 ·↑×2 ·→ · wait about 2 s, →
Priest wait about 2 s, → · → ·↑ ·→
Warrior↓ ·→×8 ·↑×2 ·→×2 ·↑
Priest→×2 ·↓ ·→
Warrior→
Warrior→ ·↓ ·→ ·↓ ·→ ·↑×2
Priest←
Warrior←
Priest↑
Warrior↑×2 ·↓
Priest↓
Warrior← ·↑ ·→
Priest↓
Warrior↓ ·→
Priest→
Warrior→×2 ·activate · wait about 2 s, activate while the 2nd-from-left goblin of the right group is falling
Priest→
Warrior→×3 ·activate · wait about 2 s, activate
Priest→ ·↓
Warrior→×2 ·↓
Priest→×2 ·↑ ·→
Warrior↓ ·→×2 ·↑
Priest→ ·↓×4 ·→
Warrior→
Warrior→ ·↓×4 ·→×6 ·↓ ·→ ·↓
Priest← ·↓ ·→×2
Warrior→ ·↑×2
Warrior←×6
Priest↓ ·←×5 ·↑×3 ·←
Warrior←×2 ·↑×3 ·→ ·↑ ·→
Warrior↓×2
Priest← ·↓
Warrior←×2 ·↓×2 ·→×5
Warrior←×5 ·↑×6 ·→ ·↑
Warrior→
Priest←×5 ·↑×6 ·→
Warrior↓
Priest← ·↓
Warrior←×2 ·↓×2 ·→
Priest↓ ·→ ·↓ ·→×3
Warrior↓×3 ·→×2 ·↑ ·→×3
Priest↓ ·→
Priest↓×2 ·←×2 ·↑ ·←×3 ·↑×3 ·→ ·↑ ·→×2
Warrior↑×2
Priest→×3 ·↓×2 ·→×2 ·↑ ·→×2
Warrior↑ ·→×3 ·↓×2 ·→×2 ·↑ ·→
Queen↑ · wait about 2 s, ↑ · ← ·↑×2 ·←×6 ·↑
Queen↑ ·↓
Queen→×2 ·↑ ·↓
Queen→ ·↑ ·↓
Queen→×3 ·↓×2 ·→ ·↓
Warrior→ · wait about 2 s, → · →×2
Priest↓
Warrior↓ ·→ ·↓×2 ·→×2
Priest↓ ·→
Warrior↑ ·←×2 ·↑×2
Priest← ·↑
Warrior→×2
Priest↑
Warrior↑
Priest→
Warrior→×5
Priest↓
Warrior→ ·↓
Priest→×2
Warrior↓ ·→
Priest↑
Warrior→
Priest→
Warrior↑
Priest→ ·↓×3 ·→ ·↓ ·→×2
Warrior→
Warrior→ ·↓×3 ·→ ·↓ ·→×2 ·↓
Priest←
Warrior↑
Priest←
Warrior←
Priest↑
Warrior← ·↑×2 ·→×3
Priest↓
Warrior↓×2 ·→×2
Priest→
Warrior↑ ·←
Priest←×5
Warrior←×5 ·↑
Priest↑
Warrior↑
Warrior→×2
Priest↓
Warrior↓
Priest→
Warrior↓ ·→×2 ·↑
Priest→
Warrior→ ·↑×3
Priest→×3 ·↓ ·→ ·↓×2 ·→×2 ·↑ ·→
Warrior→×2
Warrior→×2 ·↓×2 ·→×2 ·↑
Priest→ ·↓×2 ·→ ·↓
Warrior→
Warrior→ ·↓×2 ·→ ·↓×2
Priest→ ·↑
Warrior→×2
Priest↑
Warrior→ ·↑×3
Priest←
Warrior← ·↑
Priest←
Warrior←×3
Priest↓
Warrior↓
Priest← ·↓
Warrior→
Priest↑×2 ·→
Warrior↑ ·→ ·↑ ·→×3 ·←×2
Priest←×2 ·↓×3 ·←
Warrior← ·↓ ·← ·↓×2 ·→×3
Priest↓
Warrior↓×2
Priest←×2 ·↑
Warrior← ·↑
Warrior↑
Priest←
Warrior← ·↑ ·← ·↑ ·→
Priest↓ ·→
Warrior↓ ·→ ·↓ ·→ ·↑
Priest←
Warrior↑ ·←
Priest↑
Warrior↑ ·↓
Priest→
Warrior← ·↑ ·→
Priest↓×5 ·←×3
Warrior↓ ·← ·↓ ·← ·↓×3
Priest→
Warrior↓
Priest↑
Warrior→
Warrior↑×2
Priest←
Warrior←
Priest↑
Warrior← ·↑×2 ·→×4
Warrior↑
Priest↑ ·→
Warrior→×4
Priest↓ ·→×2 ·↑ ·→
Warrior↓ ·→×3 ·↑
Priest→ ·↓×2 ·→ ·↓
Warrior→
Warrior→ ·↓×2 ·→ ·↓
Priest→
Warrior↓
Priest↑
Warrior→ ·↑
Priest←
Warrior←
Priest↑
Warrior← ·↑×2 ·→×3
Priest↓ ·→
Warrior↓ ·→×2 ·↓ ·→
Priest←
Warrior↑
Priest↓ ·↑ ·← ·↑×2 ·→×2 ·↓
Warrior↑×2
Priest→×3 ·↓×2 ·→×2 ·↑ ·→
Warrior↑ ·→×3 ·↓×2 ·→×2 ·↑
Priest→ ·↓×4 ·→
Warrior→
Warrior→ ·↓×4 ·→×6 ·↓ ·→ ·↓
Priest← ·↓ ·→×2
Warrior→ ·↑×2
Warrior←×6
Priest↓ ·←×5 ·↑×3 ·←
Warrior←×2 ·↑×3 ·→ ·↑ ·→
Warrior↓×2
Priest← ·↓
Warrior←×2 ·↓×2 ·→×5
Warrior←×5 ·↑×6 ·→ ·↑
Warrior→
Priest←×5 ·↑×6 ·→
Warrior↓
Priest← ·↓
Warrior←×2 ·↓×2 ·→
Priest↓ ·→ ·↓ ·→×3
Warrior↓×3 ·→×2 ·↑ ·→×3
Priest↓ ·→
Priest↓×2 ·←×2 ·↑ ·←×3 ·↑×3 ·→ ·↑ ·→×2
Warrior↑×2
Priest→×3 ·↓×2 ·→×2 ·↑ ·→×2
Warrior↑ ·→×3 ·↓×2 ·→×2 ·↑ ·→
Frame-exact timing
Seconds from puzzle start · 60 fps · Start holding Ctrl + Shift; step 1 is immediate. · hold Ctrl+Shift throughout
Queen: right 6. Warrior: right 1, wait about 2 s then right, right 2. Priest: down 1. Warrior: down 1, right 1, down 2, right 2. Priest: down 1, right 1. Warrior: up 1, left 2, up 2. Priest: left 1, up 1. Warrior: right 2. Priest: up 1. Warrior: up 1. Priest: right 1. Warrior: right 5. Priest: down 1. Warrior: right 1, down 1. Priest: right 2. Warrior: down 1, right 1. Priest: up 1. Warrior: right 1. Priest: right 1. Warrior: up 1. Priest: right 1, down 3, right 1, down 1, right 2. Warrior: right 2, down 3, right 1, down 1, right 2, down 1. Priest: left 1. Warrior: up 1. Priest: left 1. Warrior: left 1. Priest: up 1. Warrior: left 1, up 2, right 3. Priest: down 1. Warrior: down 2, right 2. Priest: right 1. Warrior: up 1, left 1. Priest: left 5. Warrior: left 5, up 1. Priest: up 1. Warrior: up 1, right 2. Priest: down 1. Warrior: down 1. Priest: right 1. Warrior: down 1, right 2, up 1. Priest: right 1. Warrior: right 1, up 3. Priest: right 3, down 1, right 1, down 2, right 2, up 1, right 1. Warrior: right 4, down 2, right 2, up 1. Priest: right 1, down 2, right 1, down 1. Warrior: right 2, down 2, right 1, down 2. Priest: right 1, up 1. Warrior: right 2. Priest: up 1. Warrior: right 1, up 3. Priest: left 1. Warrior: left 1, up 1. Priest: left 1. Warrior: left 3. Priest: down 1. Warrior: down 1. Priest: left 1, down 1. Warrior: right 1. Priest: up 2, right 1. Warrior: up 1, right 1, up 1, right 3, left 2. Priest: left 2, down 3, left 1. Warrior: left 1, down 1, left 1, down 2, right 3. Priest: down 1. Warrior: down 2. Priest: left 2, up 1. Warrior: left 1, up 2. Priest: left 1. Warrior: left 1, up 1, left 1, up 1, right 1. Priest: down 1, right 1. Warrior: down 1, right 1, down 1, right 1, up 1. Priest: left 1. Warrior: up 1, left 1. Priest: up 1. Warrior: up 1, down 1. Priest: right 1. Warrior: left 1, up 1, right 1. Priest: down 5, left 3. Warrior: down 1, left 1, down 1, left 1, down 3. Priest: right 1. Warrior: down 1. Priest: up 1. Warrior: right 1, up 2. Priest: left 1. Warrior: left 1. Priest: up 1. Warrior: left 1, up 2, right 4, up 1. Priest: up 1, right 1. Warrior: right 4. Priest: down 1, right 2, up 1, right 1. Warrior: down 1, right 3, up 1, right 3. Priest: down 1. Warrior: down 2. Priest: down 1. Warrior: right 2. Priest: down 1. Warrior: right 1, down 1. Priest: right 1. Warrior: down 1. Priest: up 1. Warrior: right 1, up 3. Priest: right 1. Warrior: up 1, right 1. Priest: right 1, down 1, right 3, up 1, right 1. Warrior: right 2, down 1, right 3, up 1. Priest: right 1, down 2, right 1, down 1. Warrior: right 2, down 2, right 1, down 1. Priest: right 1. Warrior: down 1. Priest: up 1. Warrior: right 1, up 1. Priest: left 1. Warrior: left 1. Priest: up 1. Warrior: left 1, up 2, right 3. Priest: down 1, right 1. Warrior: down 1, right 2, down 1, right 1. Priest: left 1. Warrior: up 1. Priest: down 1, up 1, left 1, up 2, right 2, down 1. Warrior: up 2. Priest: right 3, down 2, right 2, up 1, right 1. Warrior: up 1, right 3, down 2, right 2, up 1, right 5, brief pause then down. Priest: left 2, down 1. Warrior: left 2. Priest: down 1. Warrior: left 1. Priest: right 1. Warrior: down 1, right 1. Priest: wait about 2 s then down, right 7, up 2, right 1, wait about 2 s then right, wait about 2 s then right, right 1, up 1, right 1. Warrior: down 1, right 8, up 2, right 2, up 1. Priest: right 2, down 1, right 1. Warrior: right 2, down 1, right 1, down 1, right 1, up 2. Priest: left 1. Warrior: left 1. Priest: up 1. Warrior: up 2, down 1. Priest: down 1. Warrior: left 1, up 1, right 1. Priest: down 1. Warrior: down 1, right 1. Priest: right 1. Warrior: right 2, activate, wait about 2 s then activate while the 2nd-from-left goblin of the right group is falling. Priest: right 1. Warrior: right 3, activate, wait about 2 s then activate. Priest: right 1, down 1. Warrior: right 2, down 1. Priest: right 2, up 1, right 1. Warrior: down 1, right 2, up 1. Priest: right 1, down 4, right 1. Warrior: right 2, down 4, right 6, down 1, right 1, down 1. Priest: left 1, down 1, right 2. Warrior: right 1, up 2, left 6. Priest: down 1, left 5, up 3, left 1. Warrior: left 2, up 3, right 1, up 1, right 1, down 2. Priest: left 1, down 1. Warrior: left 2, down 2, right 5, left 5, up 6, right 1, up 1, right 1. Priest: left 5, up 6, right 1. Warrior: down 1. Priest: left 1, down 1. Warrior: left 2, down 2, right 1. Priest: down 1, right 1, down 1, right 3. Warrior: down 3, right 2, up 1, right 3. Priest: down 1, right 1, down 2, left 2, up 1, left 3, up 3, right 1, up 1, right 2. Warrior: up 2. Priest: right 3, down 2, right 2, up 1, right 2. Warrior: up 1, right 3, down 2, right 2, up 1, right 1. Queen: up 1, wait about 2 s then up, left 1, up 2, left 6, up 2, down 1, right 2, up 1, down 1, right 1, up 1, down 1, right 3, down 2, right 1, down 1. Warrior: right 1, wait about 2 s then right, right 2. Priest: down 1. Warrior: down 1, right 1, down 2, right 2. Priest: down 1, right 1. Warrior: up 1, left 2, up 2. Priest: left 1, up 1. Warrior: right 2. Priest: up 1. Warrior: up 1. Priest: right 1. Warrior: right 5. Priest: down 1. Warrior: right 1, down 1. Priest: right 2. Warrior: down 1, right 1. Priest: up 1. Warrior: right 1. Priest: right 1. Warrior: up 1. Priest: right 1, down 3, right 1, down 1, right 2. Warrior: right 2, down 3, right 1, down 1, right 2, down 1. Priest: left 1. Warrior: up 1. Priest: left 1. Warrior: left 1. Priest: up 1. Warrior: left 1, up 2, right 3. Priest: down 1. Warrior: down 2, right 2. Priest: right 1. Warrior: up 1, left 1. Priest: left 5. Warrior: left 5, up 1. Priest: up 1. Warrior: up 1, right 2. Priest: down 1. Warrior: down 1. Priest: right 1. Warrior: down 1, right 2, up 1. Priest: right 1. Warrior: right 1, up 3. Priest: right 3, down 1, right 1, down 2, right 2, up 1, right 1. Warrior: right 4, down 2, right 2, up 1. Priest: right 1, down 2, right 1, down 1. Warrior: right 2, down 2, right 1, down 2. Priest: right 1, up 1. Warrior: right 2. Priest: up 1. Warrior: right 1, up 3. Priest: left 1. Warrior: left 1, up 1. Priest: left 1. Warrior: left 3. Priest: down 1. Warrior: down 1. Priest: left 1, down 1. Warrior: right 1. Priest: up 2, right 1. Warrior: up 1, right 1, up 1, right 3, left 2. Priest: left 2, down 3, left 1. Warrior: left 1, down 1, left 1, down 2, right 3. Priest: down 1. Warrior: down 2. Priest: left 2, up 1. Warrior: left 1, up 2. Priest: left 1. Warrior: left 1, up 1, left 1, up 1, right 1. Priest: down 1, right 1. Warrior: down 1, right 1, down 1, right 1, up 1. Priest: left 1. Warrior: up 1, left 1. Priest: up 1. Warrior: up 1, down 1. Priest: right 1. Warrior: left 1, up 1, right 1. Priest: down 5, left 3. Warrior: down 1, left 1, down 1, left 1, down 3. Priest: right 1. Warrior: down 1. Priest: up 1. Warrior: right 1, up 2. Priest: left 1. Warrior: left 1. Priest: up 1. Warrior: left 1, up 2, right 4, up 1. Priest: up 1, right 1. Warrior: right 4. Priest: down 1, right 2, up 1, right 1. Warrior: down 1, right 3, up 1. Priest: right 1, down 2, right 1, down 1. Warrior: right 2, down 2, right 1, down 1. Priest: right 1. Warrior: down 1. Priest: up 1. Warrior: right 1, up 1. Priest: left 1. Warrior: left 1. Priest: up 1. Warrior: left 1, up 2, right 3. Priest: down 1, right 1. Warrior: down 1, right 2, down 1, right 1. Priest: left 1. Warrior: up 1. Priest: down 1, up 1, left 1, up 2, right 2, down 1. Warrior: up 2. Priest: right 3, down 2, right 2, up 1, right 1. Warrior: up 1, right 3, down 2, right 2, up 1. Priest: right 1, down 4, right 1. Warrior: right 2, down 4, right 6, down 1, right 1, down 1. Priest: left 1, down 1, right 2. Warrior: right 1, up 2, left 6. Priest: down 1, left 5, up 3, left 1. Warrior: left 2, up 3, right 1, up 1, right 1, down 2. Priest: left 1, down 1. Warrior: left 2, down 2, right 5, left 5, up 6, right 1, up 1, right 1. Priest: left 5, up 6, right 1. Warrior: down 1. Priest: left 1, down 1. Warrior: left 2, down 2, right 1. Priest: down 1, right 1, down 1, right 3. Warrior: down 3, right 2, up 1, right 3. Priest: down 1, right 1, down 2, left 2, up 1, left 3, up 3, right 1, up 1, right 2. Warrior: up 2. Priest: right 3, down 2, right 2, up 1, right 2. Warrior: up 1, right 3, down 2, right 2, up 1, right 1.
Hero · AnnihilatorScreen 6 of 8Opens after Exit Low 34
Hint 1
Each front-room block is one mirror room of the board. In every room, boulders pushed into the water become ground, and Activate teleports you across the mirror to the far side.
Hint 2
After trial 1, the Judge wants the off-topic rooms cut: the sink-a-stone and button-in-the-water rooms must go; the get-behind room may stay.
Hint 3
Step on and off the button under the 4th room's block, then the one under the button-in-the-water block. Then replay the six rooms left.
Full solution689 steps
Verified in the game · build 26006400 · Oct 21, 2026
Play all eight mirror rooms once, cut the two off-topic ones in the front room, then play the six that remain. Hold Ctrl and Shift throughout.
Start holding Ctrl + Shift; step 1 is immediate. Move as soon as you can; wait only where marked.
Hero wait for the boulder in the bottom-right group's 2nd column from the left to fall to one tile left of the right switch, ← · ← ·↓×2 ·→ ·↑ ·← ·↑ ·→×3
Hero wait for the bottom right mirror to land on the right switch, ← · ←×2 ·↓×6 ·→×7 ·↑×3 ·→×2 ·↑ ·→
Hero→
Queen wait about 2.5 s, ← · ↑×2 ·→ ·←×6 ·↑×2
Queen brief pause, ↑ · ↓
Queen→×4 ·↑ ·↓
Queen↓ ·→×2 ·↓×2
Queen→
Hero wait about 2.5 s, → · →×2 ·↓×2 ·→ ·↓ ·→ ·↑×4
Hero↓×2 ·← ·↑ ·← ·↑ ·→ ·↓ ·→ ·↑
Hero↓×4 ·activate ·→×2 ·↓×3 ·→×2 ·↑ ·→
Hero→ ·↓×2 ·→ ·← ·↓×2 ·→×2 ·↑×4
Hero←×2 ·↓×3 ·→ ·↓ ·→ ·↑×5
Hero↓ ·←×2 ·↓ ·→ ·↓ ·→ ·↑×3
Hero↓×5 ·activate ·→ ·↓×3 ·→×2 ·↑ ·→
Hero→×2 ·↓×3
Hero↑ ·← ·↑ ·→×3 ·↑ ·← ·↓ ·←×2 ·↑×2 ·→ ·↓×5
Hero↑×4 ·→×2 ·↑ ·←
Hero↓ ·← ·↓×5 ·activate ·→×2 ·↓×2 ·→×2 ·↑ ·→
Hero→×2 ·↓ ·→ ·↓ ·→ ·↑×3
Hero←×3 ·↓×3 ·→×2 ·↑ ·→ ·↓
Hero brief pause, ← · ← ·↑×2 ·→ ·↓ ·→ ·↑×2
Hero↓×4 ·activate ·→ ·↓×3 ·→×2 ·↑ ·→
Hero→×2 ·↑ ·→ ·↓ ·← ·↓ ·→
Hero↑ ·→×3 ·↓ ·→ ·activate ·←
Hero↑×2 ·→ ·↑
Hero↓ ·←×2 ·↑ ·→×10 ·↑ ·→
Hero→×2 ·↓×2 ·← ·↓ ·→×3
Hero← ·↑×4 ·↓ ·←×2 ·↑×2 ·→×3
Hero↓×2 ·←×2 ·↑ ·← ·↑ ·→×3
Hero↓×3 ·← ·↓×2 ·→×2 ·activate ·↓×3 ·→×2 ·↑ ·→×2
Frame-exact timing
Seconds from puzzle start · 60 fps · Start holding Ctrl + Shift; step 1 is immediate. · hold Ctrl+Shift throughout
Queen: right 6. Hero: right 1, wait about 2 s then right, right 2, down 2, right 1, down 1, right 1, up 4, down 2, left 1, up 1, left 1, up 1, right 1, down 1, right 1, up 1, down 4, activate, right 2, down 3, right 2, up 1, right 2, down 2, right 1, left 1, down 2, right 2, up 4, left 2, down 3, right 1, down 1, right 1, up 5, down 1, left 2, down 1, right 1, down 1, right 1, up 3, down 5, activate, right 1, down 3, right 2, up 1, right 3, down 3, up 1, left 1, up 1, right 3, up 1, left 1, down 1, left 2, up 2, right 1, down 5, up 4, right 2, up 1, left 1, down 1, left 1, down 5, activate, right 2, down 2, right 2, up 1, right 3, up 1, left 1, up 1, right 5, left 3, down 3, left 1, down 1, right 1, up 1, right 1, down 1, left 1, down 1, right 3, down 1, right 1, up 1, wait about 2 s then left, left 3, up 3, left 2, up 2, right 6, down 1, right 3, down 2, right 2, up 1, right 3, down 1, right 1, down 1, right 1, up 3, left 3, down 3, right 2, up 1, right 1, down 1, brief pause then left, left 1, up 2, right 1, down 1, right 1, up 2, down 4, activate, right 1, down 3, right 2, up 1, right 3, up 1, right 1, down 1, left 1, down 1, right 1, up 1, right 3, down 1, right 1, activate, left 1, up 2, right 1, up 1, down 1, left 2, up 1, right 10, up 1, right 3, down 2, left 1, down 1, right 3, left 1, up 4, down 1, left 2, up 2, right 3, down 2, left 2, up 1, left 1, up 1, right 3, down 3, left 1, down 2, right 2, activate, down 3, right 2, up 1, right 2, down 3, right 2, up 1, right 1, up 3, left 1, up 1, right 1, wait for the boulder in the bottom-right group's rightmost column to fall to two tiles left of the right switch then down, down 2, left 1, up 1, down 1, left 2, down 2, right 1, up 2, left 1, up 1, right 2, down 1, right 1, up 2, down 1, left 2, up 1, right 1, up 1, right 2, wait for the boulder in the bottom-right group's 2nd column from the left to fall to one tile left of the right switch then left, left 1, down 2, right 1, up 1, left 1, up 1, right 3, wait for the bottom right mirror to land on the right switch then left, left 2, down 6, right 7, up 3, right 2, up 1, right 2. Queen: wait about 2.5 s then left, up 2, right 1, left 6, up 2, brief pause then up, down 1, right 4, up 1, down 2, right 2, down 2, right 1. Hero: wait about 2.5 s then right, right 2, down 2, right 1, down 1, right 1, up 4, down 2, left 1, up 1, left 1, up 1, right 1, down 1, right 1, up 1, down 4, activate, right 2, down 3, right 2, up 1, right 2, down 2, right 1, left 1, down 2, right 2, up 4, left 2, down 3, right 1, down 1, right 1, up 5, down 1, left 2, down 1, right 1, down 1, right 1, up 3, down 5, activate, right 1, down 3, right 2, up 1, right 3, down 3, up 1, left 1, up 1, right 3, up 1, left 1, down 1, left 2, up 2, right 1, down 5, up 4, right 2, up 1, left 1, down 1, left 1, down 5, activate, right 2, down 2, right 2, up 1, right 3, down 1, right 1, down 1, right 1, up 3, left 3, down 3, right 2, up 1, right 1, down 1, brief pause then left, left 1, up 2, right 1, down 1, right 1, up 2, down 4, activate, right 1, down 3, right 2, up 1, right 3, up 1, right 1, down 1, left 1, down 1, right 1, up 1, right 3, down 1, right 1, activate, left 1, up 2, right 1, up 1, down 1, left 2, up 1, right 10, up 1, right 3, down 2, left 1, down 1, right 3, left 1, up 4, down 1, left 2, up 2, right 3, down 2, left 2, up 1, left 1, up 1, right 3, down 3, left 1, down 2, right 2, activate, down 3, right 2, up 1, right 2.
Each front-room block is one skipping-stone room of the board. In most rooms a stone must skip or sink onto a button to open the gate.
Hint 2
After trial 1, the Judge wants the off-topic rooms cut: the cart and goblins rooms must go; the tree room may go too.
Hint 3
Step on and off the buttons under the goblins, tree and cart blocks: each gate crushes its block and that room is cut. Then replay the five stone rooms.
Full solution1043 steps
Verified in the game · build 26006400 · Oct 22, 2026
Queen: right 6. Hero: brief pause then right, right while the cart crosses, right 1, down 1, right 1, up 1, left 1, up 1, right 2, up 1, right 3, down 1, up 1, left 3, down 2, left 1, down 3, right 3, up 1, right 1, down 1, right 1, up 2, down 1, left 2, down 1, left 3, up 3, right 1, up 2, right 3, down 1, right 1, left 1, up 1, left 3, down 2, left 1, down 3, right 5, up 1, right 1, up 1, right 4, up 1, right 4, down 3, right 4, down 1, right 1, up 2, left 1, down 1, left 2, up 1, left 3, up 1, left 1, up 1, right 2, down 2, right 2, down 1, right 3, up 3, right 1, down 1, right 3, up 1, right 4, left 1, down 2, right 1, down 2, wait about 10 s then up, wait about 18 s then up, left 1, up 2, right 1, wait about 24 s then down, right 1, down 1, right 4, down 1, wait about 6 s then up, up 1, left 1, down 1, brief pause then right, down 1, wait about 34 s, up 2, wait about 6.5 s then up, right 1, up 1, left 1, down 1, left 1, up 2, wait about 16 s then down, down 2, wait about 8.5 s then up, up 3, wait for the cart to land on the rightmost switch of the left group then wait a moment, down 3, right 3, wait about 9.5 s then right, right 1, up 1, right 4, down 1, right 1, down 2, right 5, up 1, right 1, up 2, left 1, down 1, right 1, down 1, left 1, down 1, left 6, up 1, right 1, up 1, left 2, up 2, right 1, down 2, left 1, down 1, right 2, down 1, right 5, up 1, right 1, up 2, left 1, down 1, right 1, down 1, left 1, down 1, left 1, up 1, right 2, up 1, right 2, up 1, right 4, down 1, right 1, up 1, left 1, up 1, right 1, brief pause then down, down 2, left 3, down 3, right 6, up 2, right 1, up 1, left 1, down 2, left 4, down 1, left 2, up 3, right 2, up 1, right 1, down 1, left 3, down 3, right 2, up 1, right 1, down 1, right 1, up 1, wait about 1.5 s then left, left 1, down 1, left 2, up 3, right 3, up 5, right 2, down 1, left 1, up 1, left 1, down 2, left 1, down 2, right 1, up 1, left 1, up 1, right 1, wait for the 4th-from-left skipping stone of the bottom group to land on the right switch of the middle pair then down, down 1, left 3, down 4, right 7, up 1, right 2, up 3, right 2, up 1, right 5, up 1, right 1, down 1, left 2, down 1, left 1, down 3, right 4, down 1, right 1, up 1, right 1, up 1, left 1, down 1, left 1, up 1, brief pause then down, left 4, up 3, right 1, up 1, right 2, up 2, right 1, up 1, right 4, down 1, up 1, left 4, down 1, left 1, down 2, left 2, down 1, left 1, down 3, right 6, up 1, right 1, up 2, right 3, up 1, right 4, down 1, right 1, up 1, left 1, up 1, right 1, left 1, down 2, left 1, down 1, left 1, down 3, right 2, up 1, down 1, left 2, up 3, right 1, up 2, right 2, down 1, left 1, up 1, left 2, down 2, right 1, up 1, left 1, up 1, right 2, down 1, right 1, up 1, left 1, up 1, right 3, left 2, down 2, left 2, down 1, left 1, down 3, right 4, up 1, brief pause then left, left 1, down 1, left 2, up 3, right 1, up 1, right 2, up 2, right 2, left 2, down 2, left 3, down 4, right 6, up 1, right 3, up 3, right 2, up 1, right 3, activate, right 1, activate, right 1, down 1, left 1, down 1, right 1, up 1, right 1, down 1, left 1, activate, right 1, up 1, right 3, up 1, right 2, down 1, right 2, up 1, right 2. Queen: wait about 8.5 s then left, up 1, right 1, up 1, left 1, wait about 6 s then up, up 2, left 2, up 1, down 1, left 2, up 1, down 1, left 3, up 1, down 1, right 7, down 3, right 1. Hero: wait about 11 s then right, right 2, down 1, right 1, up 1, left 1, up 1, right 2, up 1, right 3, down 1, up 1, left 3, down 2, left 1, down 3, right 3, up 1, right 1, down 1, right 1, up 2, down 1, left 2, down 1, left 3, up 3, right 1, up 2, right 3, down 1, right 1, left 1, up 1, left 3, down 2, left 1, down 3, right 5, up 1, right 1, up 1, right 4, up 1, right 4, down 3, right 4, down 1, right 1, up 2, left 1, down 1, left 2, up 1, left 3, up 1, left 1, up 1, right 2, down 2, right 2, down 1, right 3, up 3, right 1, down 1, right 3, up 1, right 4, down 1, right 1, down 2, right 5, up 1, right 1, up 2, left 1, down 1, right 1, down 1, left 1, down 1, left 6, up 1, right 1, up 1, left 2, up 2, right 1, down 2, left 1, down 1, right 2, down 1, right 5, up 1, right 1, up 2, left 1, down 1, right 1, down 1, left 1, down 1, left 1, up 1, right 2, up 1, right 2, up 1, right 4, down 1, right 1, up 1, left 1, up 1, right 1, brief pause then down, down 2, left 3, down 3, right 6, up 2, right 1, up 1, left 1, down 2, left 4, down 1, left 2, up 3, right 2, up 1, right 1, down 1, left 3, down 3, right 2, up 1, right 1, down 1, right 1, up 1, wait about 1.5 s then left, left 1, down 1, left 2, up 3, right 3, up 5, right 2, down 1, left 1, up 1, left 1, down 2, left 1, down 2, right 1, up 1, left 1, up 1, right 1, brief pause then down, down 1, left 3, down 4, right 7, up 1, right 2, up 3, right 2, up 1, right 4, down 1, right 1, up 1, left 1, up 1, right 1, left 1, down 2, left 1, down 1, left 1, down 3, right 2, up 1, down 1, left 2, up 3, right 1, up 2, right 2, down 1, left 1, up 1, left 2, down 2, right 1, up 1, left 1, up 1, right 2, down 1, right 1, up 1, left 1, up 1, right 3, left 2, down 2, left 2, down 1, left 1, down 3, right 4, up 1, brief pause then left, left 1, down 1, left 2, up 3, right 1, up 1, right 2, up 2, right 2, left 2, down 2, left 3, down 4, right 6, up 1, right 3, up 3, right 2, up 1, right 2.
Wizard · Beam source · Gate ×3 · Goblin · Boulder ×5 · Button · Gem pad · Gem ×3 · Skipping stone ×2Screen 7 of 8
Hint 1
The Wizard swaps with the first piece in line. In a Double beam, his steps and swap ray jump two tiles at a time, so he can skip a piece beside him.
Hint 2
Put the left gem on its pad. Move the Double source up one row, enter its beam from below, and hop left past it. Three swaps put the source on the bottom row for the crossing to the goblin.
Hint 3
For the perfect verdict, remove the two extra boulders, the two left stones and the spare right gem. Keep the power gem, Double source, goblin, button rock, both exit-room rocks and the gem that the final Double swap skips. Return beside the Judge before trial 2.
Full solution264 steps
Verified in the game · build 26249670 · Nov 10, 2026
Route by XZadare
Finish the first trial, then crush both extra boulders, both left stones and the spare right gem. Keep the other pieces for the Judge's best verdict: "This is perfect. I couldn't do better myself." Use the Double beam to hop past its source and skip the gem on the exit line.
Queen←×5 ·↓
Wizard↑×2 ·→ ·↑ ·←×3 ·↓ ·→ ·↑ ·← ·↓×3 ·↑
Wizard← ·↓×4 ·→×4 ·↑ ·←
Wizard↑×5 ·→×7 ·↓
Wizard→ ·↑ ·←×7 ·→
Wizard←×3 ·↓ ·← ·↓×6 ·↑
Wizard← ·↓×7 ·→×2 ·↓ ·→
Wizard←×5 ·↑ ·→ ·↓ ·→×3 ·↓ ·→×4 ·↓ ·←
Wizard↑ ·→×8 ·↑ ·↓
Wizard←×2 ·↑ ·→ ·↑
Queen↑ ·→×6 ·↑×2 ·→×2
Queen↑×2 ·→×3 ·↑ ·→×5 ·↓ ·↑
Queen←×10 ·↑ ·←×2
Queen← ·↓×4 ·←
Queen← ·↓×2 ·← ·↓
Wizard↑×2 ·→ ·↑ ·←×4 ·↓×3 ·↑ ·← ·↓×3 ·→×4 ·←
Wizard↑ ·→ ·↑×4 ·→×7 ·↓
Wizard→ ·↑ ·←×7 ·→
Wizard←×3 ·↓ ·← ·↓×6 ·↑
Wizard← ·↓×6 ·→×2 ·↓×2 ·→
Wizard←×5 ·↑ ·→ ·↓ ·→×3 ·↓ ·→×4 ·↓ ·←
Wizard↑ ·→×8 ·↑ ·↓
Wizard←×2 ·↑ ·→ ·↑
Queen: left 5, down 1. Wizard: up 2, right 1, up 1, left 3, down 1, right 1, up 1, left 1, down 3, up 1, left 1, down 4, right 4, up 1, left 1, up 5, right 7, down 1, right 1, up 1, left 7, right 1, left 3, down 1, left 1, down 6, up 1, left 1, down 7, right 2, down 1, right 1, left 5, up 1, right 1, down 1, right 3, down 1, right 4, down 1, left 1, up 1, right 8, up 1, down 1, left 2, up 1, right 1, up 1. Queen: up 1, right 6, up 2, right 2, up 2, right 3, up 1, right 5, down 1, up 1, left 10, up 1, left 3, down 4, left 2, down 2, left 1, down 1. Wizard: up 2, right 1, up 1, left 4, down 3, up 1, left 1, down 3, right 4, left 1, up 1, right 1, up 4, right 7, down 1, right 1, up 1, left 7, right 1, left 3, down 1, left 1, down 6, up 1, left 1, down 6, right 2, down 2, right 1, left 5, up 1, right 1, down 1, right 3, down 1, right 4, down 1, left 1, up 1, right 8, up 1, down 1, left 2, up 1, right 1, up 1.
Hero · Skipping stone · Gate ×9 · Button · Boulder ×2Screen 7 of 8Opens after Exit Low 35
Hint 1
The board is solved the same way both times. In the front room, a button beside a block shuts a gate on it and crushes it, removing a piece the solution does not need.
Hint 2
After trial 1, the Judge wants the board simplified: crush the top block, the right block of the middle row and the rightmost block.
Hint 3
On the board: sink both boulders as bridges, skip the stone up to the top row, then skip it right onto the button to open the exit gate.
Full solution212 steps
Verified in the game · build 25882299 · Oct 14, 2026
Play the skipping board once, crush three unneeded pieces in the front room, then play it again.
Move as soon as you can; wait only where marked.
Queen↑ ·→×4 ·↑
Hero↓×2 ·← ·↑ ·← ·↑ ·→×3
Hero→ ·←×2 ·↓×5 ·→×4 ·↓ ·→ ·↑
Hero←×5 ·↑×7 ·← ·↓×3 ·← ·↓ ·→×2 ·↑ ·→ ·↓×3
Hero← ·↓ ·→×4 ·↓ ·→ ·↑
Hero↑×2 · wait for the skipping stone to reach 4 tiles right and 5 tiles above its starting position, ↓
Queen: up 1, right 4, up 1. Hero: down 2, left 1, up 1, left 1, up 1, right 4, left 2, down 5, right 4, down 1, right 1, up 1, left 5, up 7, left 1, down 3, left 1, down 1, right 2, up 1, right 1, down 3, left 1, down 1, right 4, down 1, right 1, up 3, wait for the skipping stone to reach 4 tiles right and 5 tiles above its starting position then down, down 1, left 5, up 5, right 4, up 1, right 1, left 1, down 1, left 4, up 1, left 2, up 1. Queen: left 1, down 2, left 1, up 1, left 5, up 1, right 1, up 1, down 1, right 2, down 5, up 1, right 2, up 4, right 1, up 1. Hero: down 2, left 1, up 1, left 1, up 1, right 4, left 2, down 5, right 4, down 1, right 1, up 1, left 5, up 7, left 1, down 3, left 1, down 1, right 2, up 1, right 1, down 3, left 1, down 1, right 4, down 1, right 1, up 3, down 2, left 5, up 5, right 4, up 1, right 1, left 1, down 1, left 4, up 1, left 2, up 1.
Gems on all five pads light the green Through beam that lets the Gemsman walk through the wall to the exit. In a cyan Strong beam he pushes like a Warrior; in a red Open beam he bumps gates open; in a yellow Smash beam a bumped boulder breaks.
Hint 2
After trial 1, the Judge wants the redundant beam sources gone. In the front room, a button beside a beam source shuts a gate on it and crushes it: crush three yellow, two cyan and the bottom-left red one.
Hint 3
In trial 2, push the middle red beam source left along its row to open both lower gates one after the other, collect all five gems and fill the pads.
Full solution351 steps
Verified in the game · build 25998871 · Oct 20, 2026
Play the gem board once, crush six redundant beam sources in the front room, then collect the gems using only the beams that remain.
Queen: down 1, right 5. Gemsman: up 1, left 3, up 3, take gem, down 5, left 2, down 3, left 1, down 2, right 1, up 2, left 1, up 2, right 5, down 2, left 1, down 4, take gem, up 3, right 2, down 4, take gem, up 3, right 5, up 2, right 1, up 1, left 1, up 2, right 1, down 7, right 1, take gem, left 1, down 2, left 1, up 3, left 12, down 5, take gem, up 5, right 11, down 5, right 4, place gem, up 1, place gem, left 1, place gem, right 2, place gem, left 1, up 1, place gem, down 2, right 3, up 1, right 2. Queen: up 1, left 1, up 2, left 12, up 8, down 11, right 4, up 11, right 3, down 3, left 1, right 4, down 8, right 2. Gemsman: left 4, up 2, right 2, up 1, take gem, down 3, right 7, down 1, right 2, up 1, left 1, up 2, right 1, down 7, right 1, take gem, left 1, down 2, left 1, up 4, left 5, down 2, left 1, down 4, take gem, up 3, right 1, up 2, left 2, down 1, left 1, down 5, take gem, up 4, left 4, down 5, take gem, up 5, right 11, down 5, right 4, place gem, up 2, place gem, down 1, left 1, place gem, right 1, place gem, right 1, place gem, up 1, right 2, down 1, right 2.
Hero ×2 · Skipping stoneScreen 7 of 8Opens after Exit Low 37
Hint 1
Each column of front-room buttons picks one version of a part of the pool; the block on it chooses which. Trial 1 is played with the noisy versions.
Hint 2
After trial 1, the Judge wants the clean version of every part: pull the four blocks down two, three, two and one.
Hint 3
On the board Hero 1 and Hero 2 pass the skipping stone back and forth across the pool, then Hero 1 sinks it as the bridge to the middle exit while both reach their exits.
Full solution334 steps
Verified in the game · build 26249670 · Nov 3, 2026
Queen: left 1. Hero 1: wait about 2.5 s then right, right 2, up 1, right 2, up 1, right 2, down 3, left 1. Hero 2: wait for the skipping stone to reach one tile left of its starting position then up, right 1. Hero 1: right 1, up 3, left 2, down 1, left 2, down 1, left 1. Hero 2: right 1. Hero 1: down 1. Hero 2: brief pause then left, left 1, up 2. Hero 1: left 3, down 2, right 1, left 1. Hero 2: down 5, right 2, down 1, right 5, up 5, left 1. Hero 1: up 2, right 3, up 1, right 1, up 1, right 2, up 1, right 2, down 3, left 1, down 1. Hero 2: right 1. Hero 1: right 1, down 2. Hero 2: left 1. Hero 1: up 1, right 1, up 1, left 1, right 1, up 4, left 7, down 1, left 1, down 4. Hero 2: right 1, down 5, left 7, up 4, left 1, up 1. Hero 1: down 1. Hero 2: right 1, up 1. Hero 1: up 3, left 1, up 1, right 4, up 1, right 1, down 1, wait about 1 s then left, left 2, down 1. Hero 2: down 5, right 2, down 1, right 5, up 4, left 3, down 1. Queen: wait about 2.5 s then up, wait about 6 s, right 1, up 2, right 1, down 2, wait a moment, left 1, up 3, right 1, up 1, right 1, down 2, right 1, down 3, right 1, up 3, right 1, down 2, left 1, down 1, right 2, up 3, right 1, down 1, left 1, down 2, left 7. Hero 1: wait about 5.5 s then right, right 2, up 1, right 2, up 1, right 2, down 3, left 1. Hero 2: up 1, right 1. Hero 1: right 1, up 3, left 2, down 1, left 2, down 1, left 2, down 1. Hero 2: brief pause, left 1, up 2. Hero 1: wait a moment, left 2, down 2, right 1, left 1, up 4, right 8, down 3, left 1, right 1, down 2, left 1, up 1, right 1, up 1, left 1, right 1, up 4, left 7, down 1, left 1, down 4. Hero 2: down 1, left 1. Hero 1: down 1. Hero 2: right 1, up 1. Hero 1: up 3, left 1, up 1, right 4, up 1, right 1, down 2, wait about 1 s then left, left 2. Hero 2: down 5, right 2, down 1, right 5, up 4, left 3, down 1.
Hero · Boulder · MirrorScreen 7 of 8Opens after Exit Low 38
Hint 1
Activate teleports you across the magic mirror: from some tiles along one arm to as many along the other. The front-room boulder drops into the water below wherever you leave it.
Hint 2
The board is solved the same way both times; the Judge only cares where the boulder lands. It wants it on the right side of the lake.
Hint 3
After trial 1, bump the Judge to melt the freezer, push the boulder right six and re-enter.
Full solution62 steps
Verified in the game · build 25882299 · Oct 13, 2026
Play the two-teleport board once, move the front-room boulder to the right side of the lake, then play it again.
Queen→×3 ·↑×3 ·→
Hero↓ ·→ ·↓ ·→
Heroactivate
Hero←×2 ·activate
Hero←×6 ·↑
Queen← ·↑
Queen←×7 ·↓×4
Queen→×6
Queen↑ ·→ ·↑×3 ·→
Hero↓ ·→ ·↓ ·→
Heroactivate
Hero←×2 ·activate
Hero←×6 ·↑
Queen: right 3, up 3, right 1. Hero: down 1, right 1, down 1, right 1, activate, left 2, activate, left 6, up 1. Queen: left 1, up 1, left 7, down 4, right 6, up 1, right 1, up 3, right 1. Hero: down 1, right 1, down 1, right 1, activate, left 2, activate, left 6, up 1.
Hero · Boulder · MirrorScreen 7 of 8Opens after Exit Low 39
Hint 1
Activate teleports you across the magic mirror, from some tiles along one arm to as many along the other. The front-room buttons decide the shape of the islands on the board.
Hint 2
After trial 1, bump the Judge to melt the freezers. The Judge wants other island shapes: pull the left block down one, the bottom block right two and the top-right block down two.
Hint 3
On the new board, push the boulder left one before pushing it up and into the water as the bridge, then teleport down to the left island as before.
Full solution130 steps
Verified in the game · build 26006400 · Oct 20, 2026
Play the island board once, reshape the islands with the front-room blocks, then cross again with the mirror.
Queen↑ ·→ ·↑×3 ·←
Hero↑×2 ·← ·↑ ·→×3
Hero←×3 ·activate
Hero→ ·↓×4 ·←
Hero→ ·↑ ·→ ·↑×4 ·→ ·↑ ·←×3
Hero← ·activate
Hero↑×4
Queen↓
Queen→ ·↓×2 ·←×5 ·↑ ·← ·↓×2 ·← ·↓
Queen→ ·↓×2 ·→×4 ·↓ ·→×2
Queen↑ ·→ ·↑×2 ·→×3 ·↑×3 ·↓×2
Queen← ·↓ ·← ·↑×3 ·←×2 ·↑×2 ·←
Hero↑×2 ·← ·↑ ·→×3
Hero←×3 ·activate
Hero→ ·↓ ·→ ·↓×2 ·← ·↓ ·←
Hero→ ·↑ ·→ ·↑×2 ·→ ·↑ ·← ·↓ ·← ·↑×2 ·→ ·↑ ·←×2
Hero← ·activate
Hero↑×4
Queen: up 1, right 1, up 3, left 1. Hero: up 2, left 1, up 1, right 3, left 3, activate, right 1, down 4, left 1, right 1, up 1, right 1, up 4, right 1, up 1, left 4, activate, up 4. Queen: down 1, right 1, down 2, left 5, up 1, left 1, down 2, left 1, down 1, right 1, down 2, right 4, down 1, right 2, up 1, right 1, up 2, right 3, up 3, down 2, left 1, down 1, left 1, up 3, left 2, up 2, left 1. Hero: up 2, left 1, up 1, right 3, left 3, activate, right 1, down 1, right 1, down 2, left 1, down 1, left 1, right 1, up 1, right 1, up 2, right 1, up 1, left 1, down 1, left 1, up 2, right 1, up 1, left 3, activate, up 4.
Hero · Dragon ×6 · Gem ×2 · Gem pad ×2 · Beam source · Lily pad ×6 · Gate · TorcScreen 8 of 8
Hint 1
The six dragons ride lily pads round a loop on the left. In the orange Double beam every move covers two tiles; the Torc (Activate) turns a beam that hits you to point the way you face.
Hint 2
Push the beam source up its column ahead of you to reach the Torc, then turn the beam with the Torc so it runs west across the dragons' loop.
Hint 3
With the beam across their loop the dragons fall into the gap one after another; once none is left, the monster gate in front of the exit opens.
Full solution34 steps
Verified in the game · build 26006400 · Oct 20, 2026
Climb to the Torc in the Double beam, turn the beam across the dragons' loop to clear them, then walk through the monster gate. Hold Ctrl throughout.
Before step 1: hold Ctrl for 41 frames (0.683 s). Move as soon as you can; wait only where marked.
Hero↓ · wait for the right lily pad of the bottom-left pair to reach 6 tiles left of the exit and wait for the right lily pad of the left pair to reach one tile below its starting position and wait for the right lily pad of the top-left pair to reach one tile below its starting position, ↓ · ← ·↑
Hero→ ·↑ · wait about 3 s, ↓ · ↓ ·←×2 ·↑ ·→ ·↑ · wait about 2 s, ↓ · ↓ ·←×2 ·↑ · wait about 2.5 s, ↑
Hero→ ·↓ ·←
Heroactivate
Hero wait about 12 s, ↓ · ←
Heroactivate
Hero→ ·↑
Hero wait about 25 s, ↓ · ↓×5
Frame-exact timing
Seconds from puzzle start · 60 fps · Before step 1: hold Ctrl for 41 frames (0.683 s). · hold Ctrl throughout
Hero: down 1, wait for the right lily pad of the bottom-left pair to reach 6 tiles left of the exit and wait for the right lily pad of the left pair to reach one tile below its starting position and wait for the right lily pad of the top-left pair to reach one tile below its starting position then down, left 1, up 1, right 1, up 1, wait about 3 s then down, down 1, left 2, up 1, right 1, up 1, wait about 2 s then down, down 1, left 2, up 1, wait about 2.5 s then up, right 1, down 1, left 1, activate, wait about 12 s then down, left 1, activate, right 1, up 1, wait about 25 s then down, down 5.

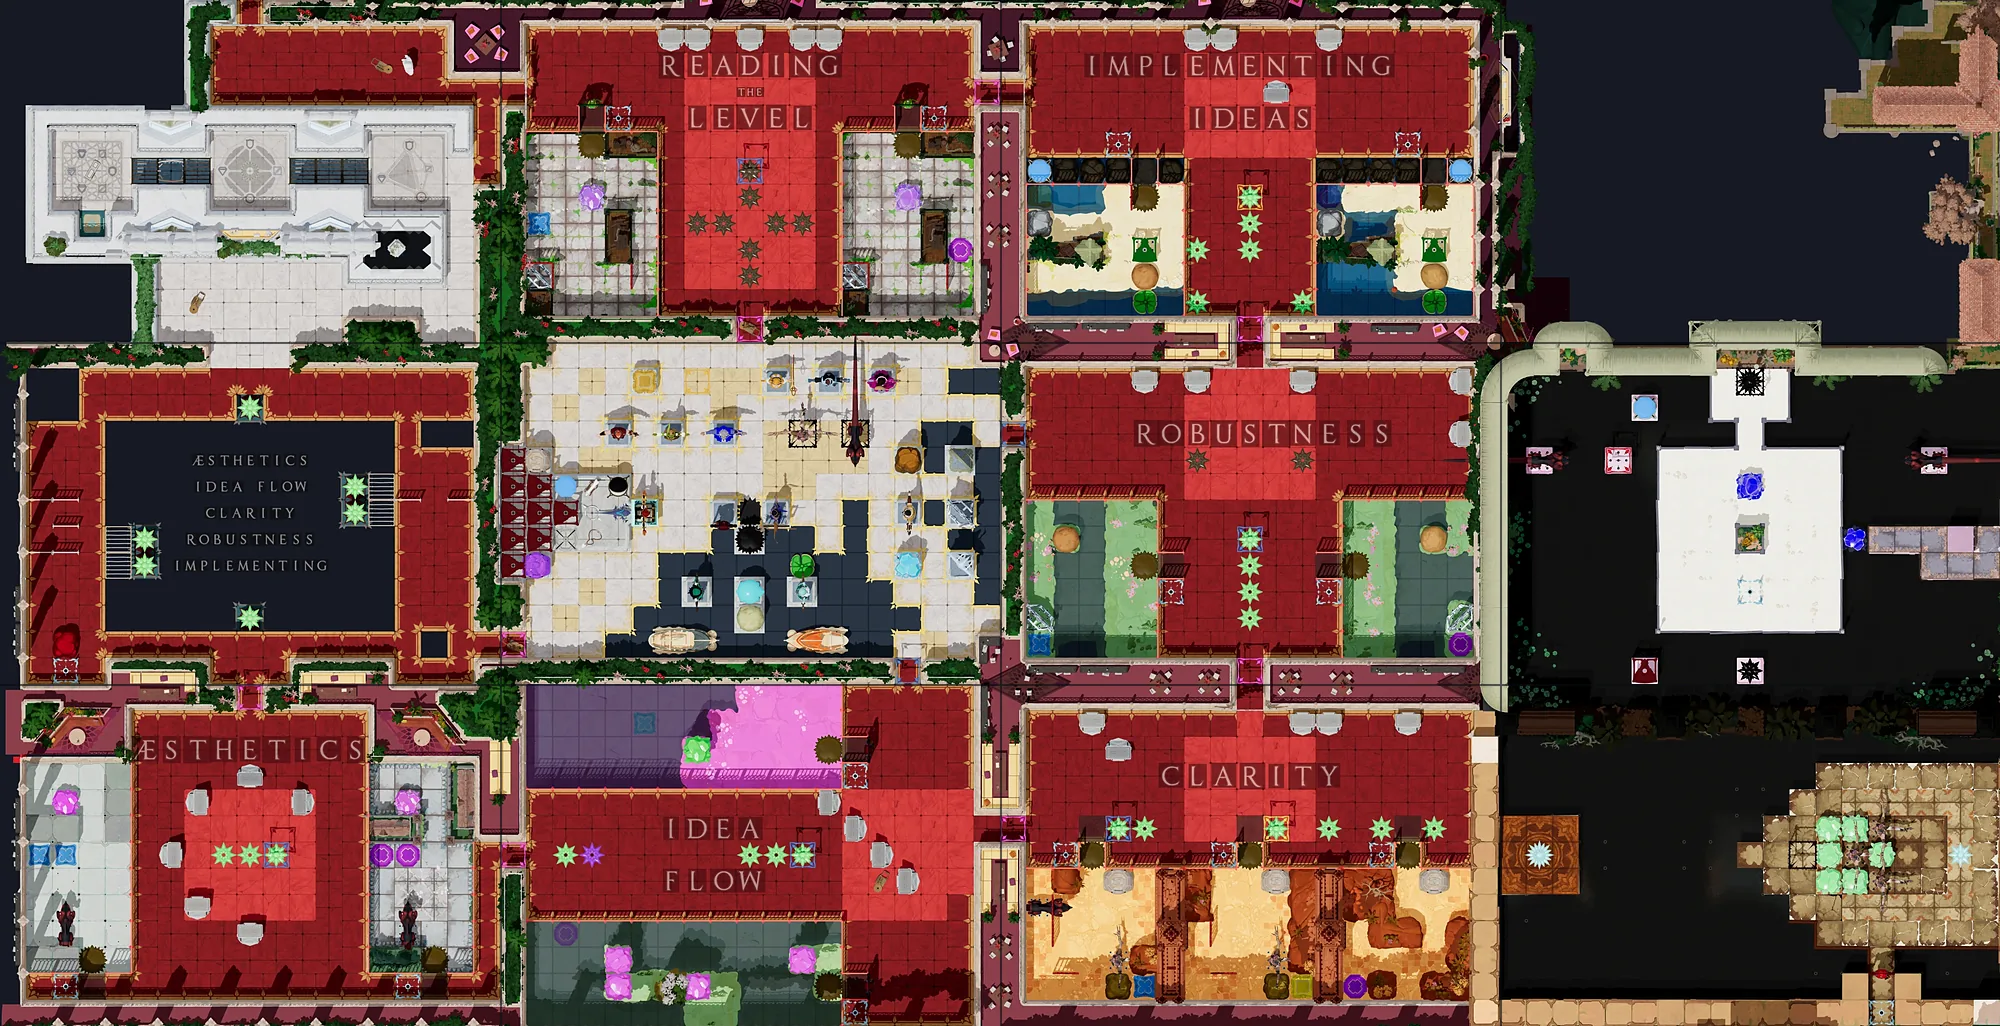 1234567891011121314151617181920212223242526272829303132333435363738394041